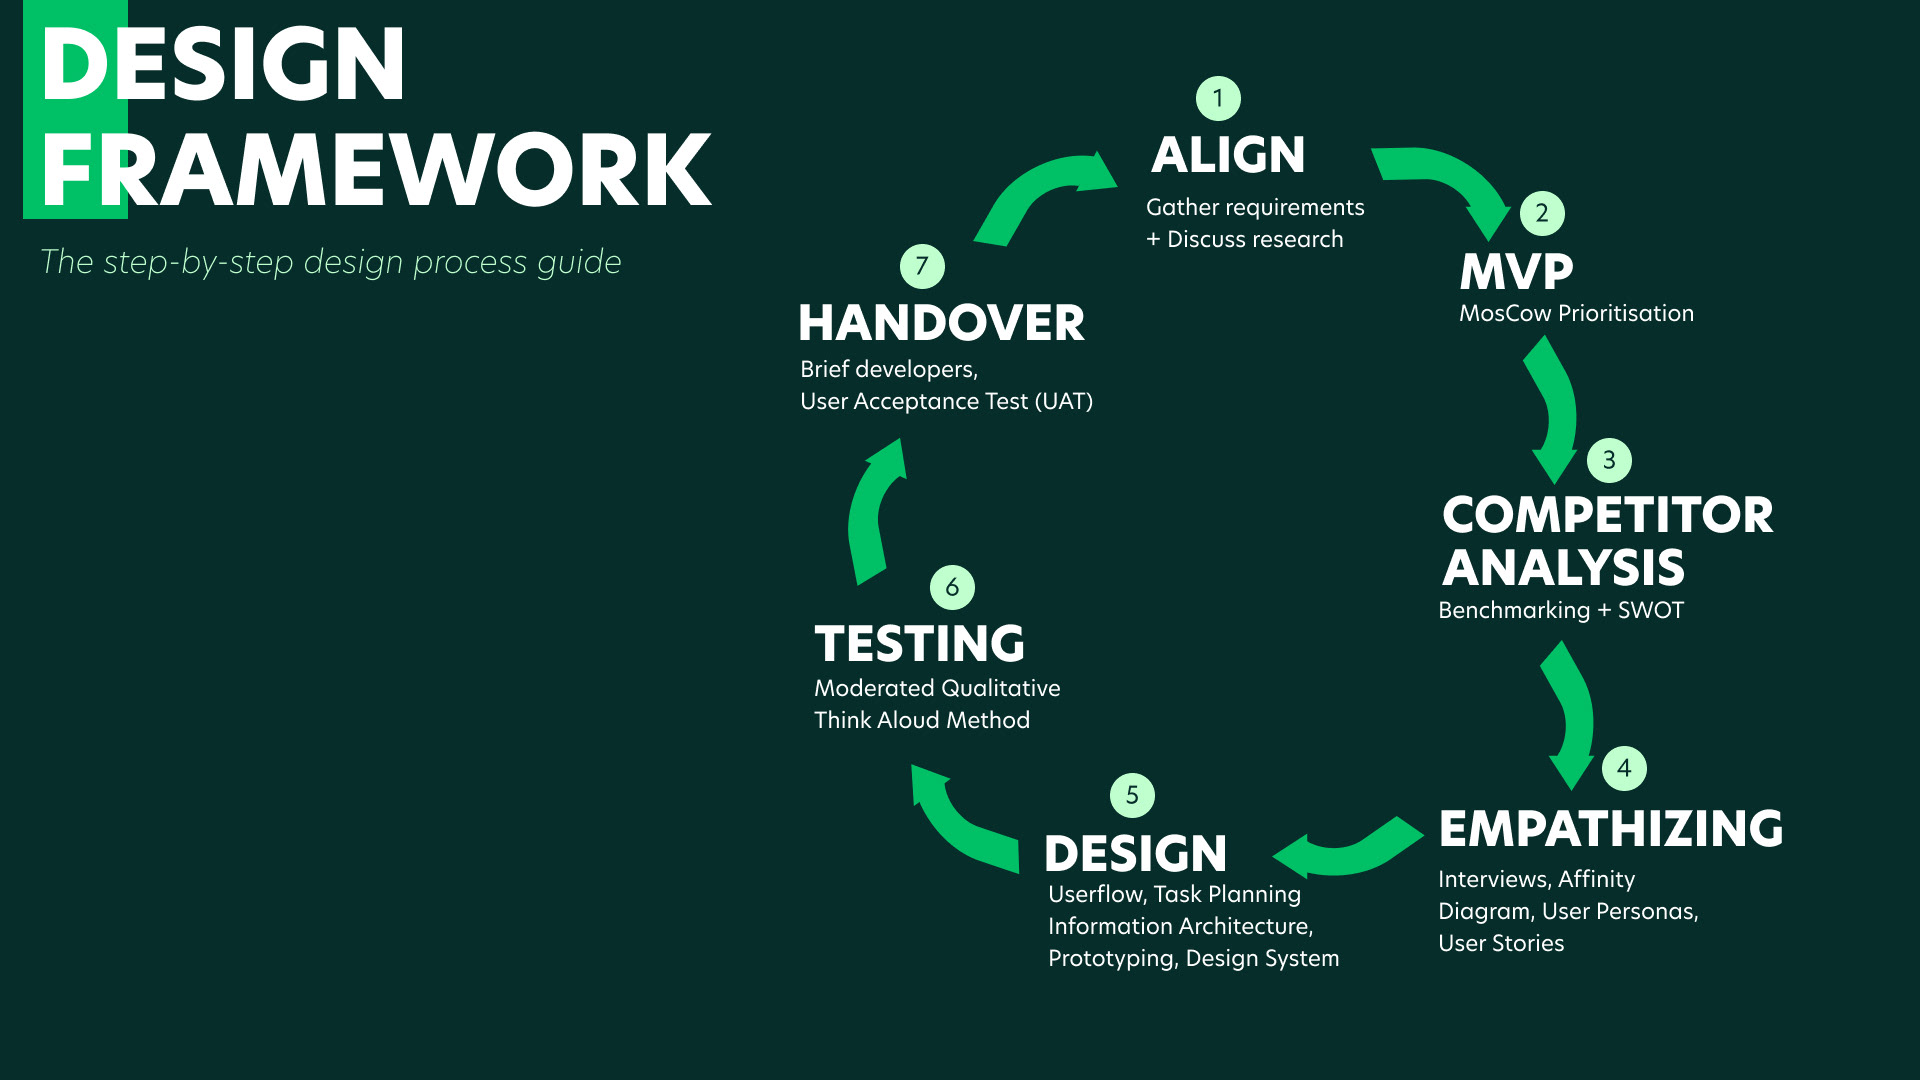
Our Design Framework
The design framework I came up with and have been using for subsequent projects. This allow us to work systematically with the developers, product managers and other stakeholders important to our projects.
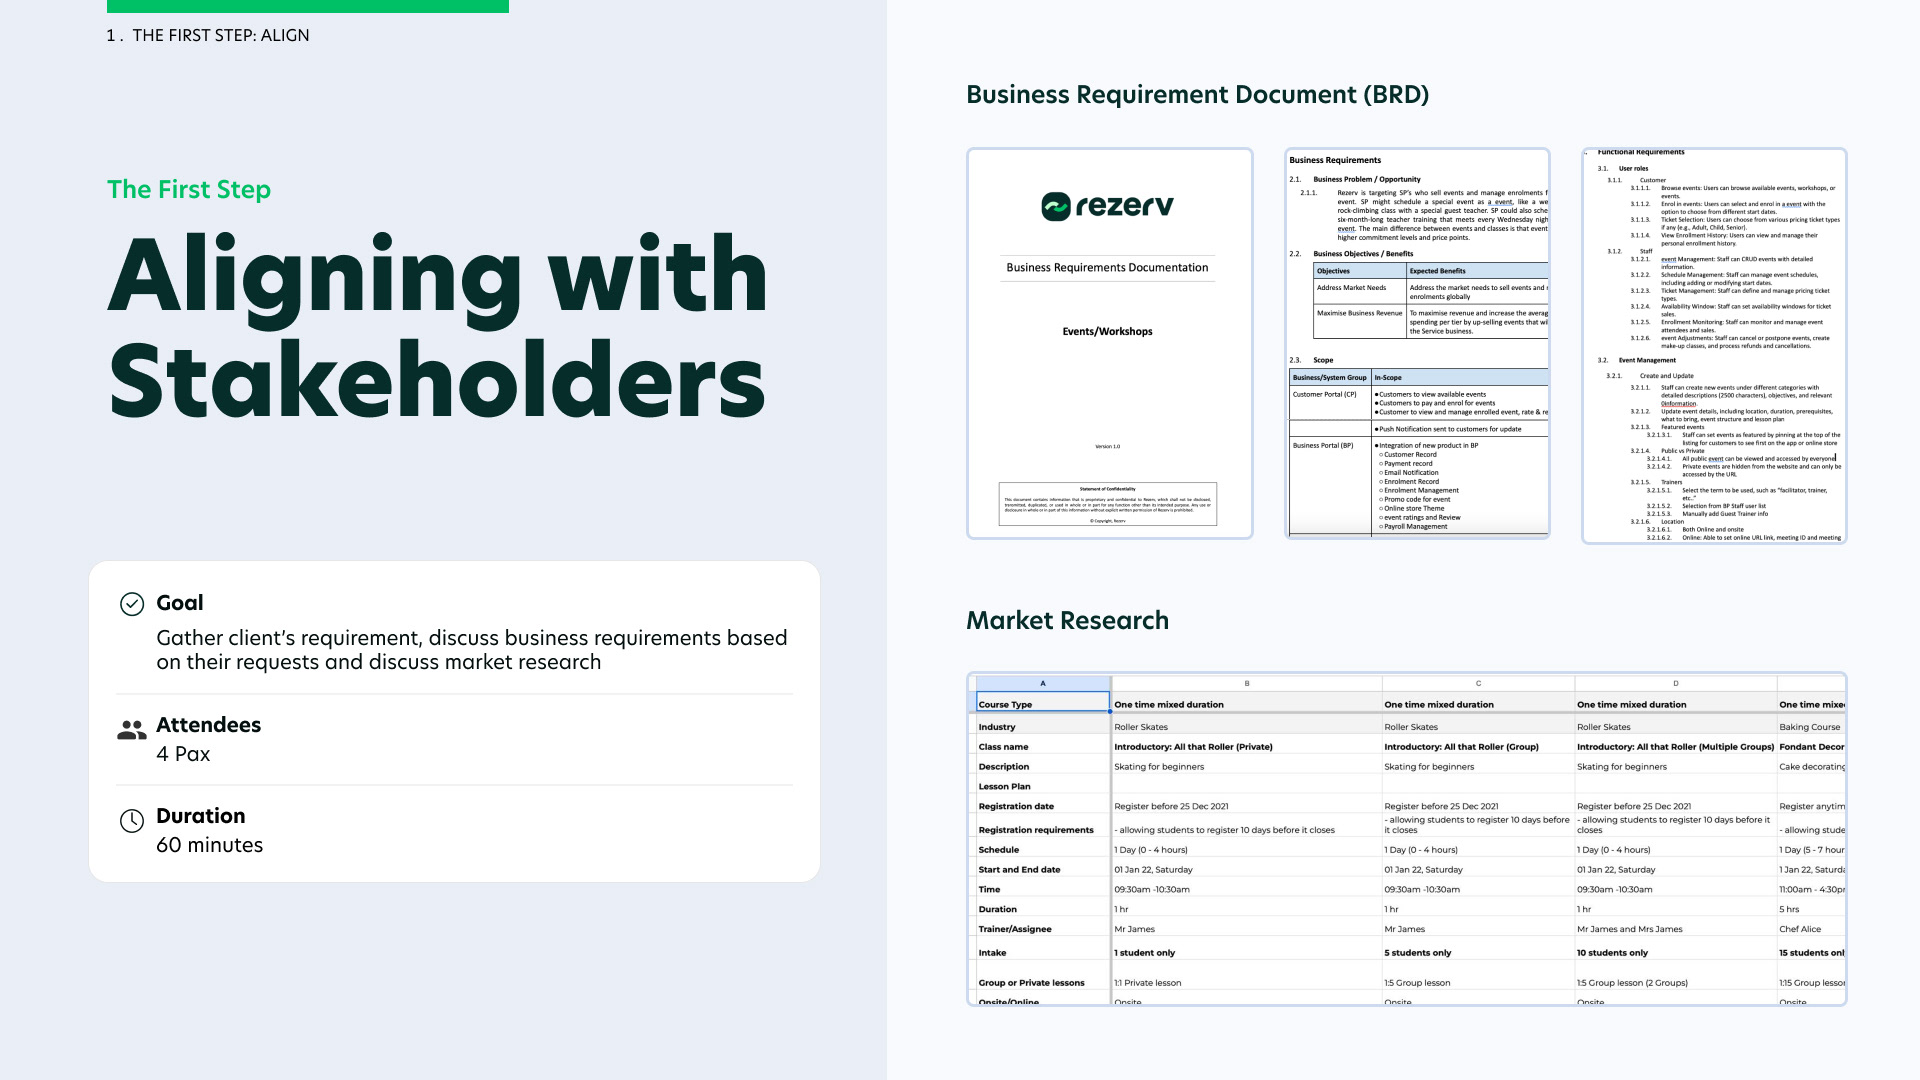
1. Align with Stakeholders
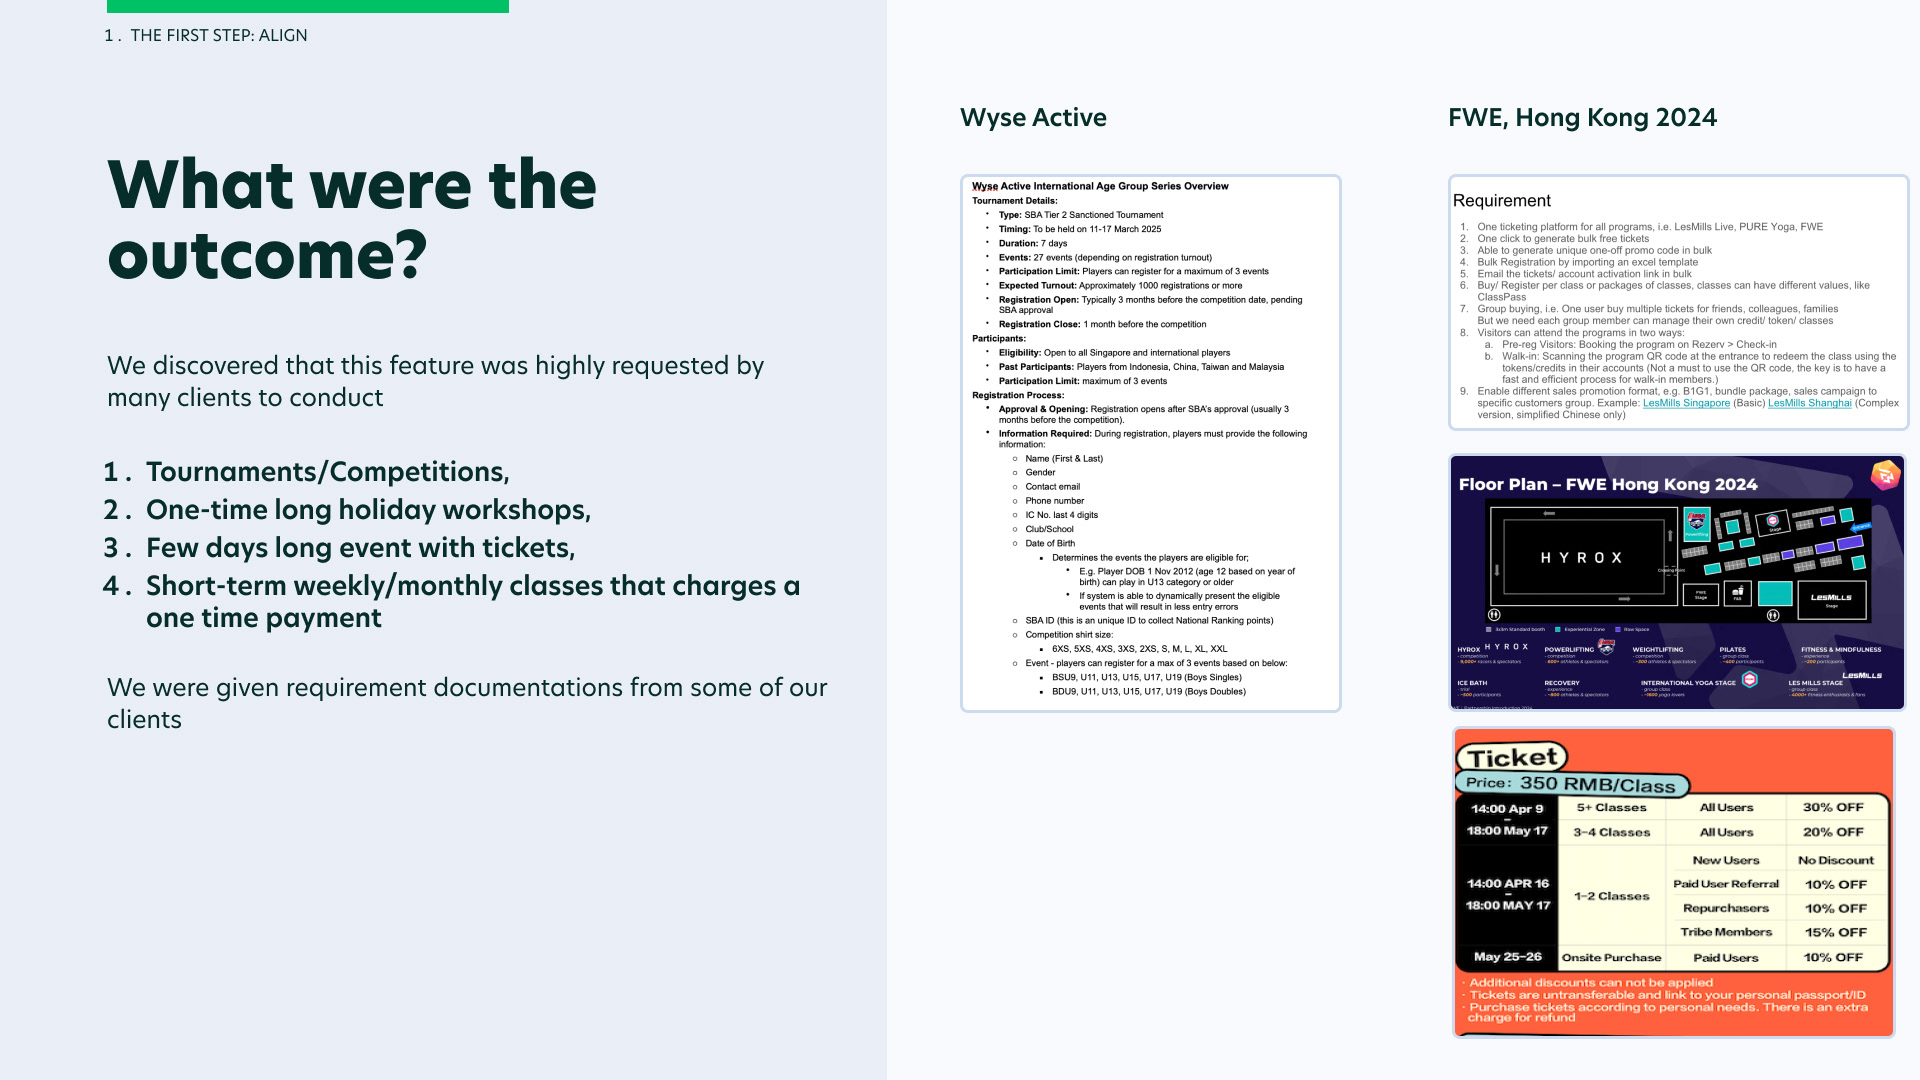
The first most important step is to ensure that we gather clients' requirement from stakeholders to understand business requirements. I would do a market research to understand how the fitness industry run their events/ workshops and we have a discussion to discuss thiese requirements and findings, solidifying the business requirement document (BRD).
The Problem Statement

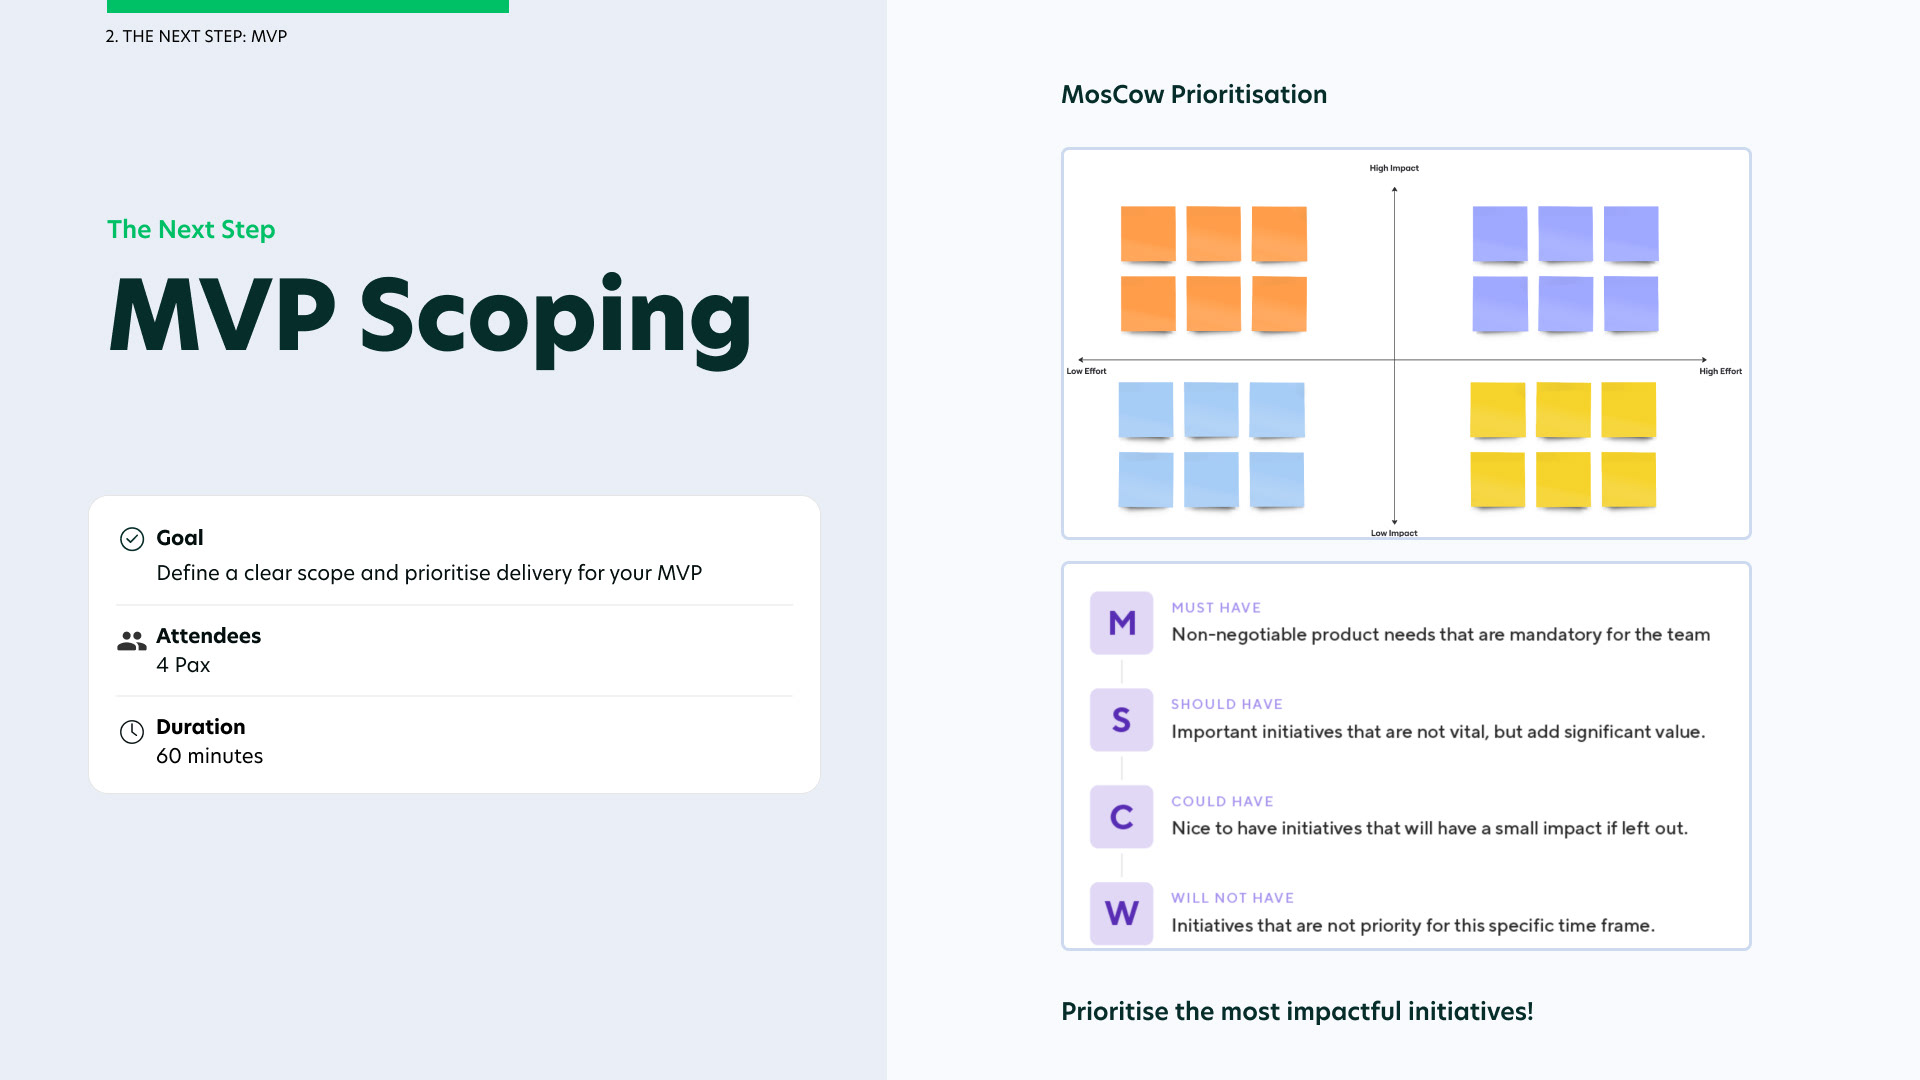
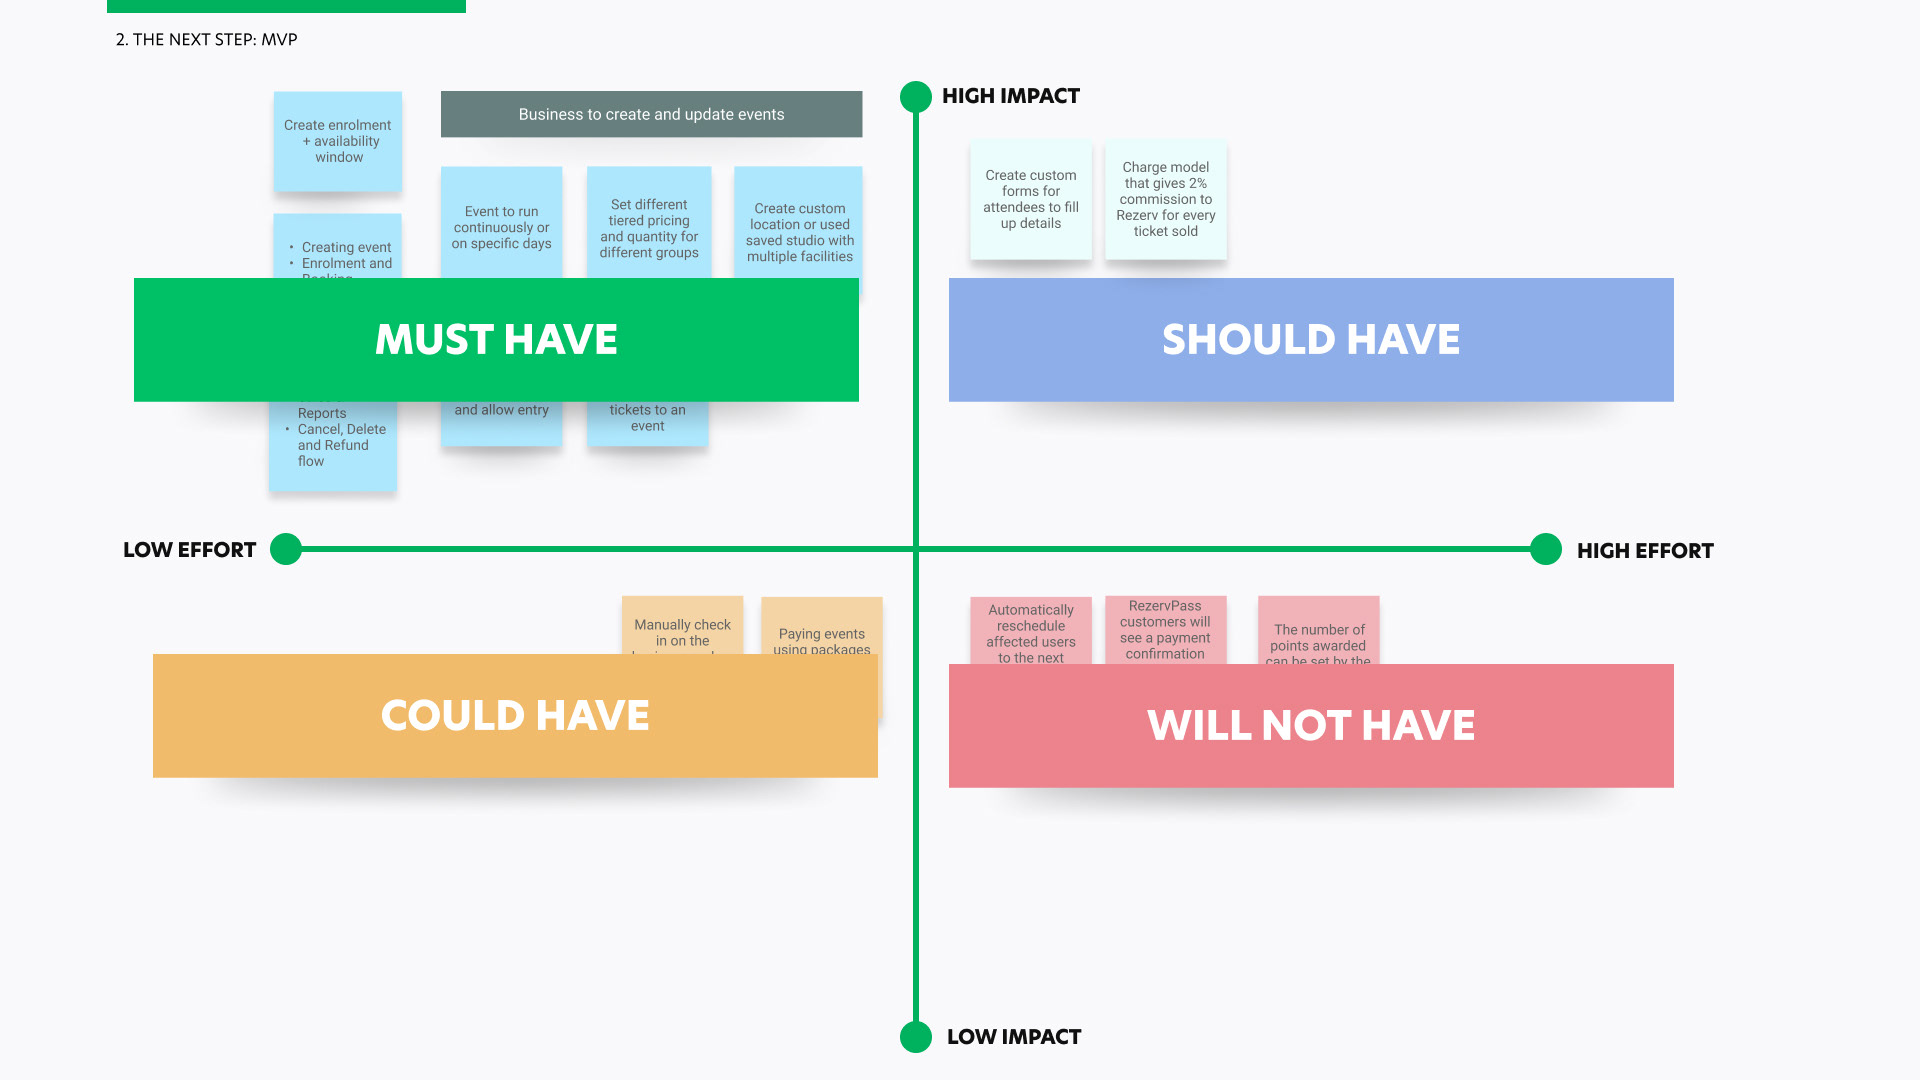
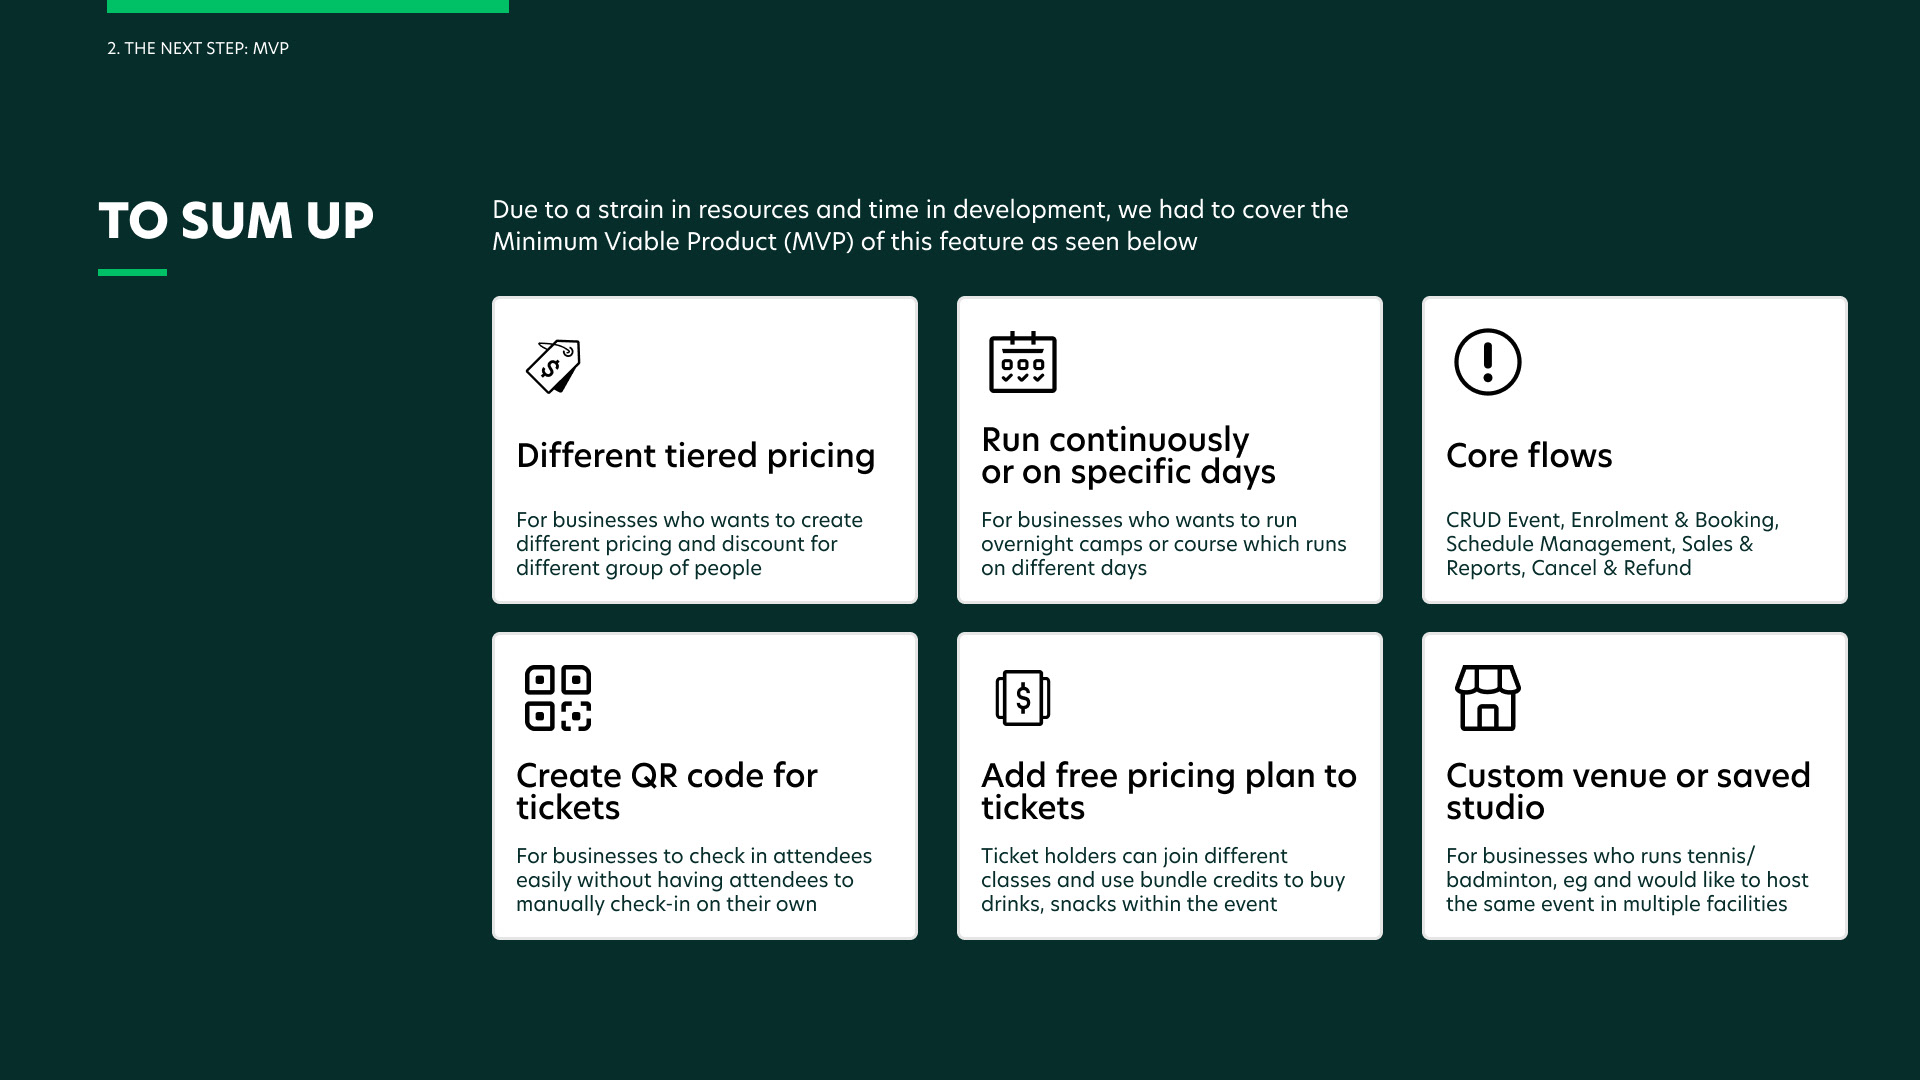
2. MVP Scoping
Once I understood the clients' requirements, I proceeded to prioritise the Minimum Viable Product (MVP) to understand what are the main features that businesses want launch as soon as possible so I can focus on those features first for the first launch of this feature.
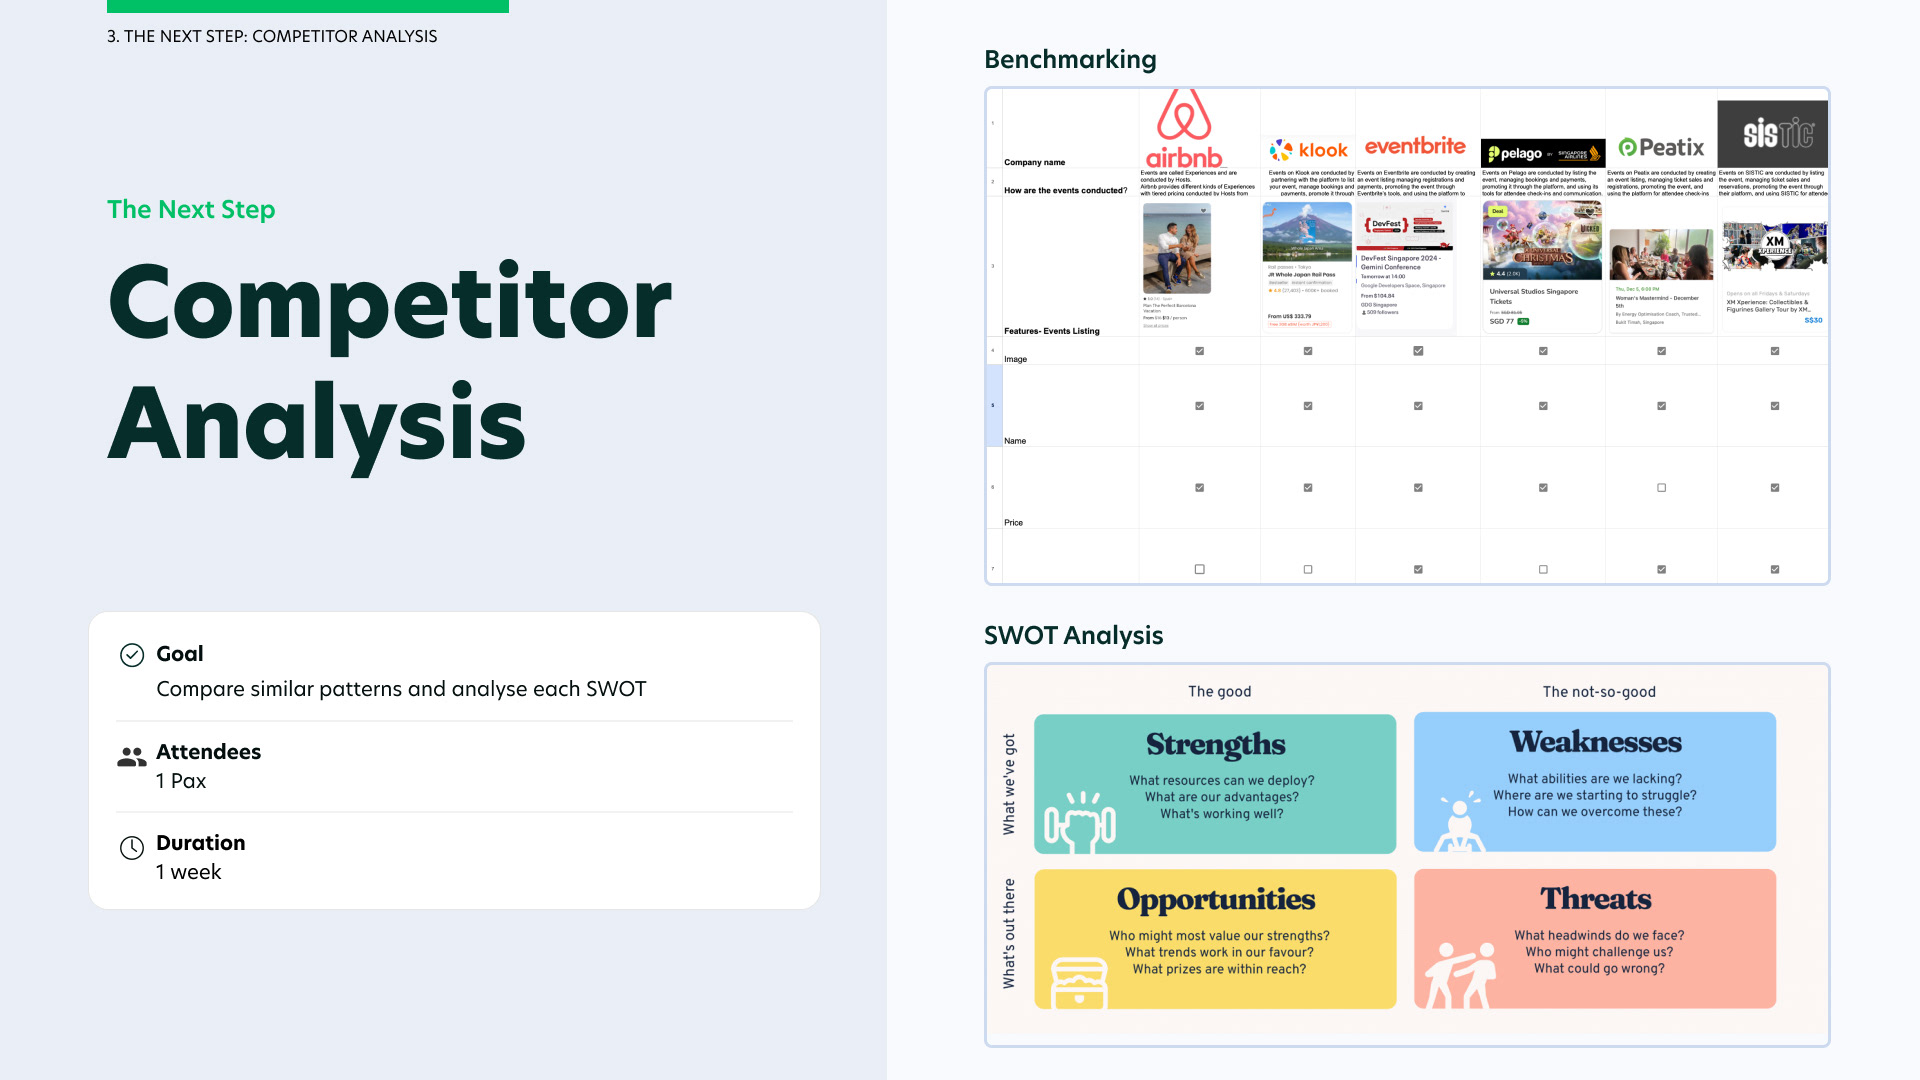
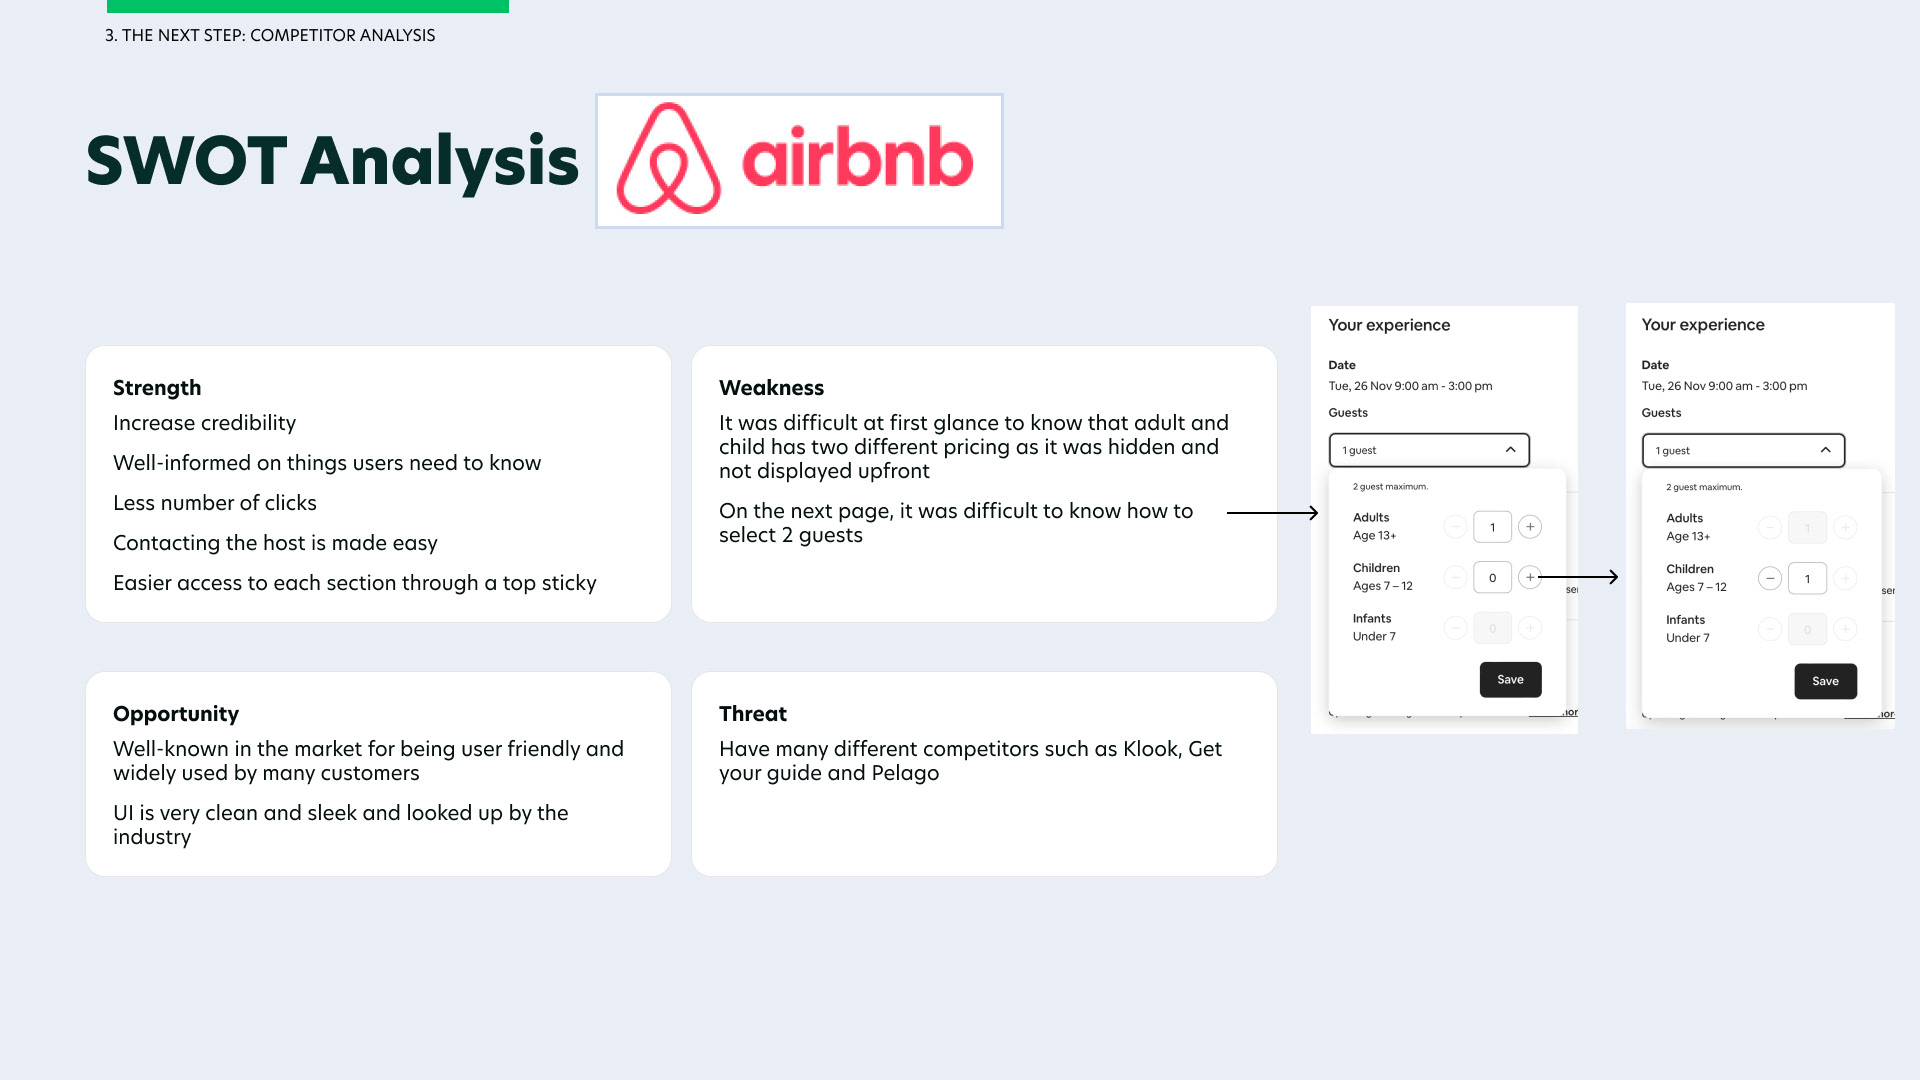
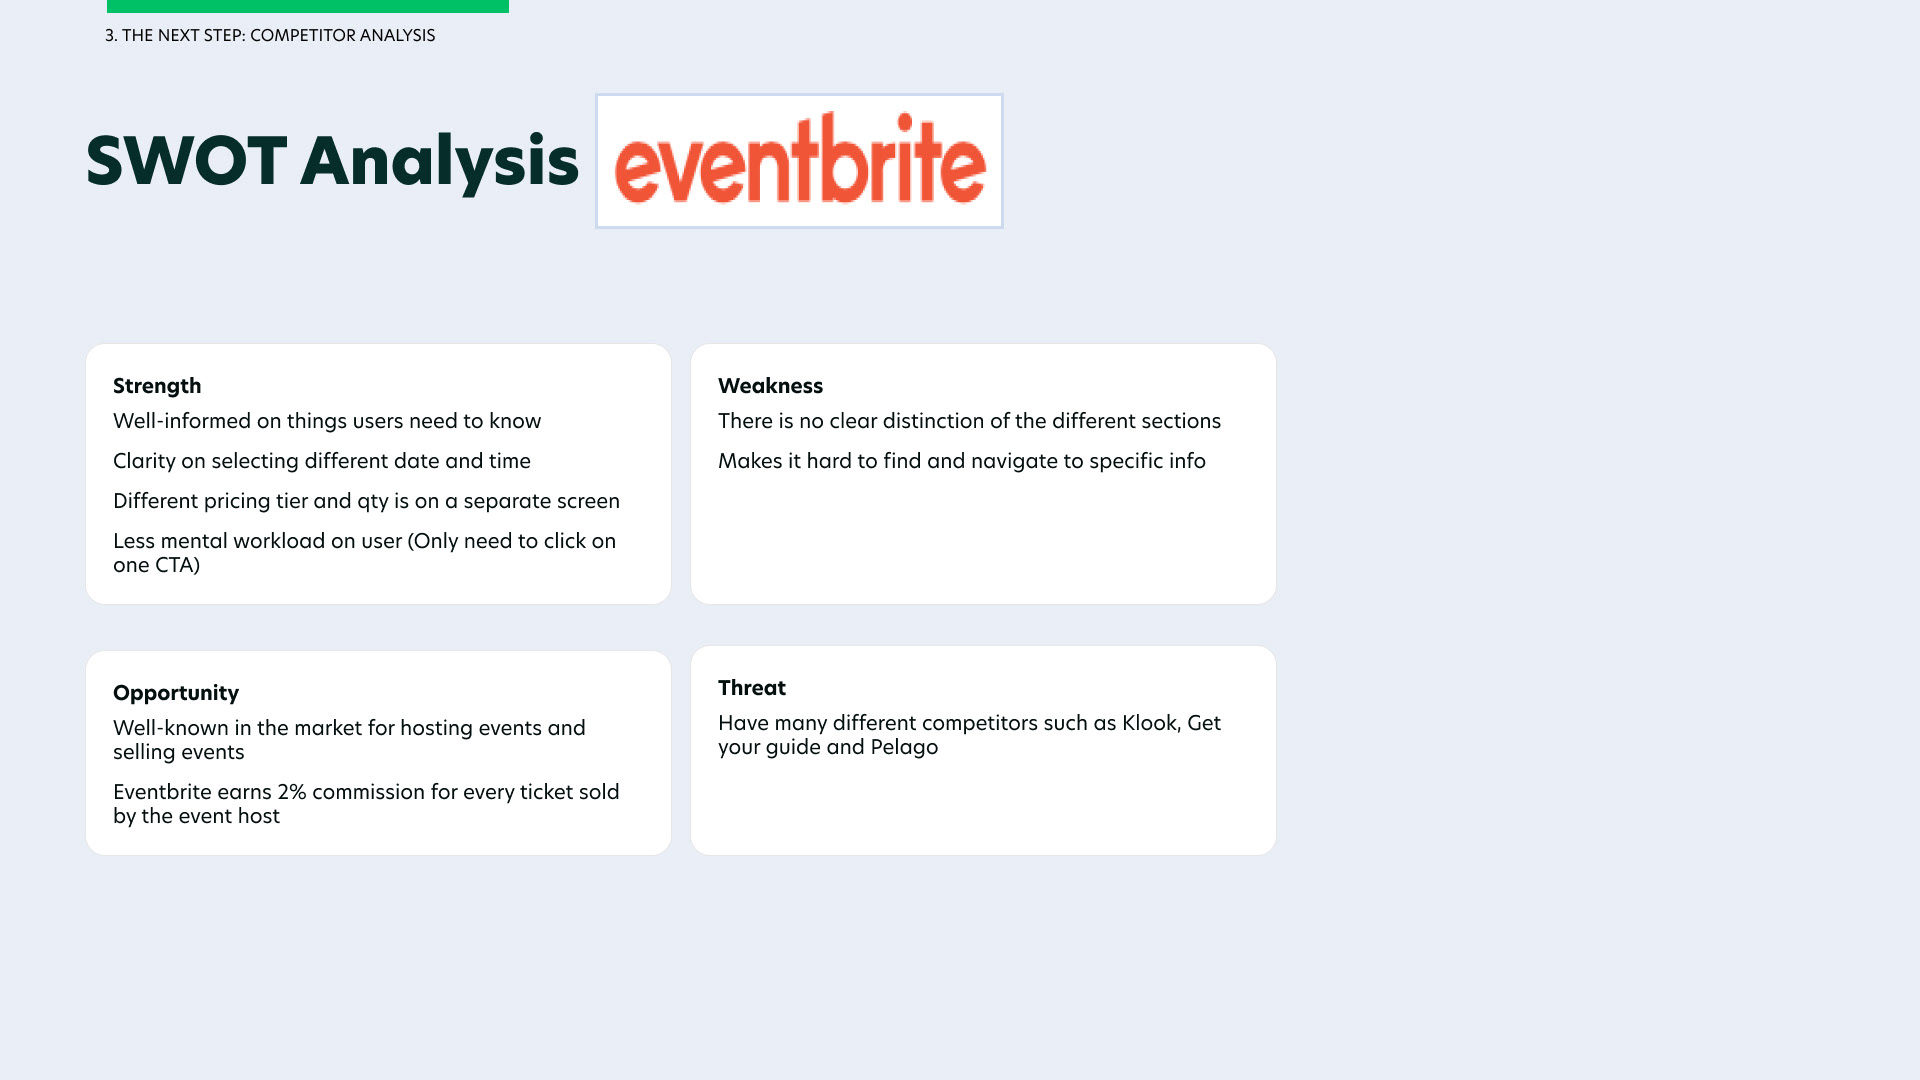
3. Competitor Analysis
Once I gathered the main features we require on the business portal, I decided to look at our competitors and analyse their strengths, weaknesses, opportunities and threats to their brand.
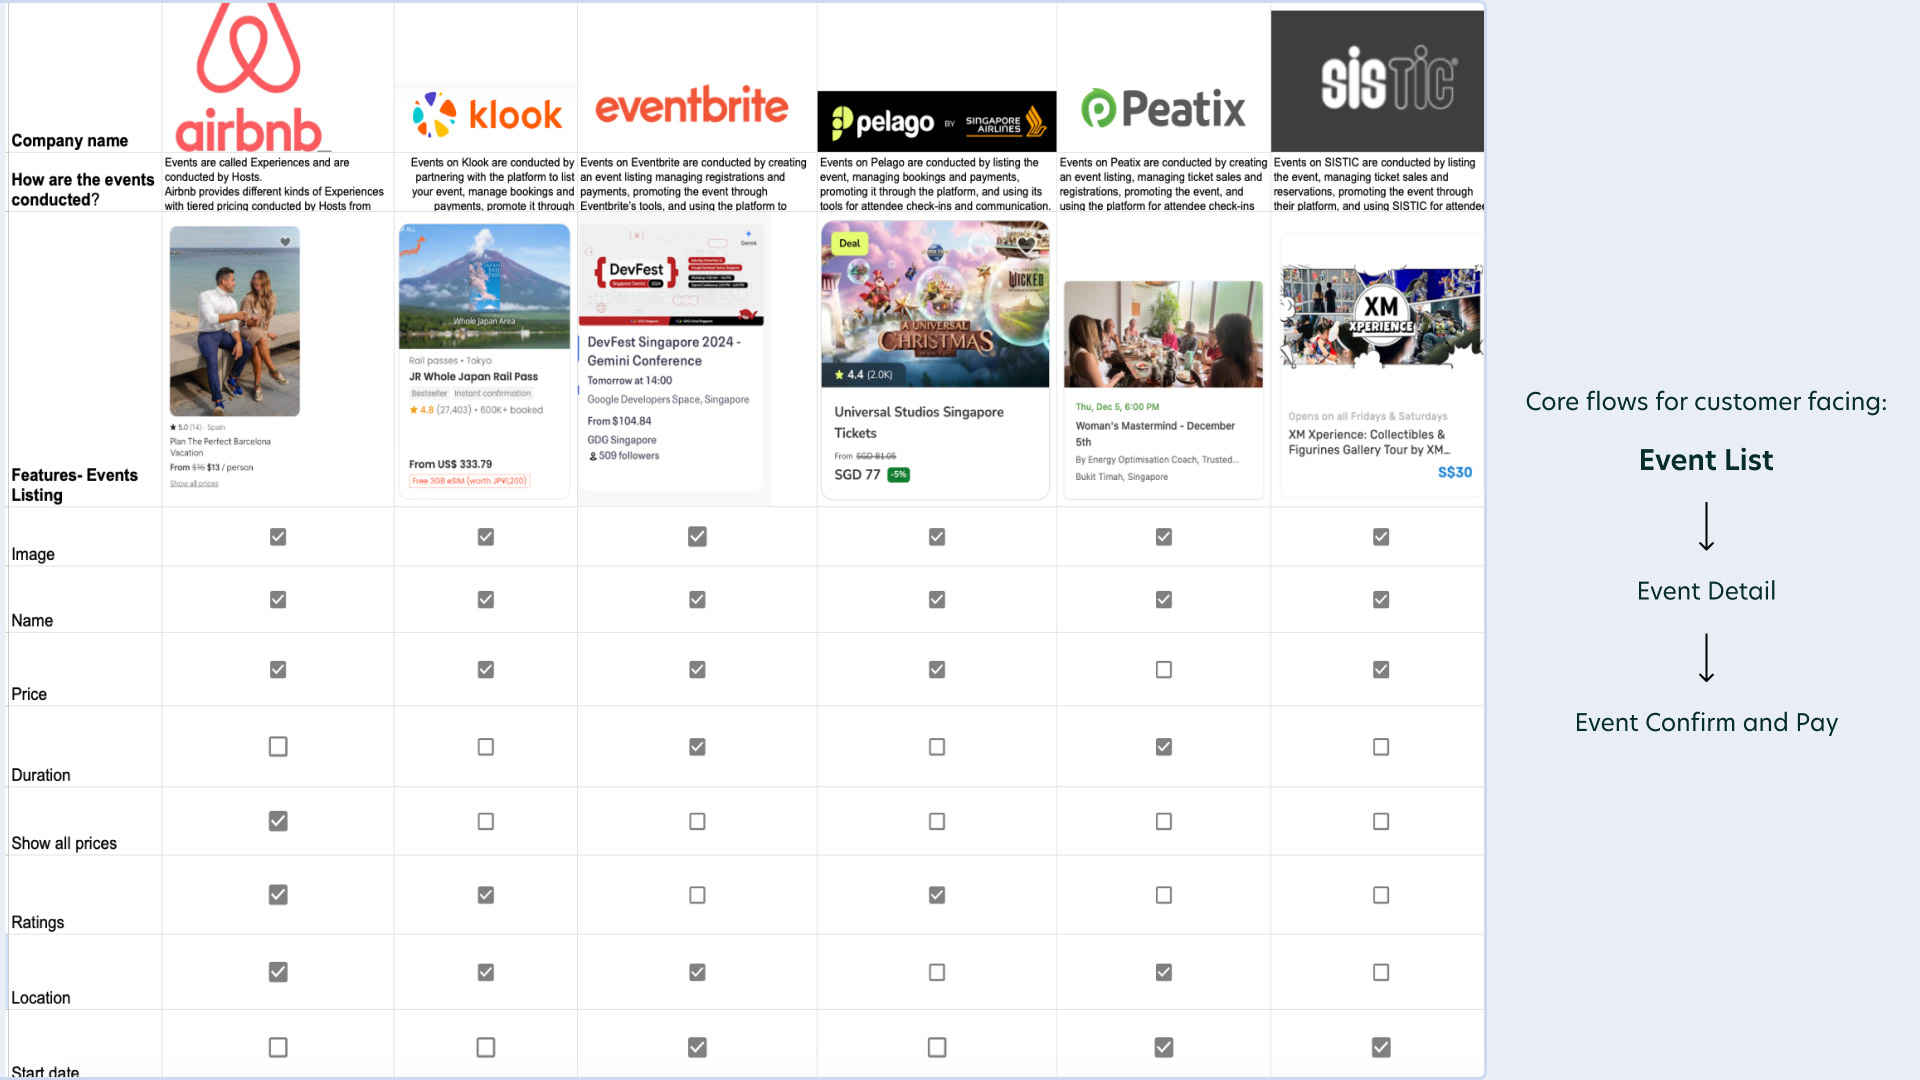
I did a benchmark on the main flows to identify what are the common features that these competitors have and understand how it could relate to our requirements.
4. Empathising with Users
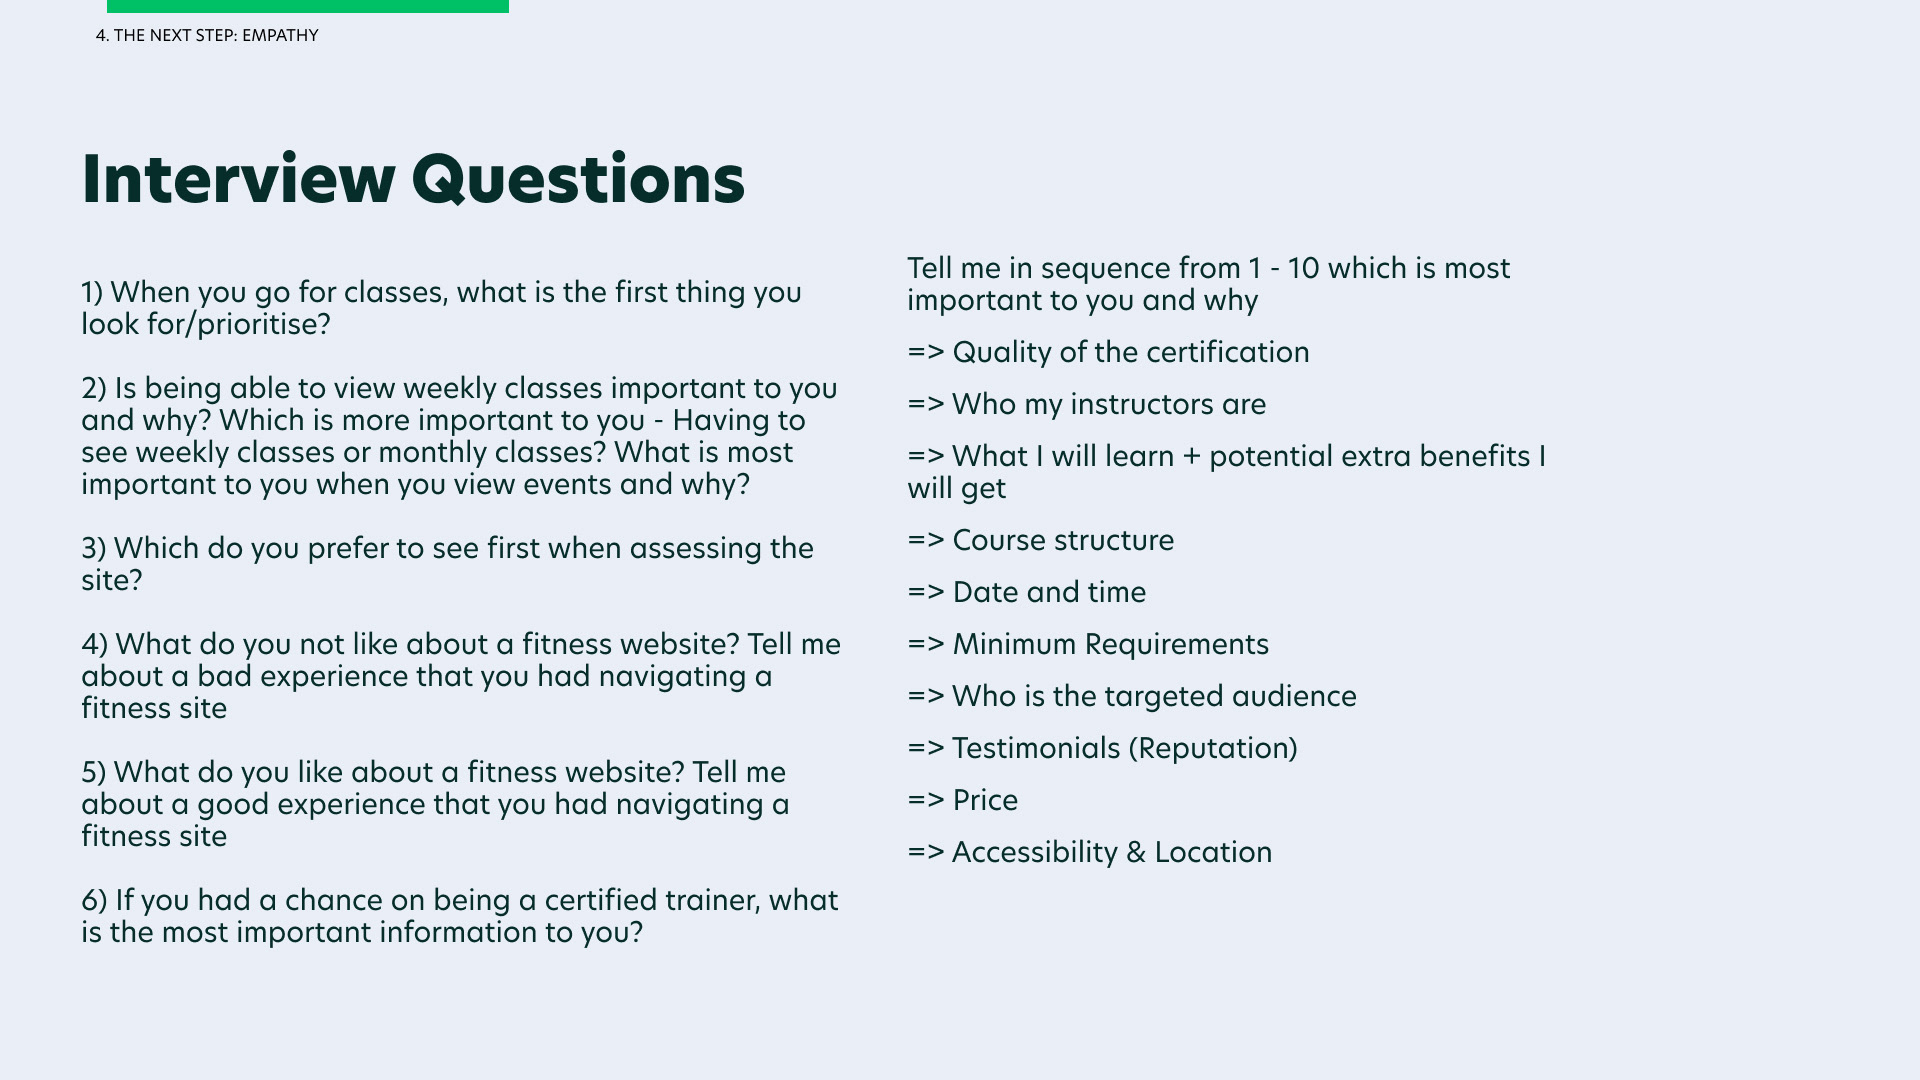
Empathising with our users is a crucial step in our UX process. This is so that we know what our customers want, the problems they face when using such similar websites and the main urgent thing that they would like solve from the end customers point of view.
To achieve this, I had to find a suitable group of people to conduct interviews with, likely those who often attend events, workshops, classes and gather qualitative responses from them to understand their needs and pain points.
To achieve this, I had to find a suitable group of people to conduct interviews with, likely those who often attend events, workshops, classes and gather qualitative responses from them to understand their needs and pain points.
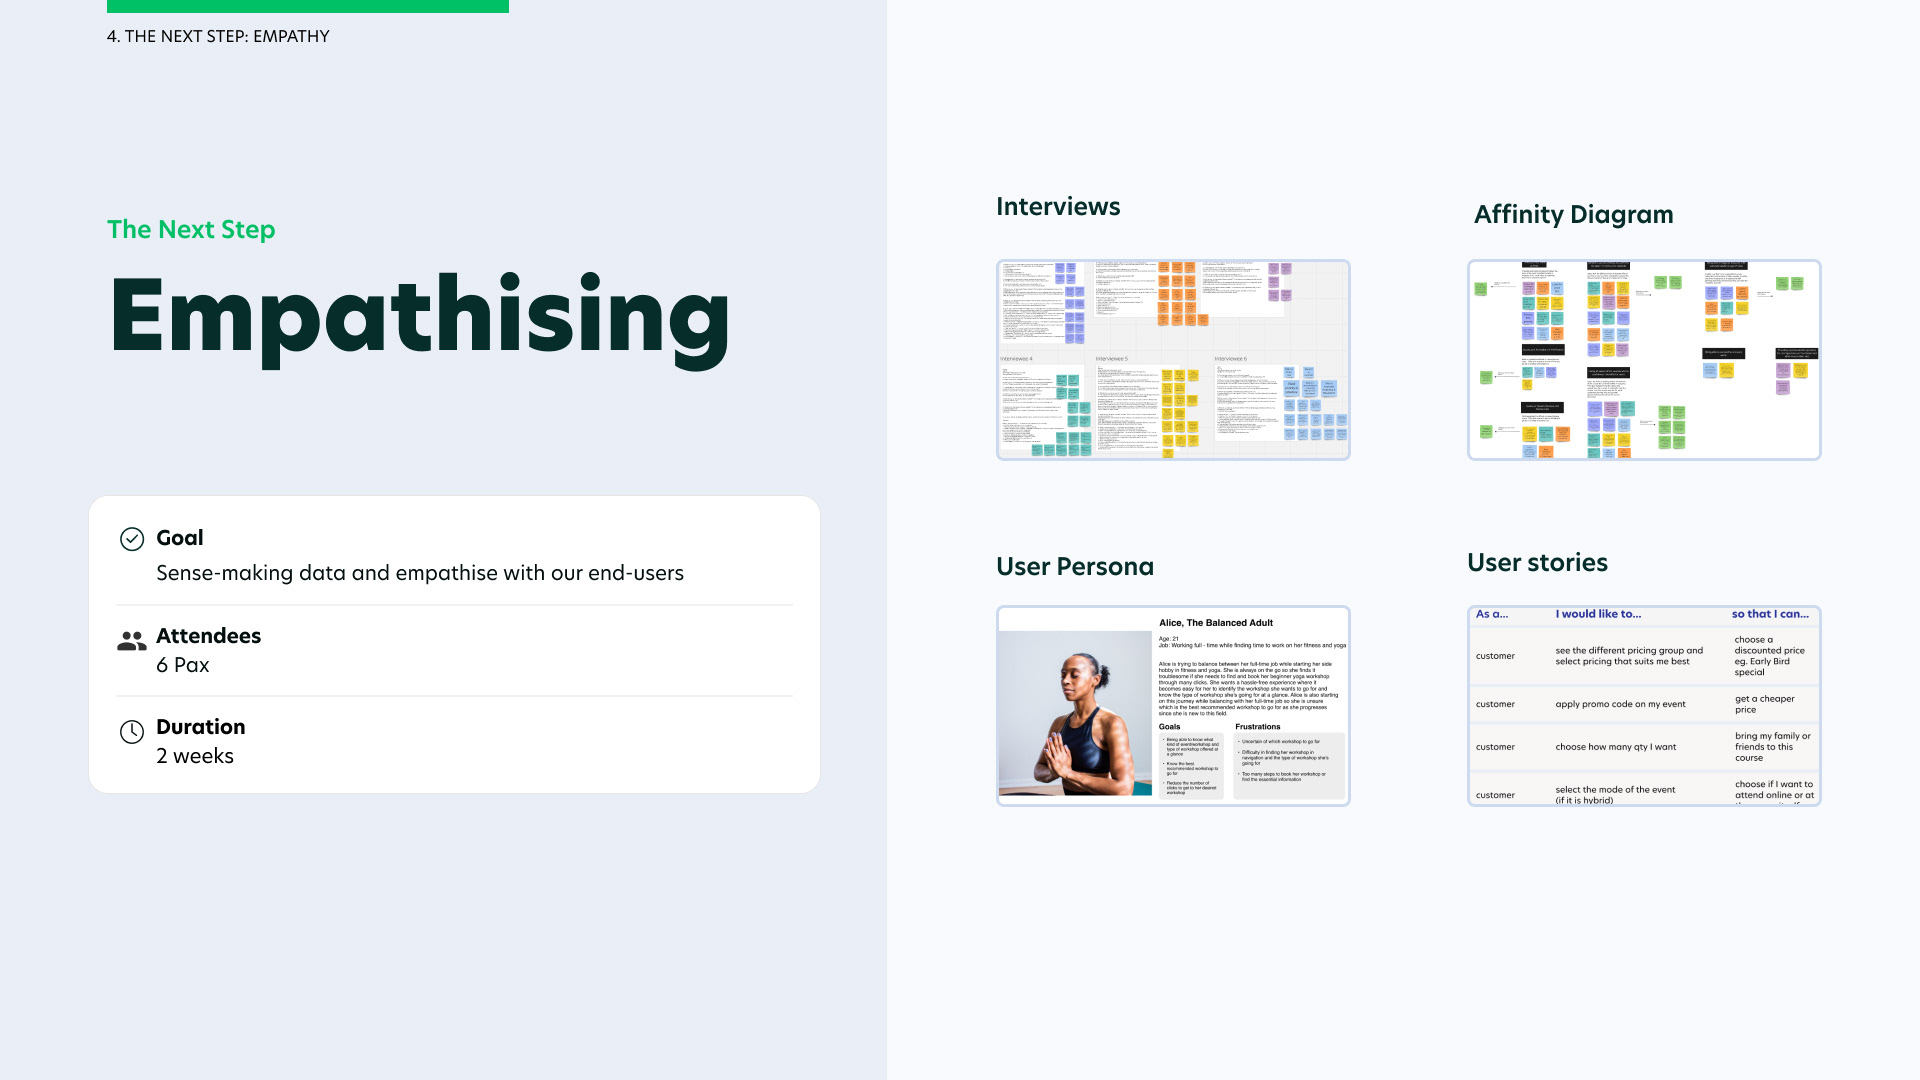
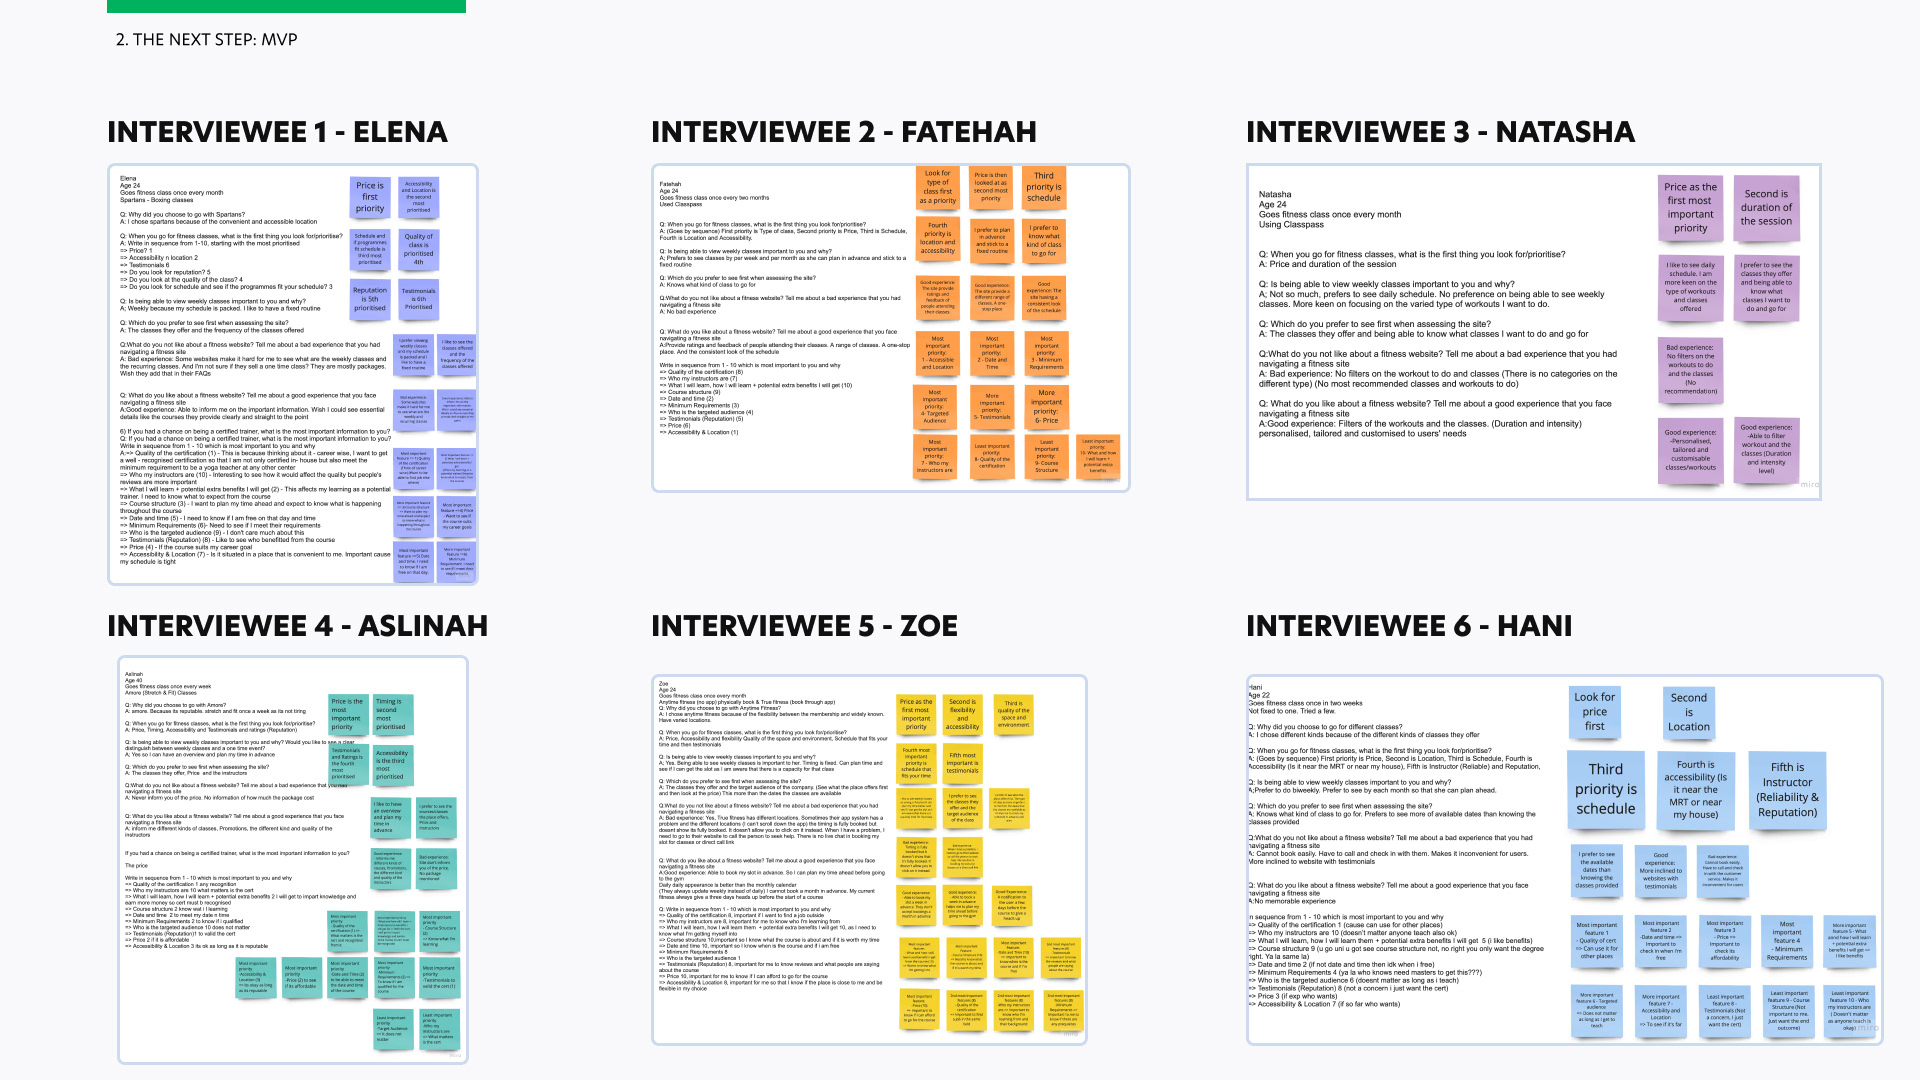
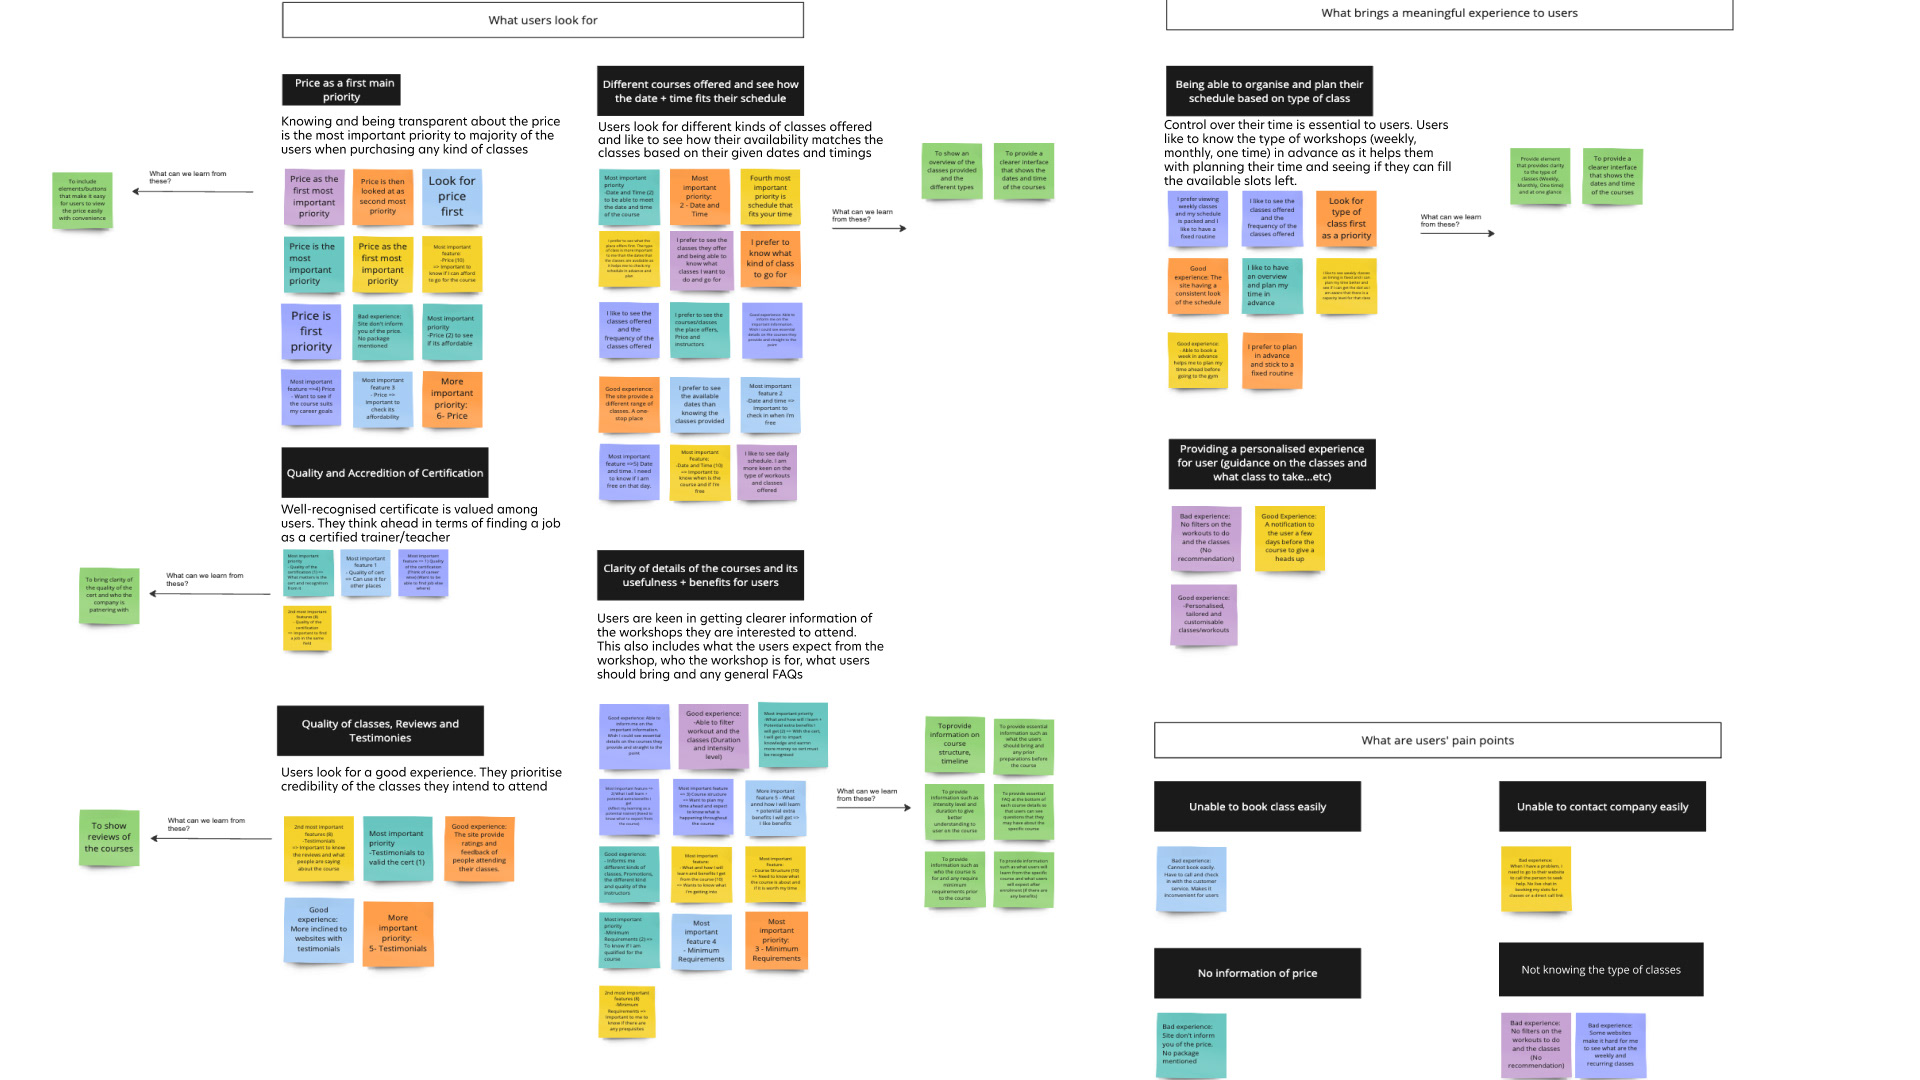
From the interviews that I conducted among 6 end-users, I created an affinity diagram to sysnthesise the data collected into user's important needs, their pain-points in using other fitness websites and what brings a meaningful experience to them.
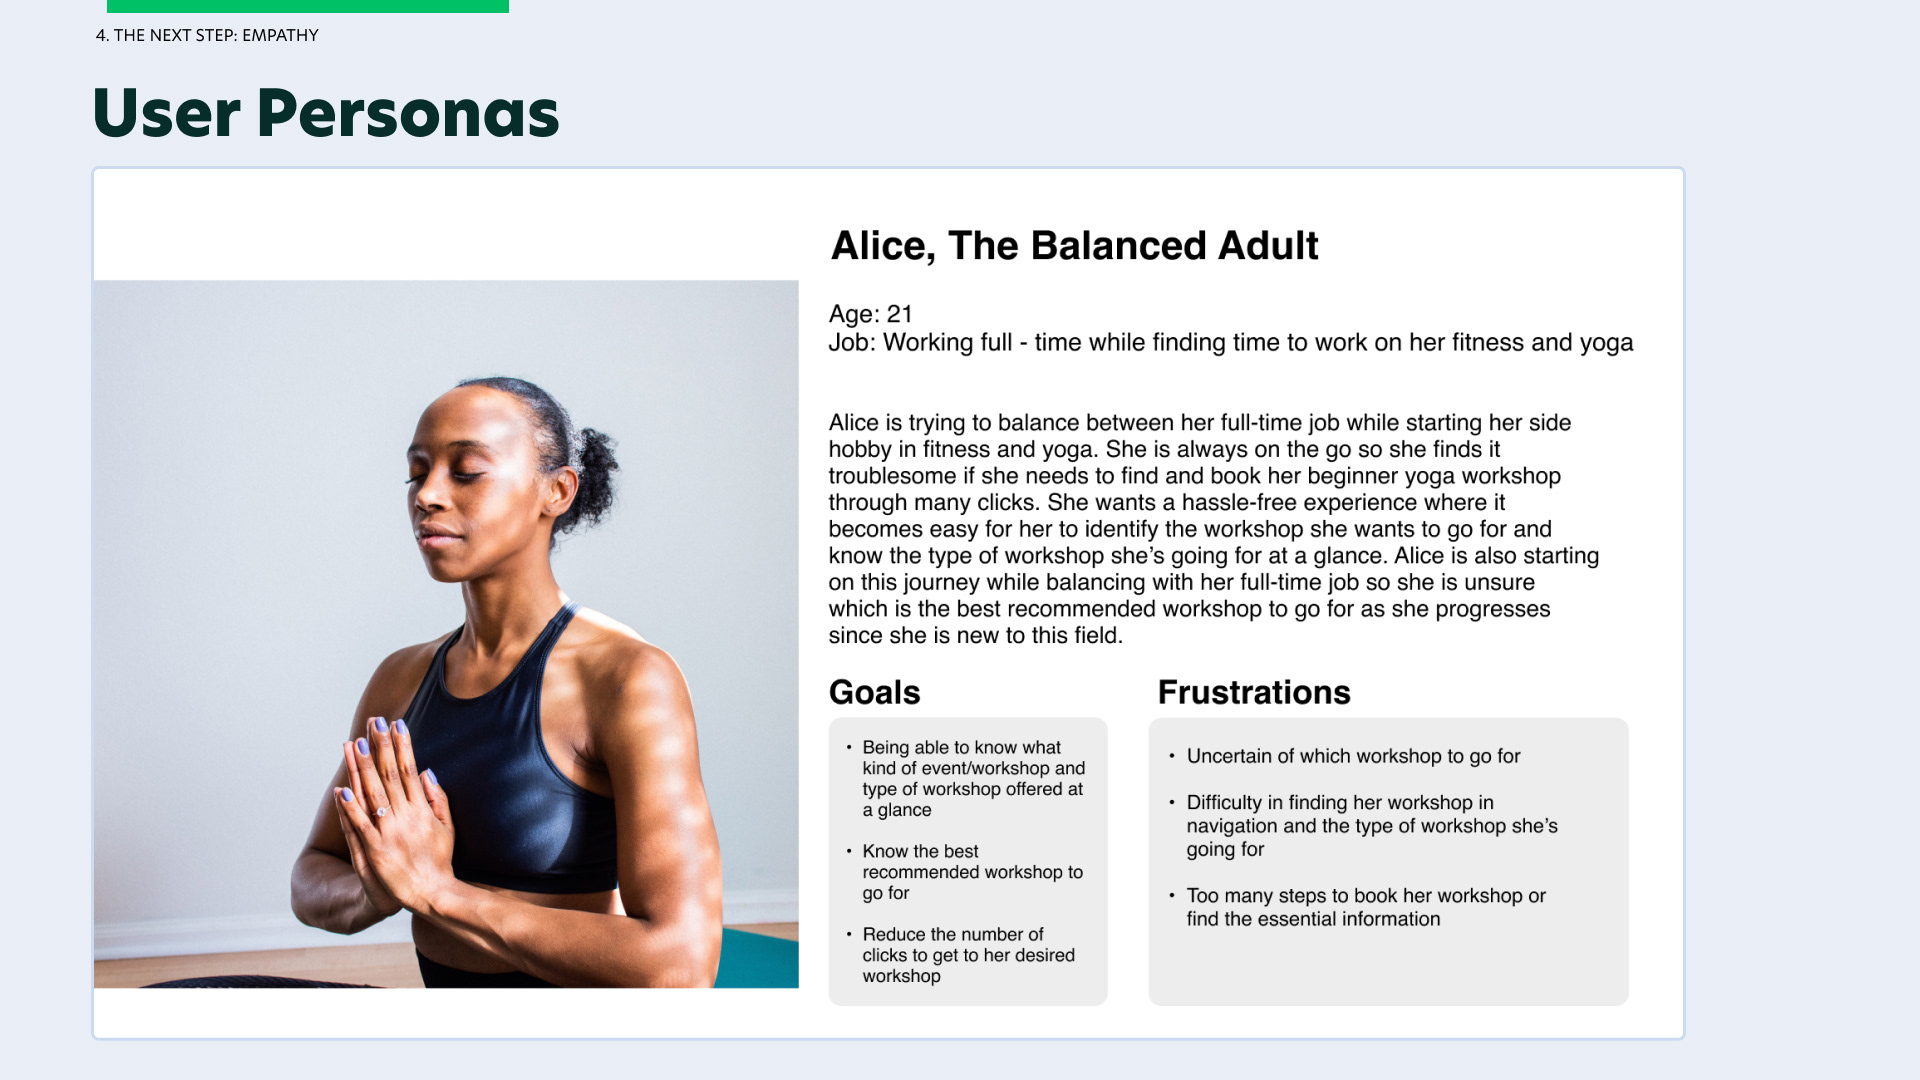
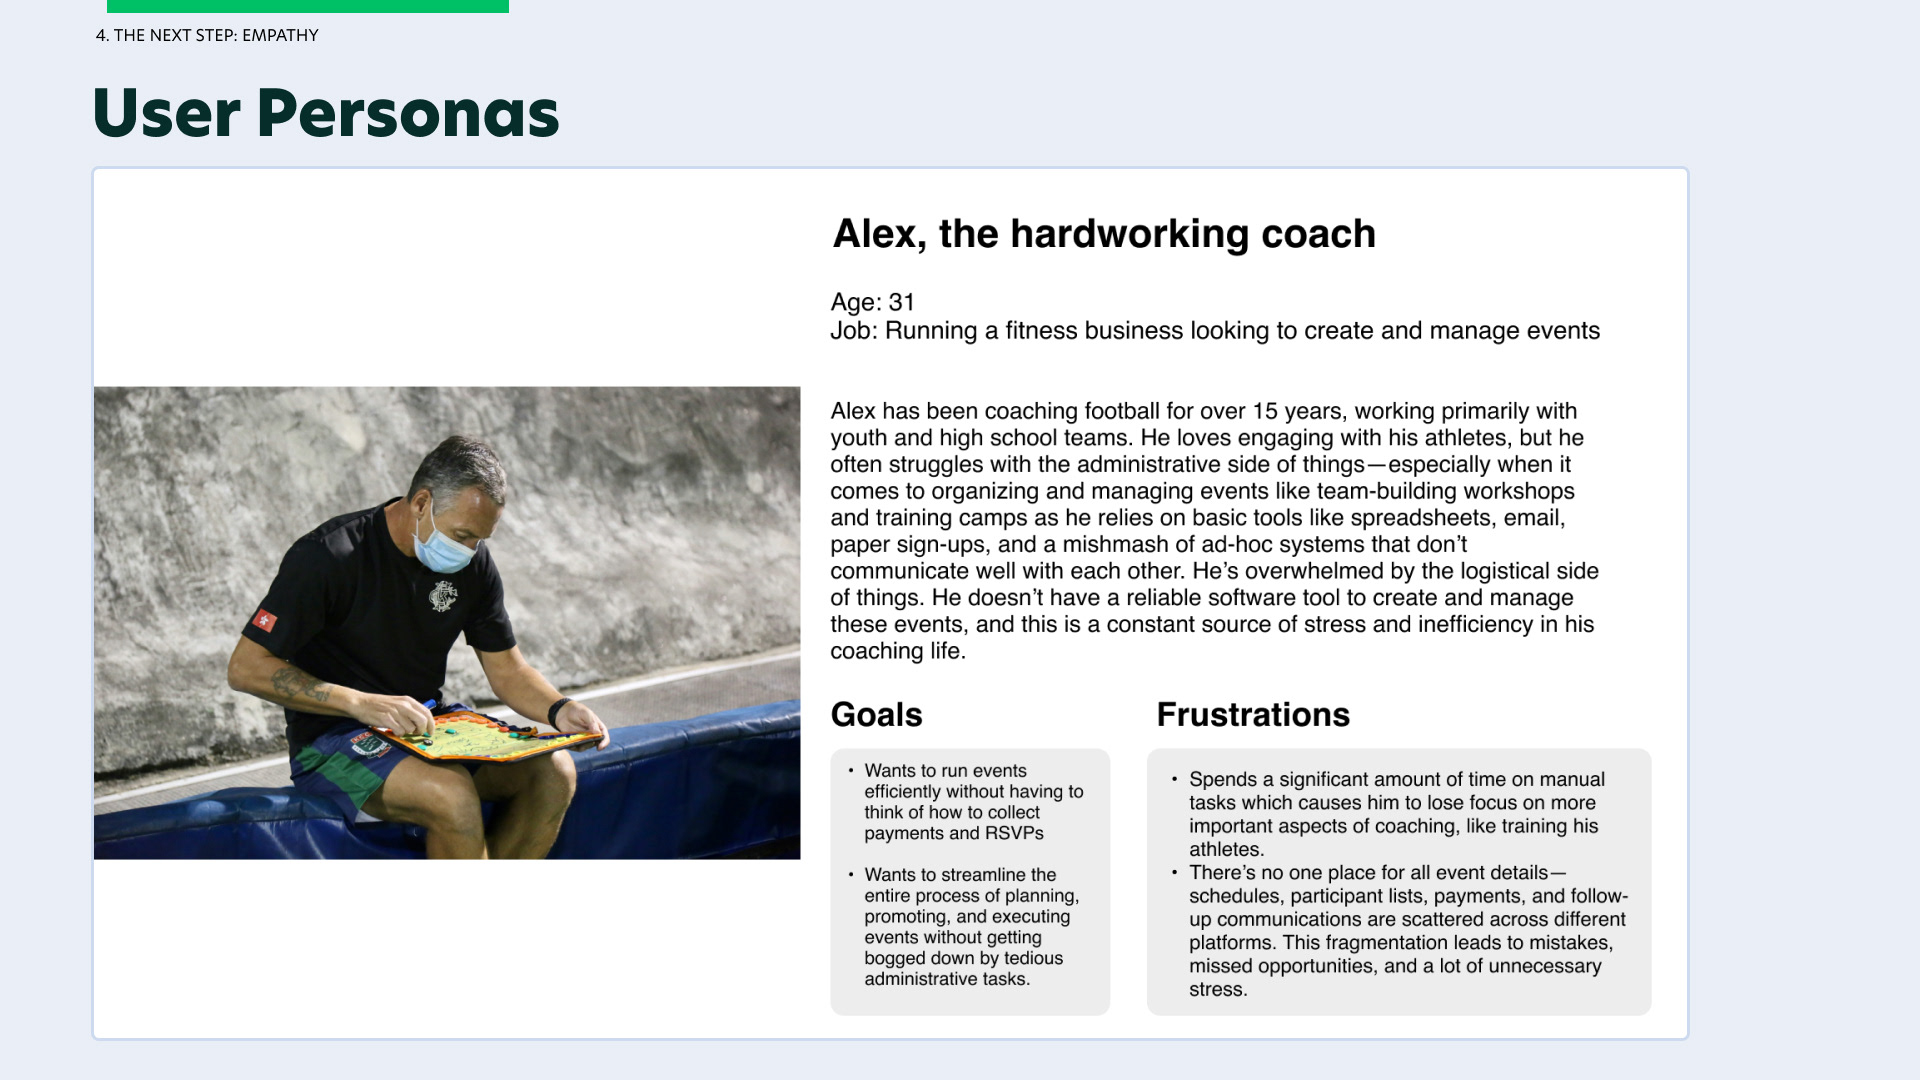
Once we have the data we need, I created two different user personas (one being the customer end user and the other being fitness business user) to visualise being in their shoes and better empathise with our users' needs + pain points.
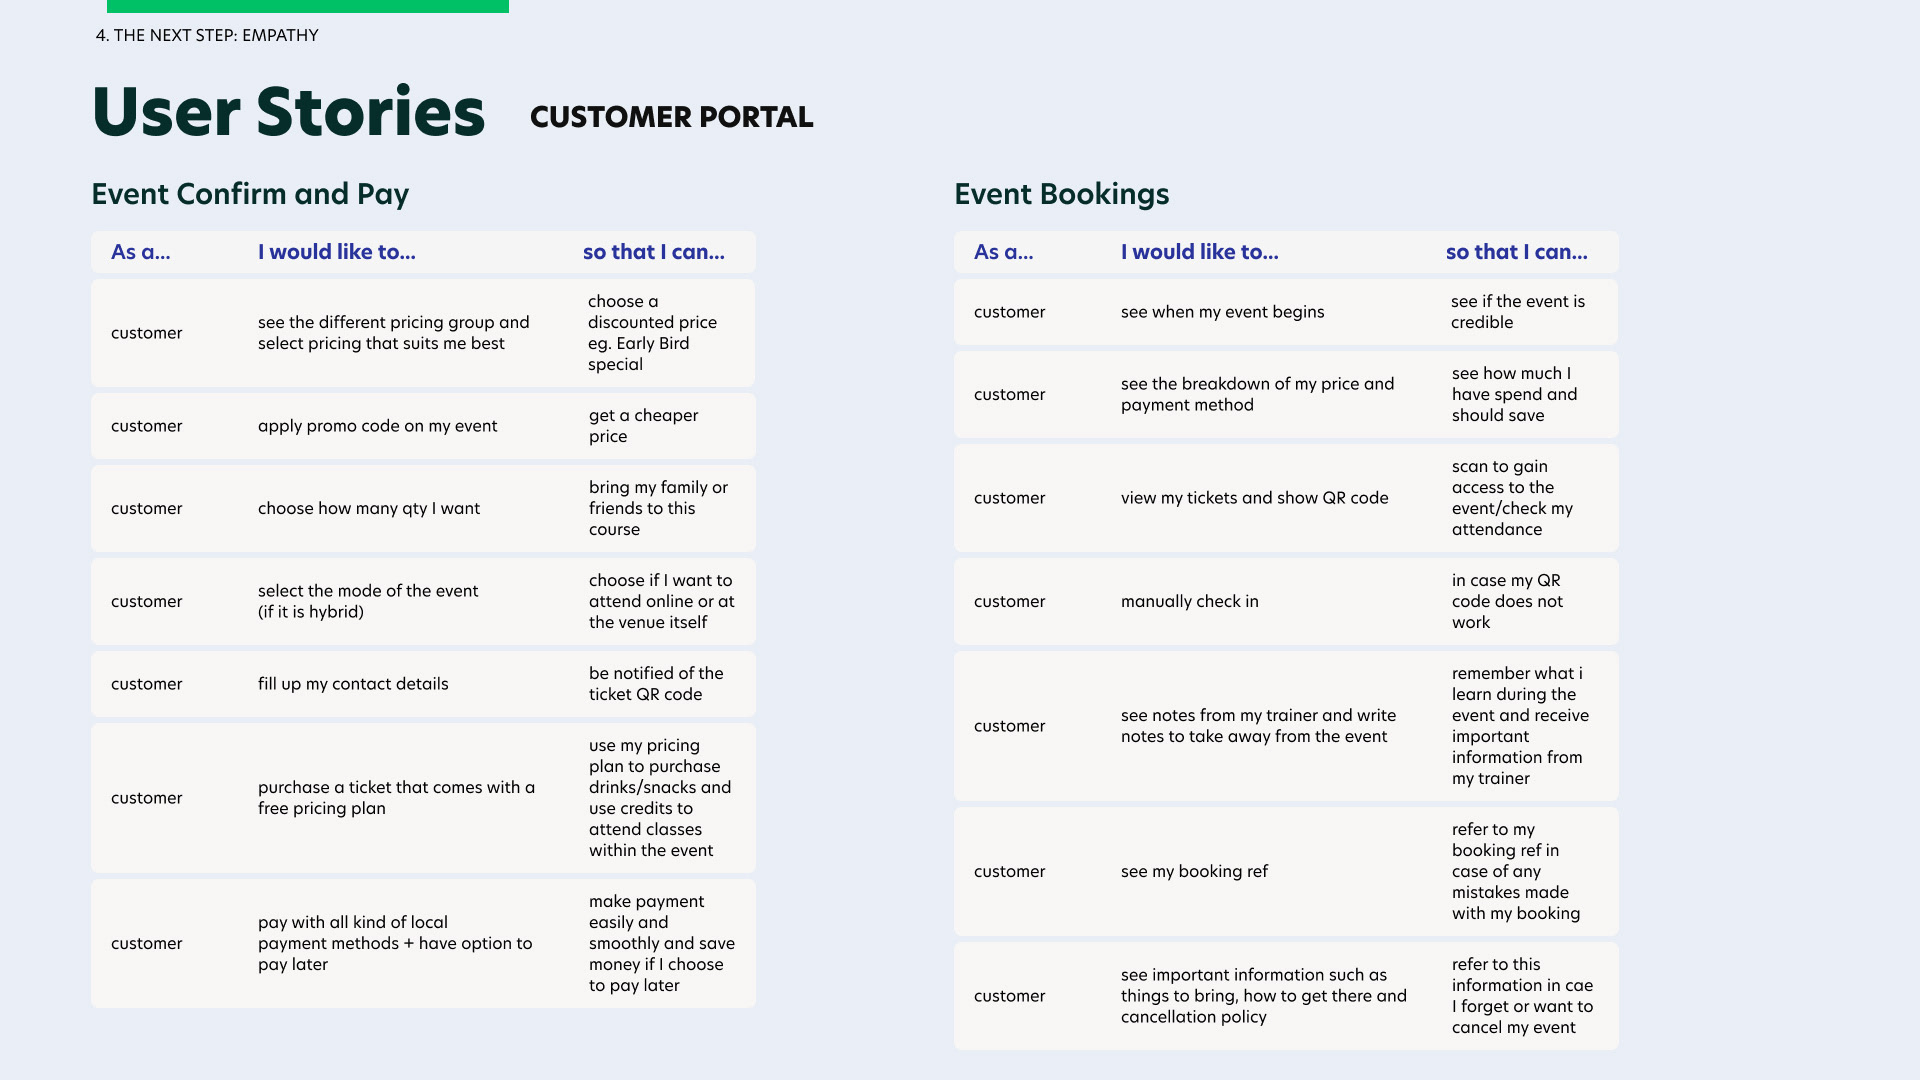
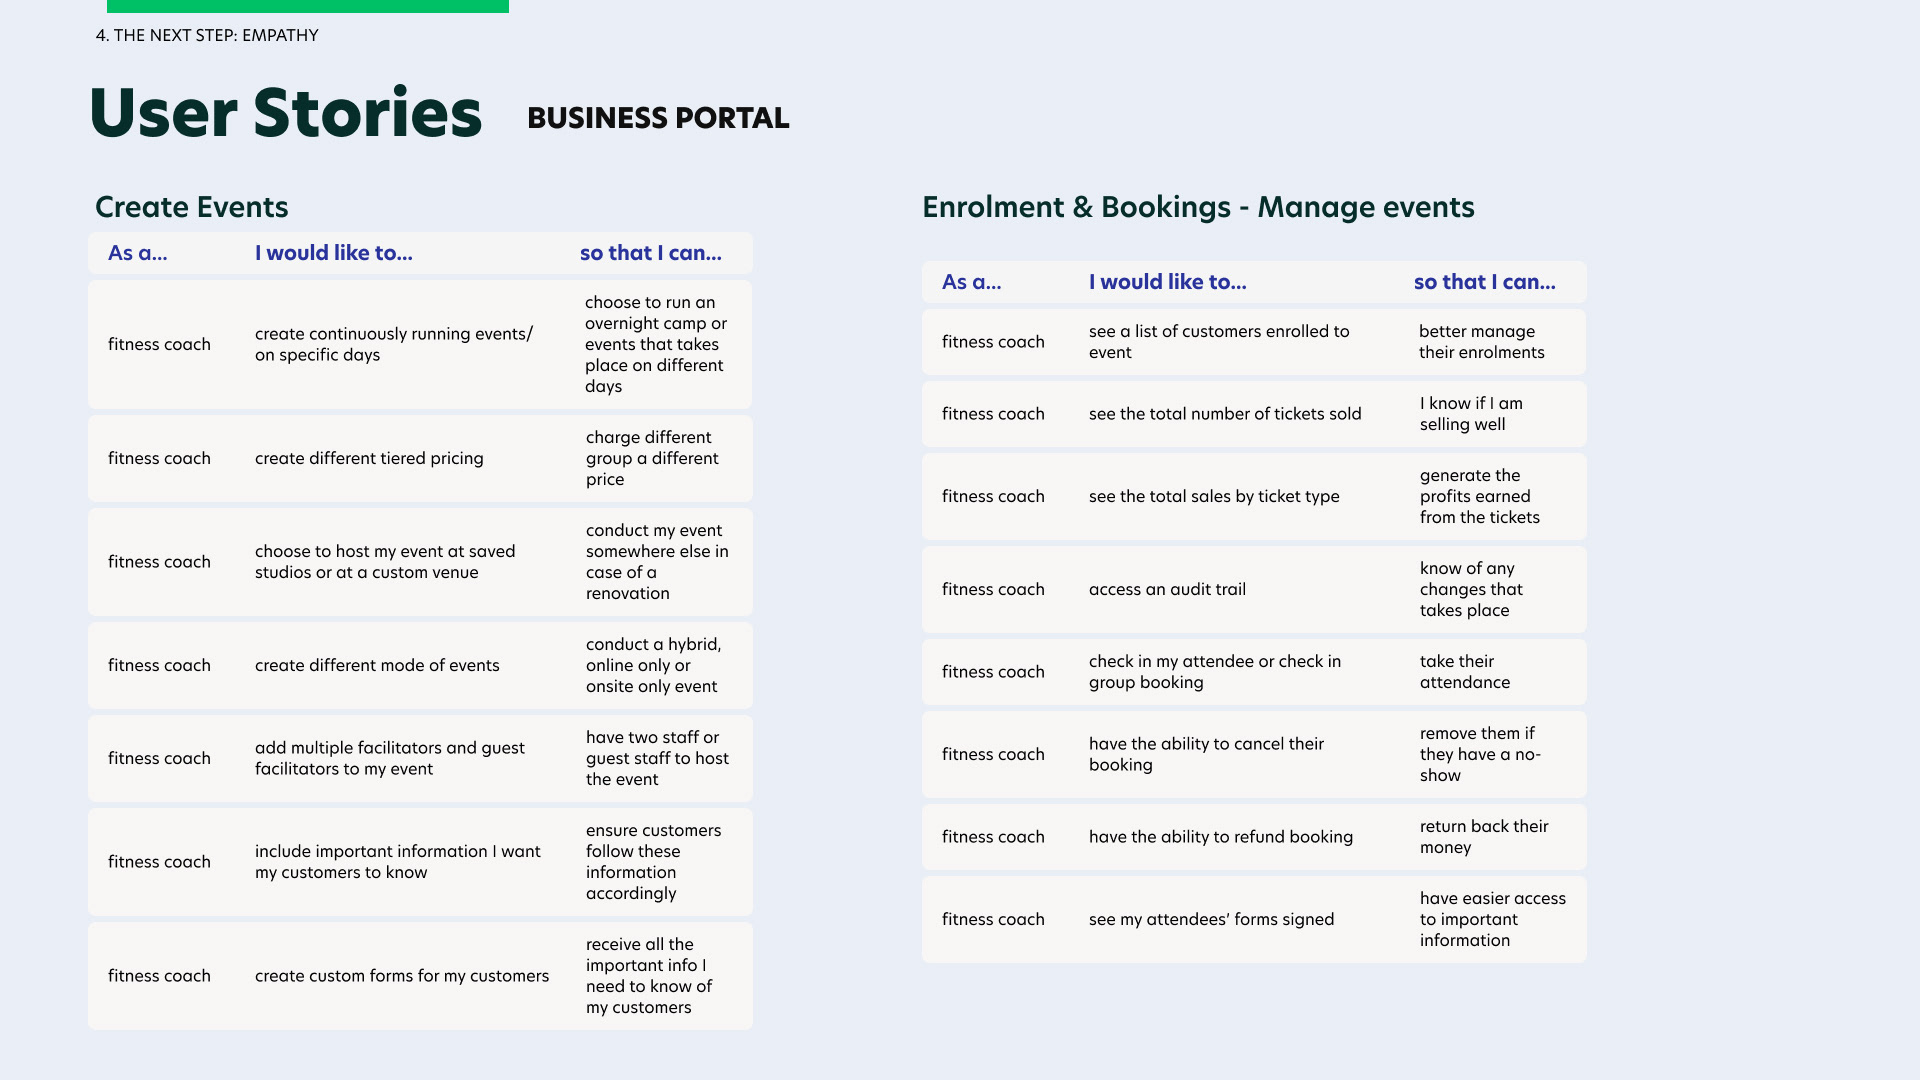
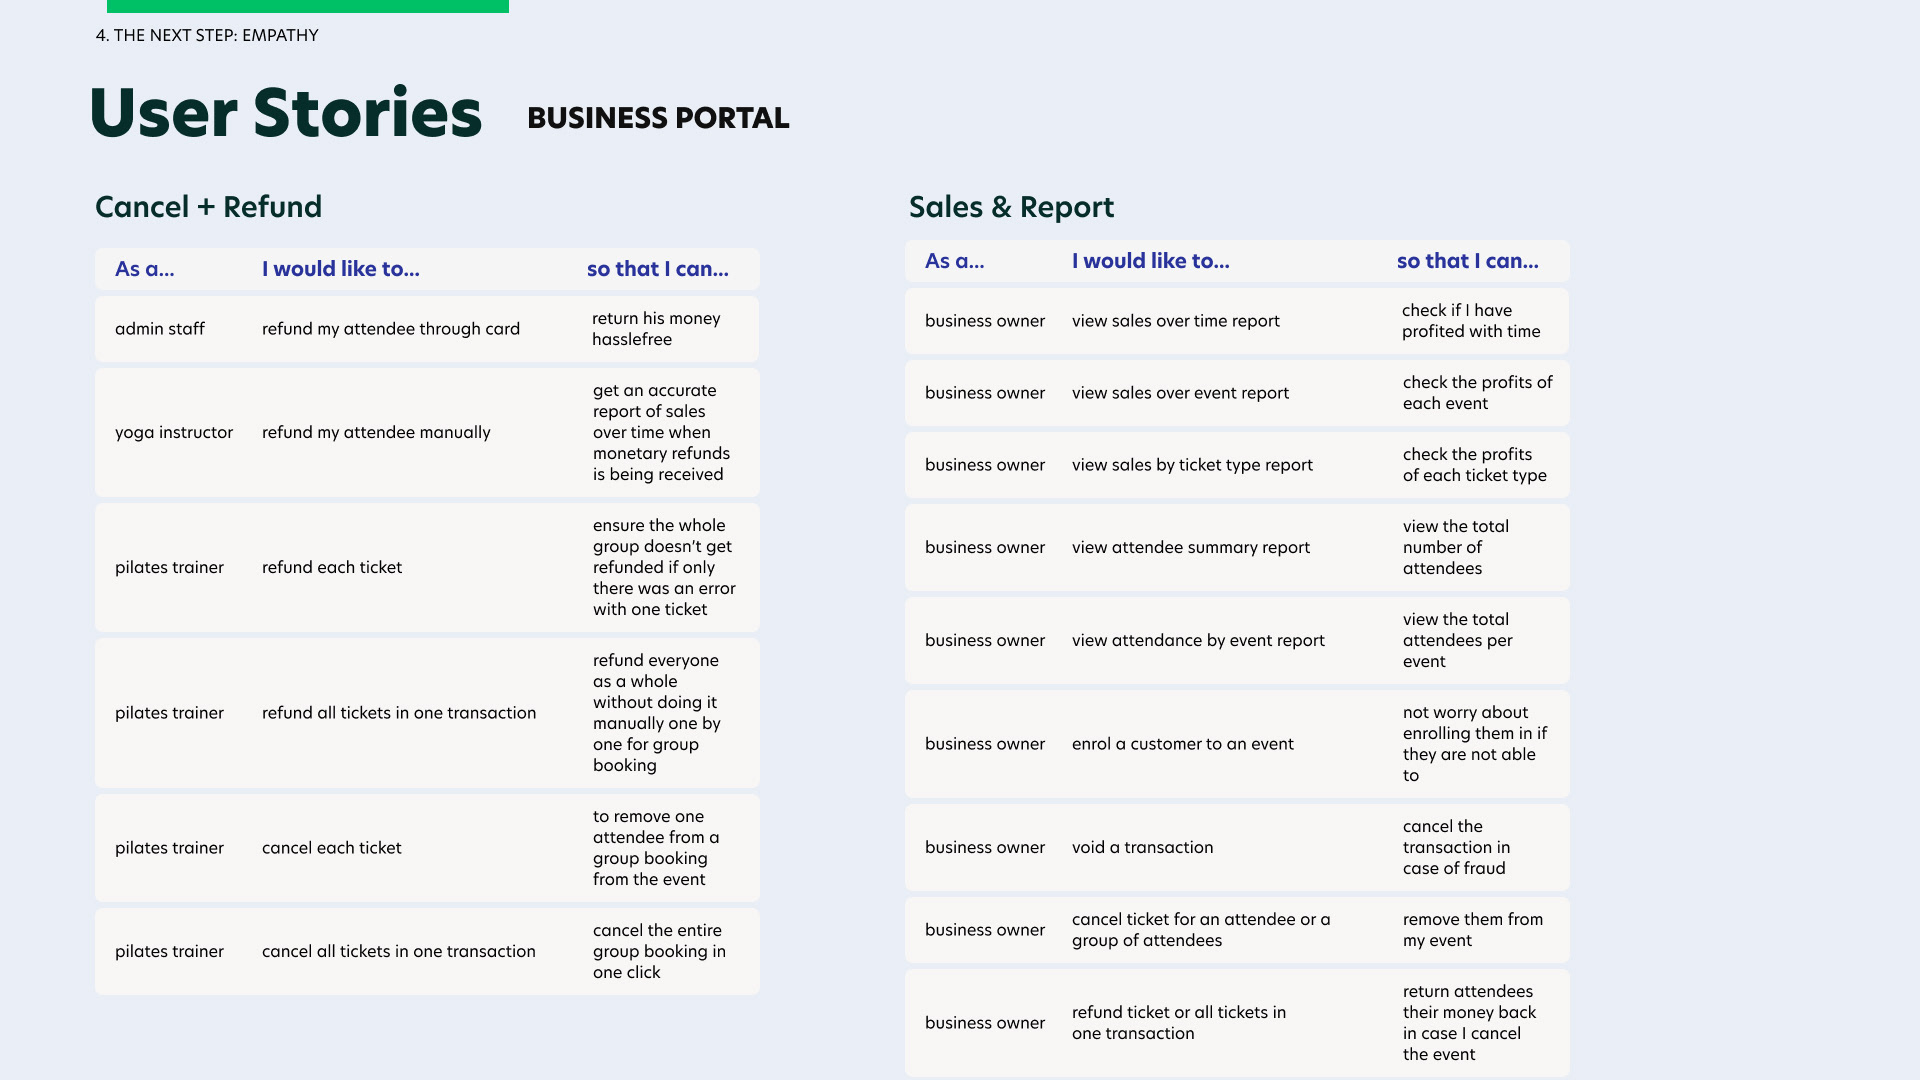
It was important for me to understand the userflows we need for both the customer portal and the business portal for this module.
From the different user personas, I crafted out the different user stories on both customer portal and business portal to gather the important flows I need to design based on their needs + pain points.

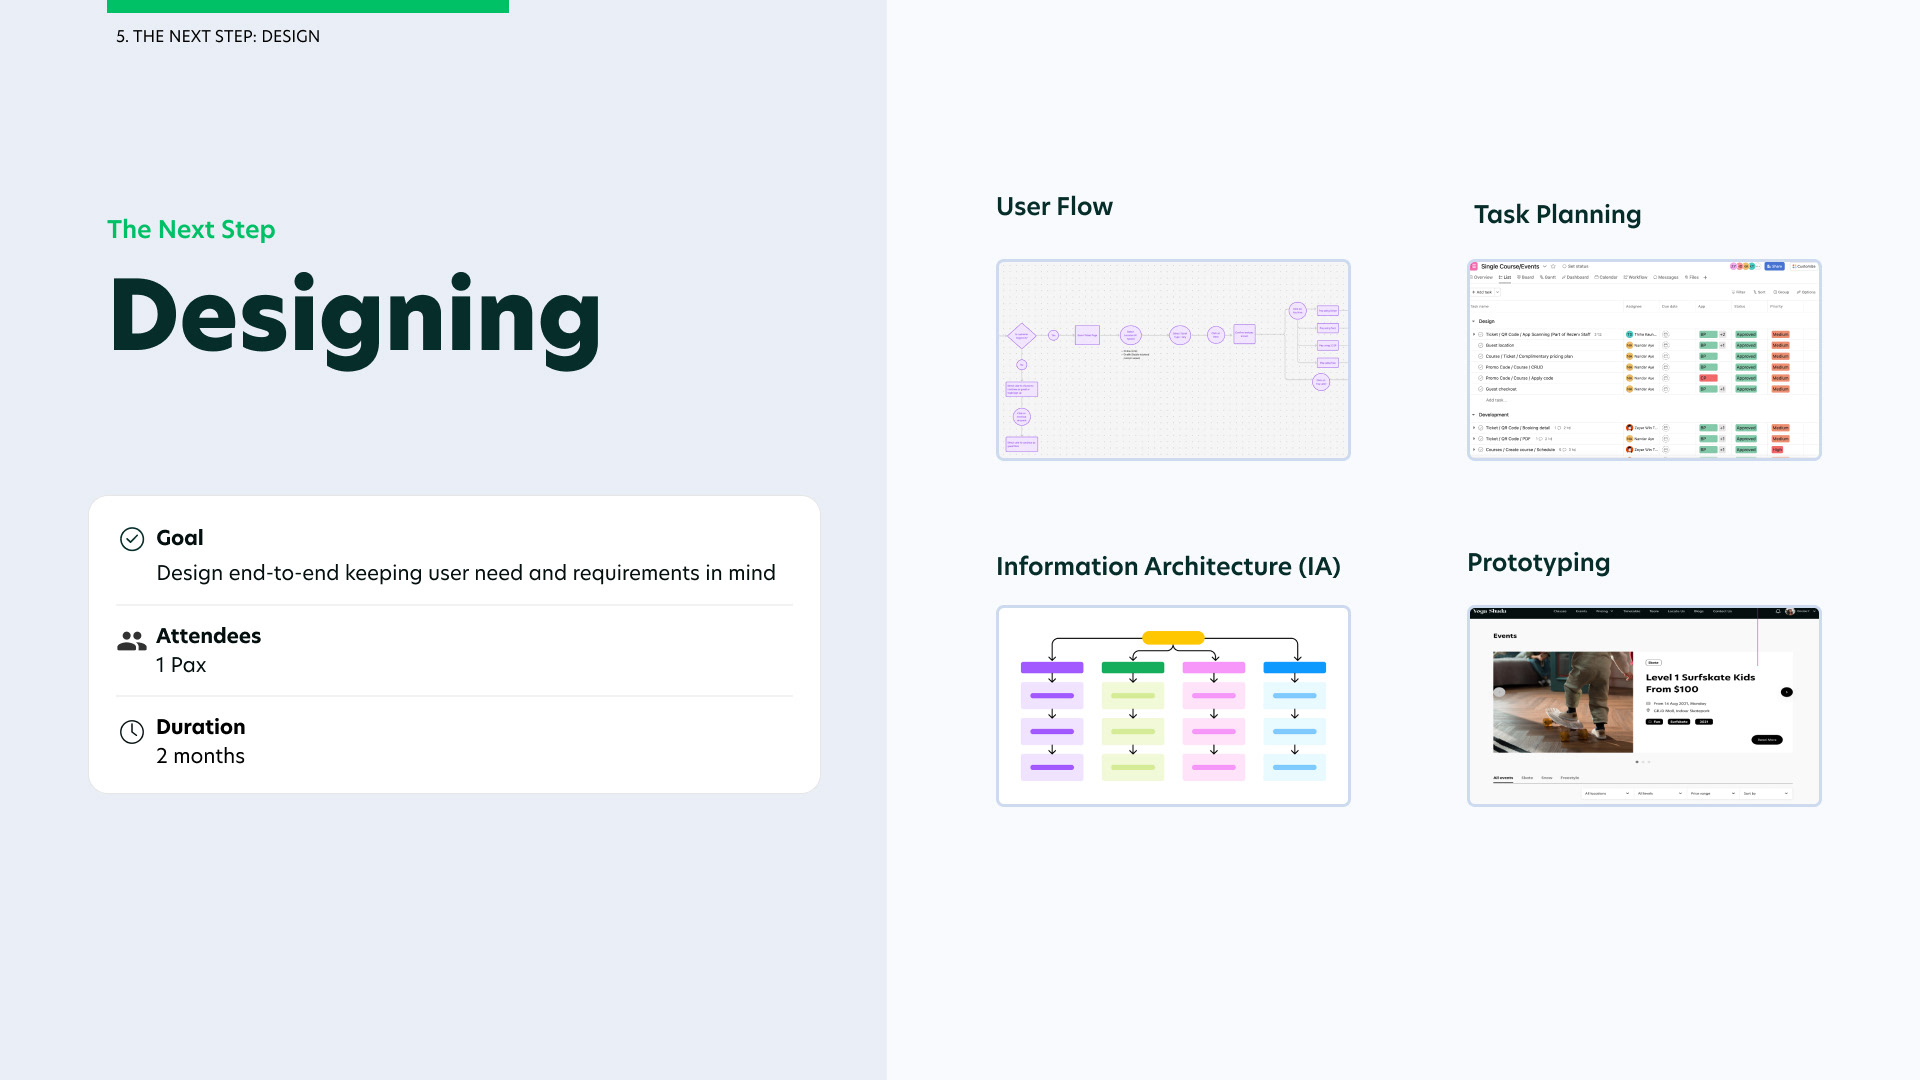
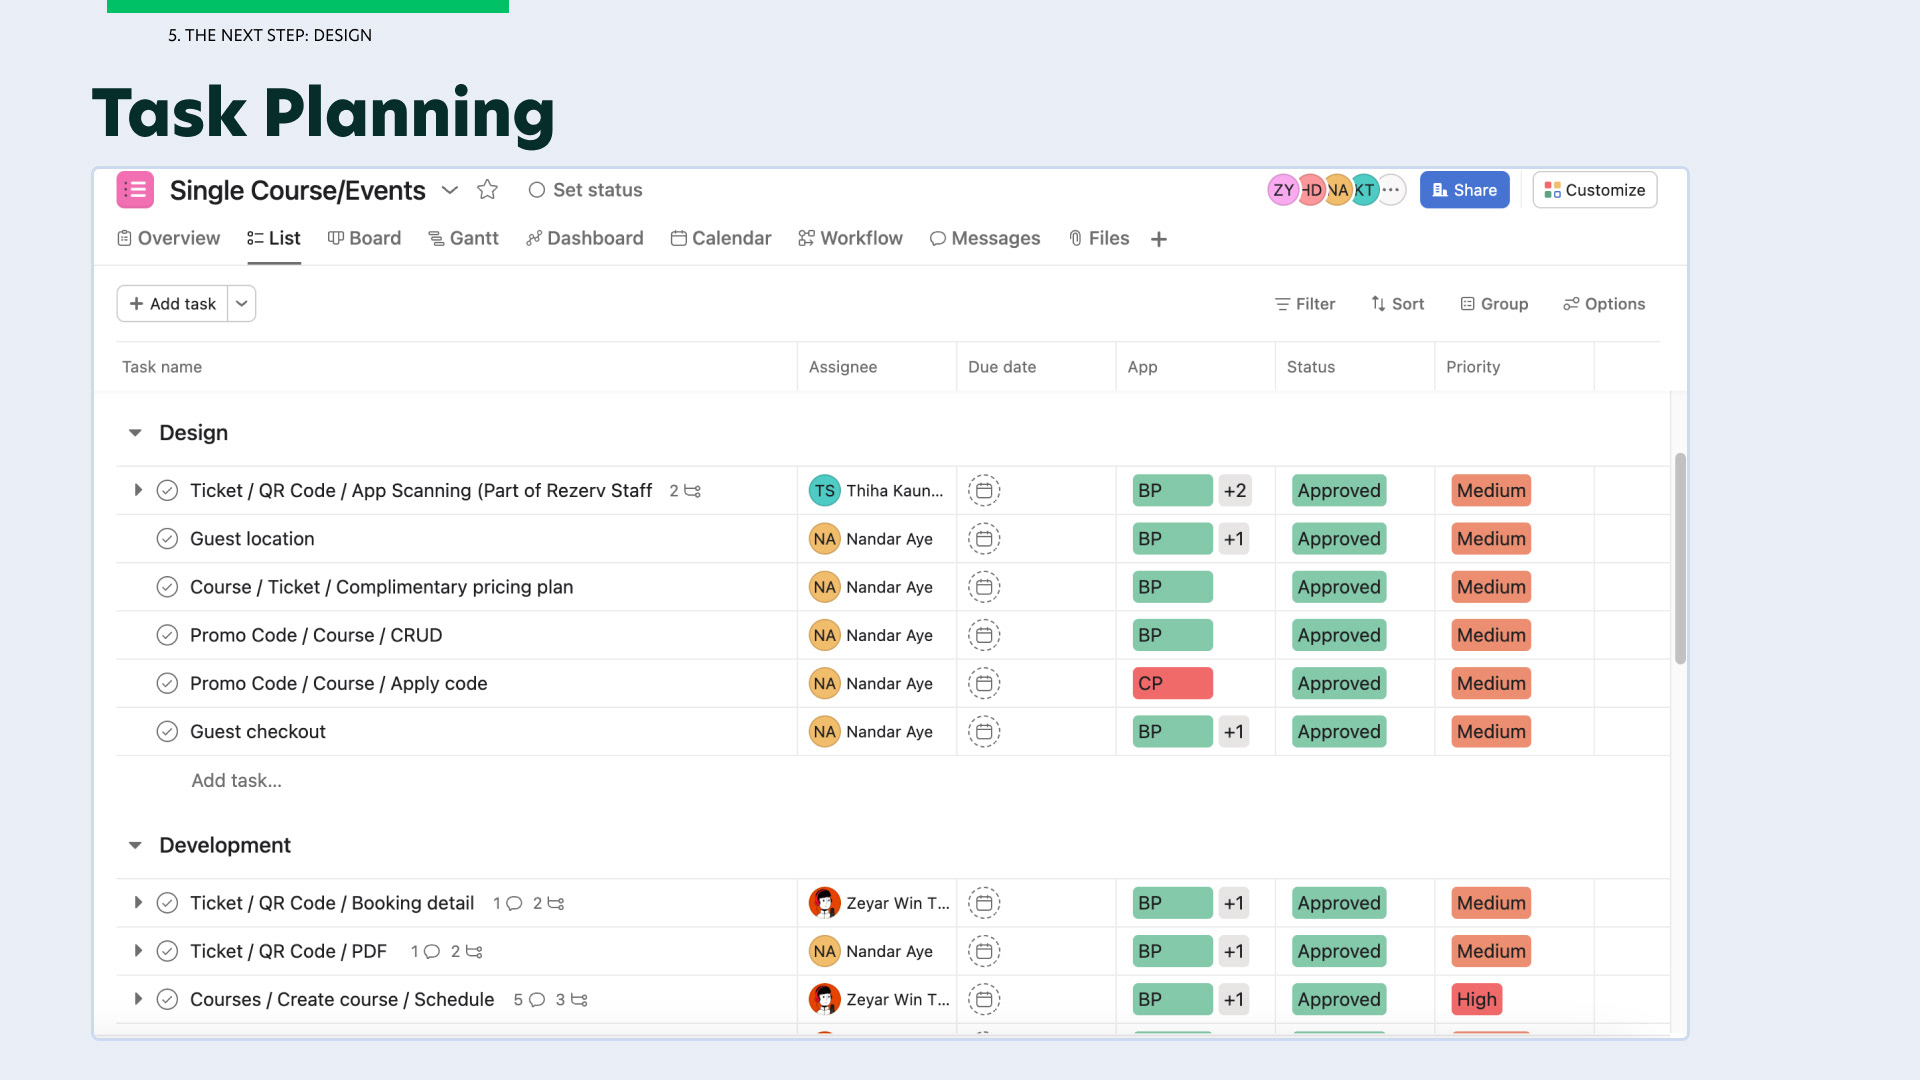
5. Designing for Users
The next step is to design for our end users in mind which includes both the business users and the customers. To do this, I would need to draft out the user flows. This is where the product manager would plan the task for me and my deadlines so that developers are informed and aware.
After which, I would come up with the information architecture (IA) of each screen, the fidelity prototype while getting end users to test on the product and lastly coming up with the final design when users' requirements are met and end-users are happy with the design.
After which, I would come up with the information architecture (IA) of each screen, the fidelity prototype while getting end users to test on the product and lastly coming up with the final design when users' requirements are met and end-users are happy with the design.
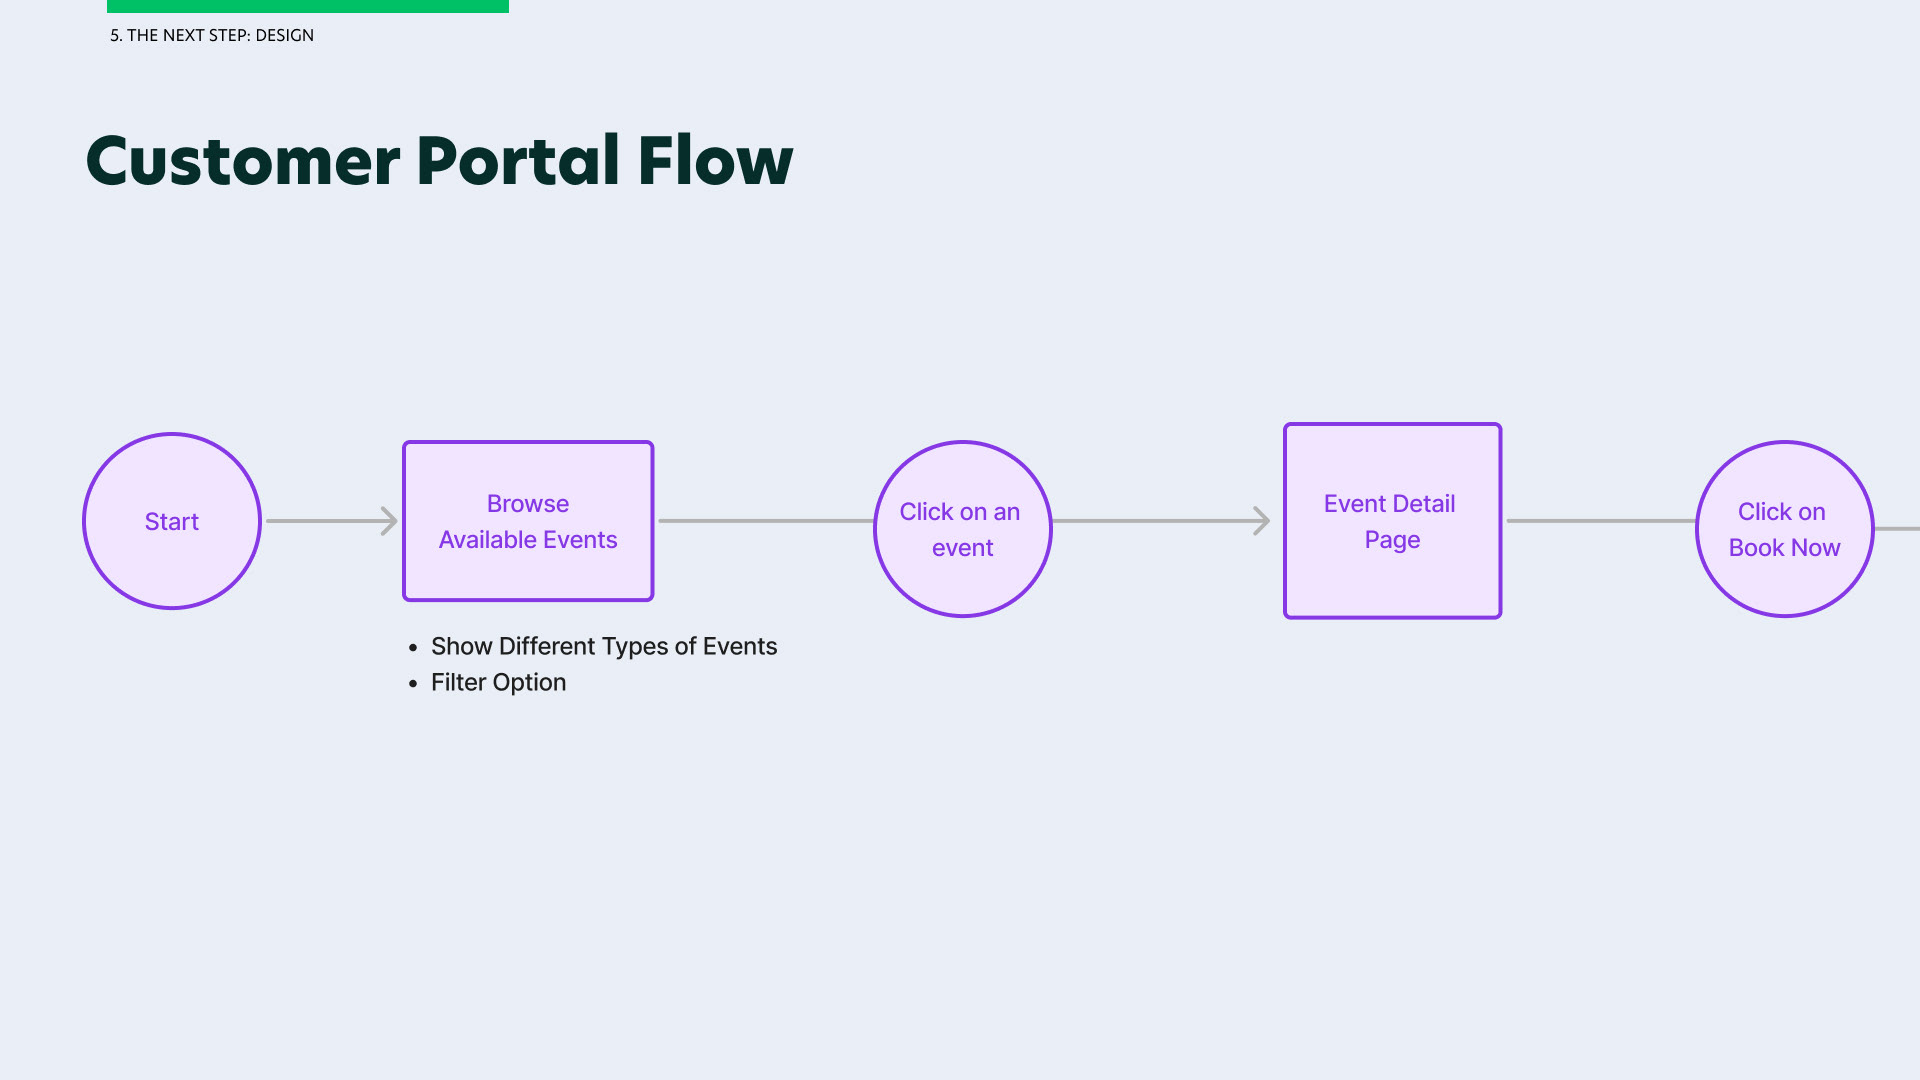
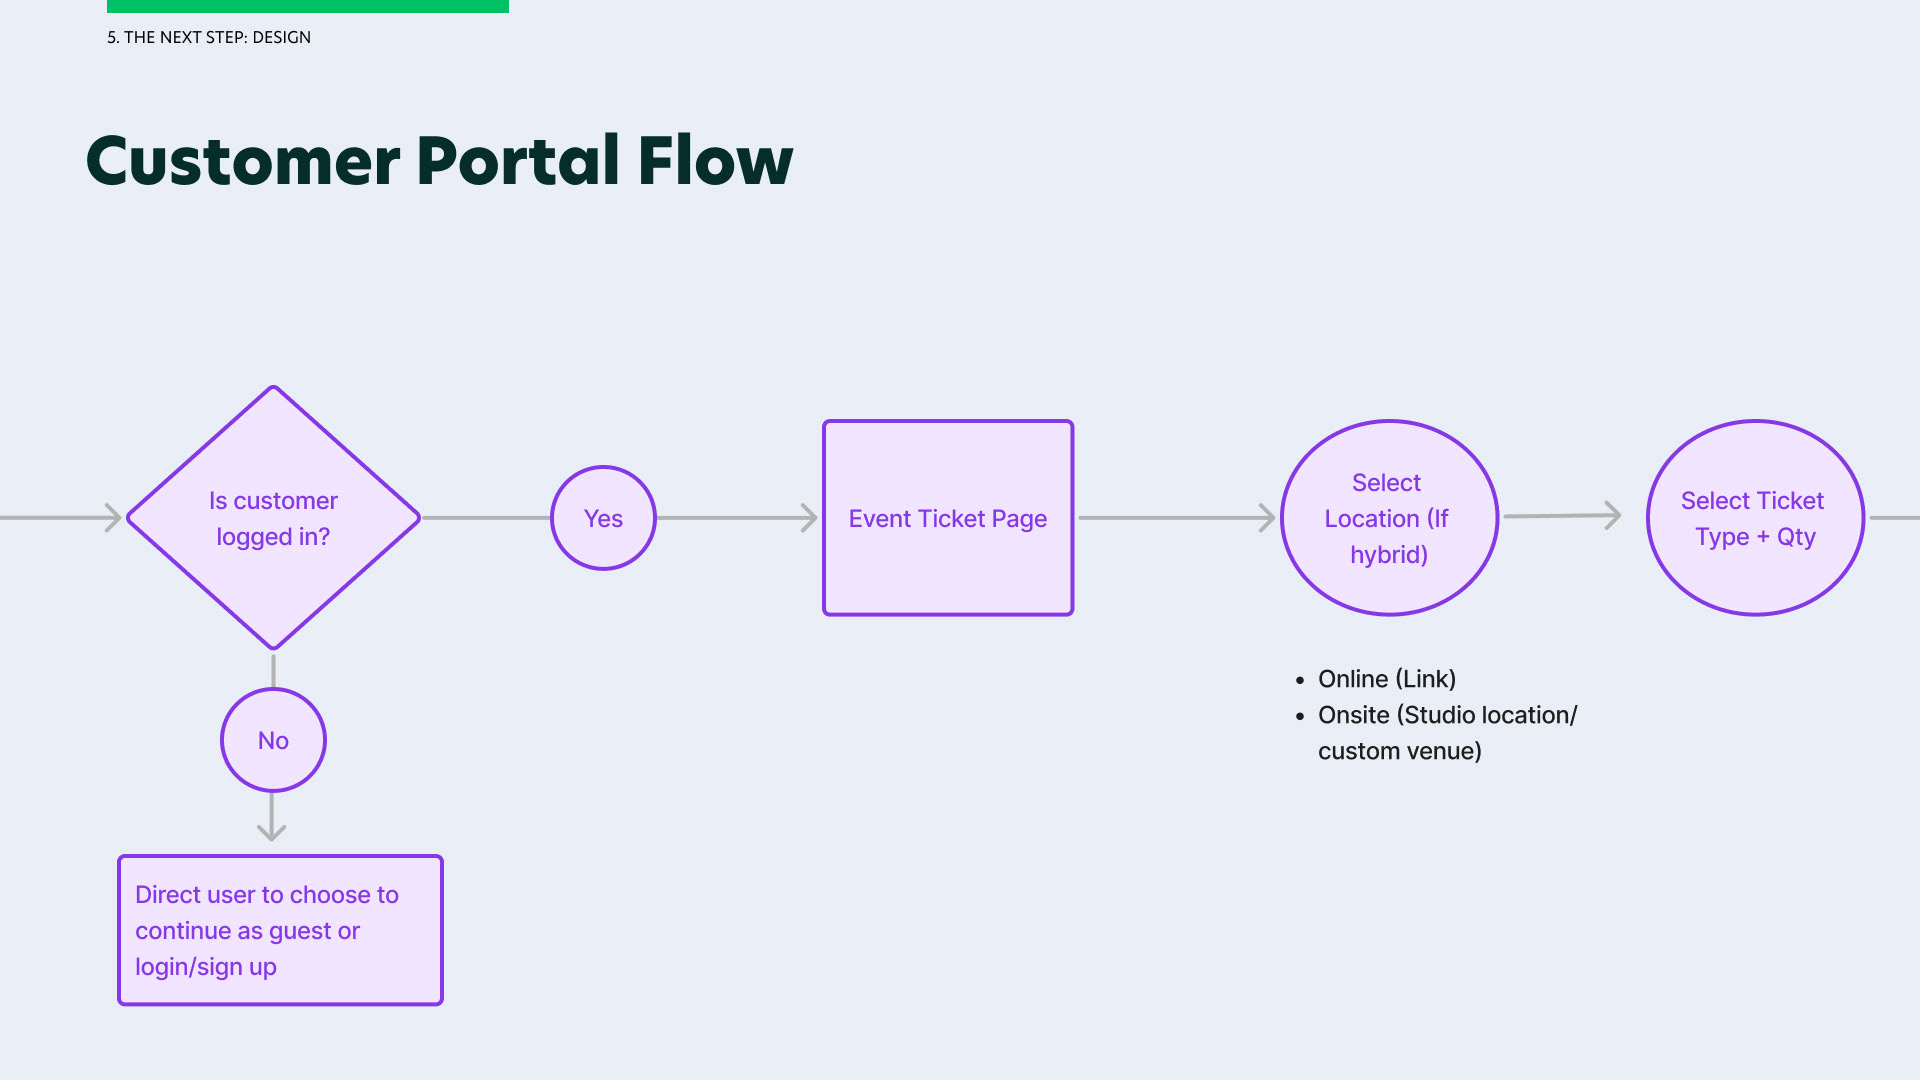
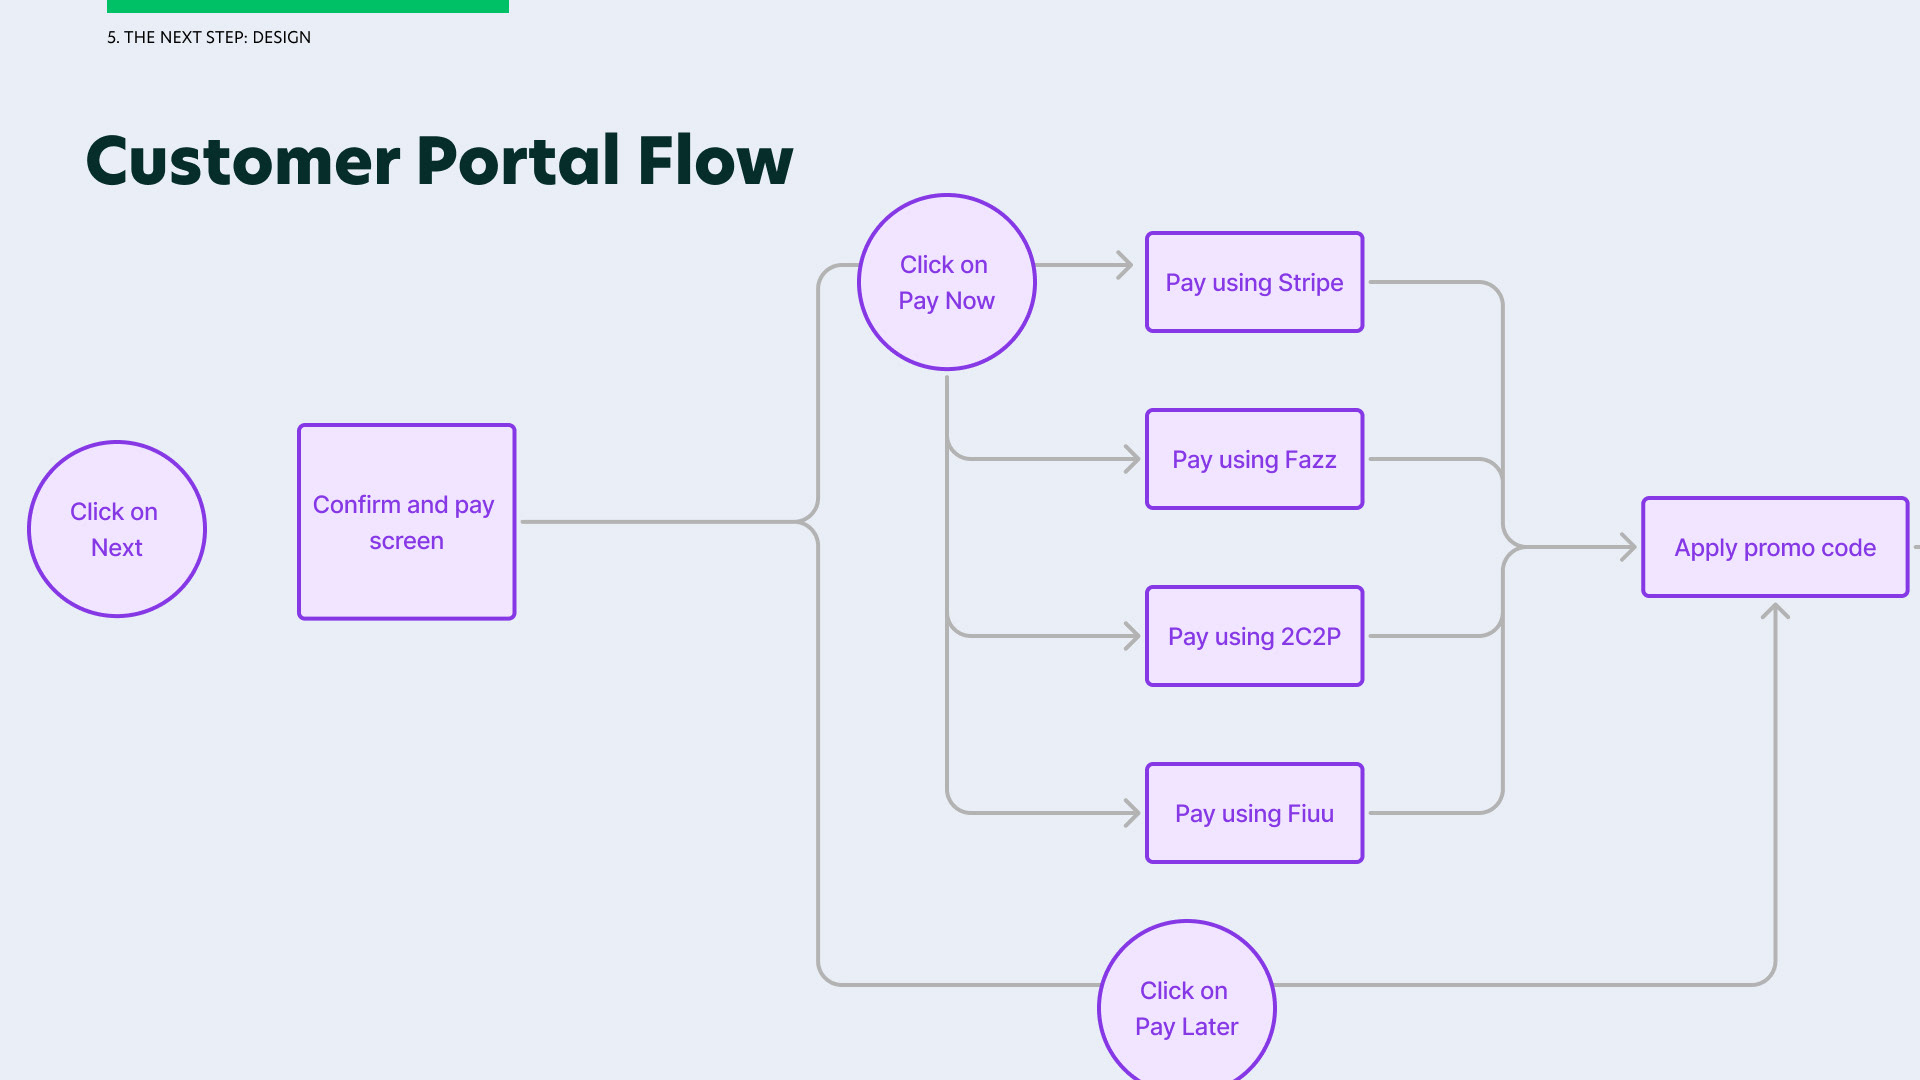
Before I start designing the different screens, it is very important for me to visualise the userflows we need for both the customer portal and business portal.
For simplicity sake, I will only be showcasing the userflow affecting the customer portal as there are many different modules that will be affected on the business portal.

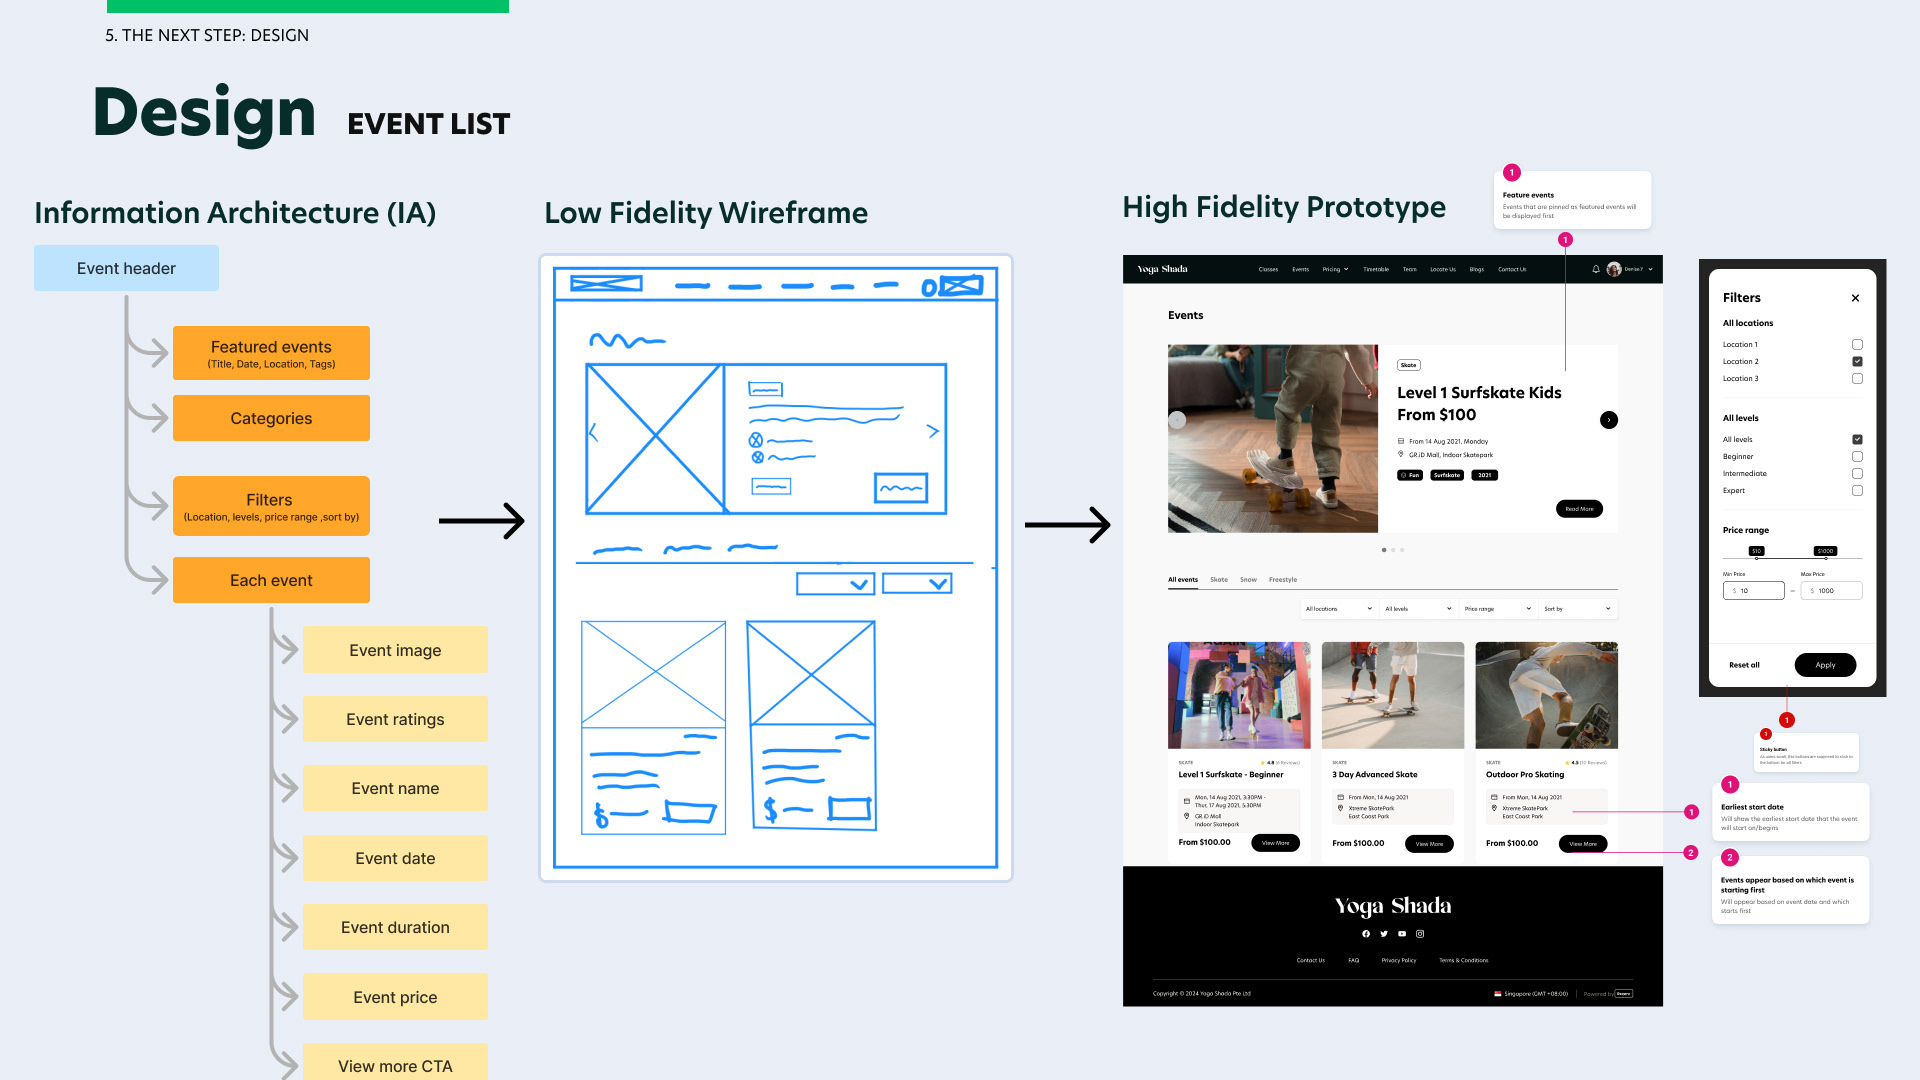
Once I understood the user flow, I crafted out the IA of each screen to finalise the content, all the while ensuring my stakeholders are aware and approve of the content, coming up with the low fidelity wireframe and use the components from the Design System to design the features requested while ensuring consistency in our design standards throughout the software.
As a UX designer, I also ensured that all the dependencies of the user flow are met and the negative flow for each module is also accomodated for.
Design for Event List & The User Flow on Figma

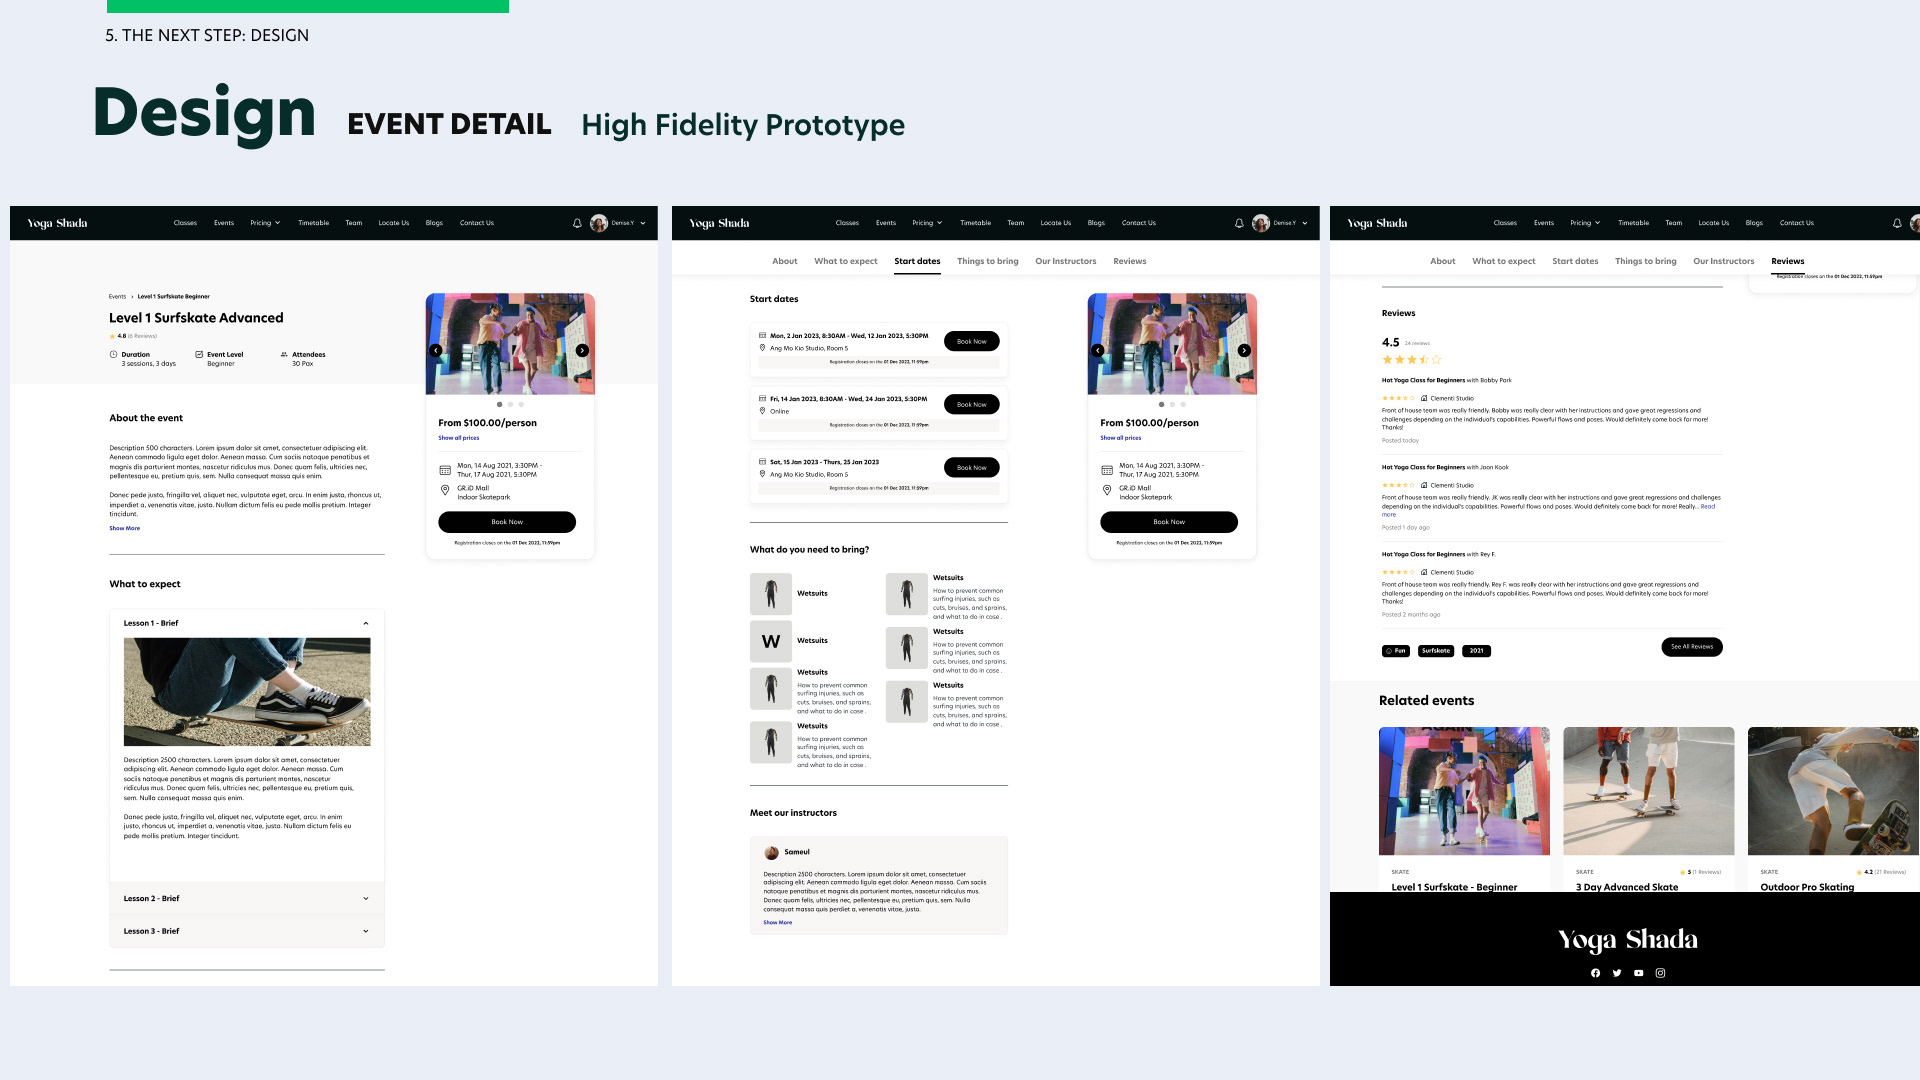
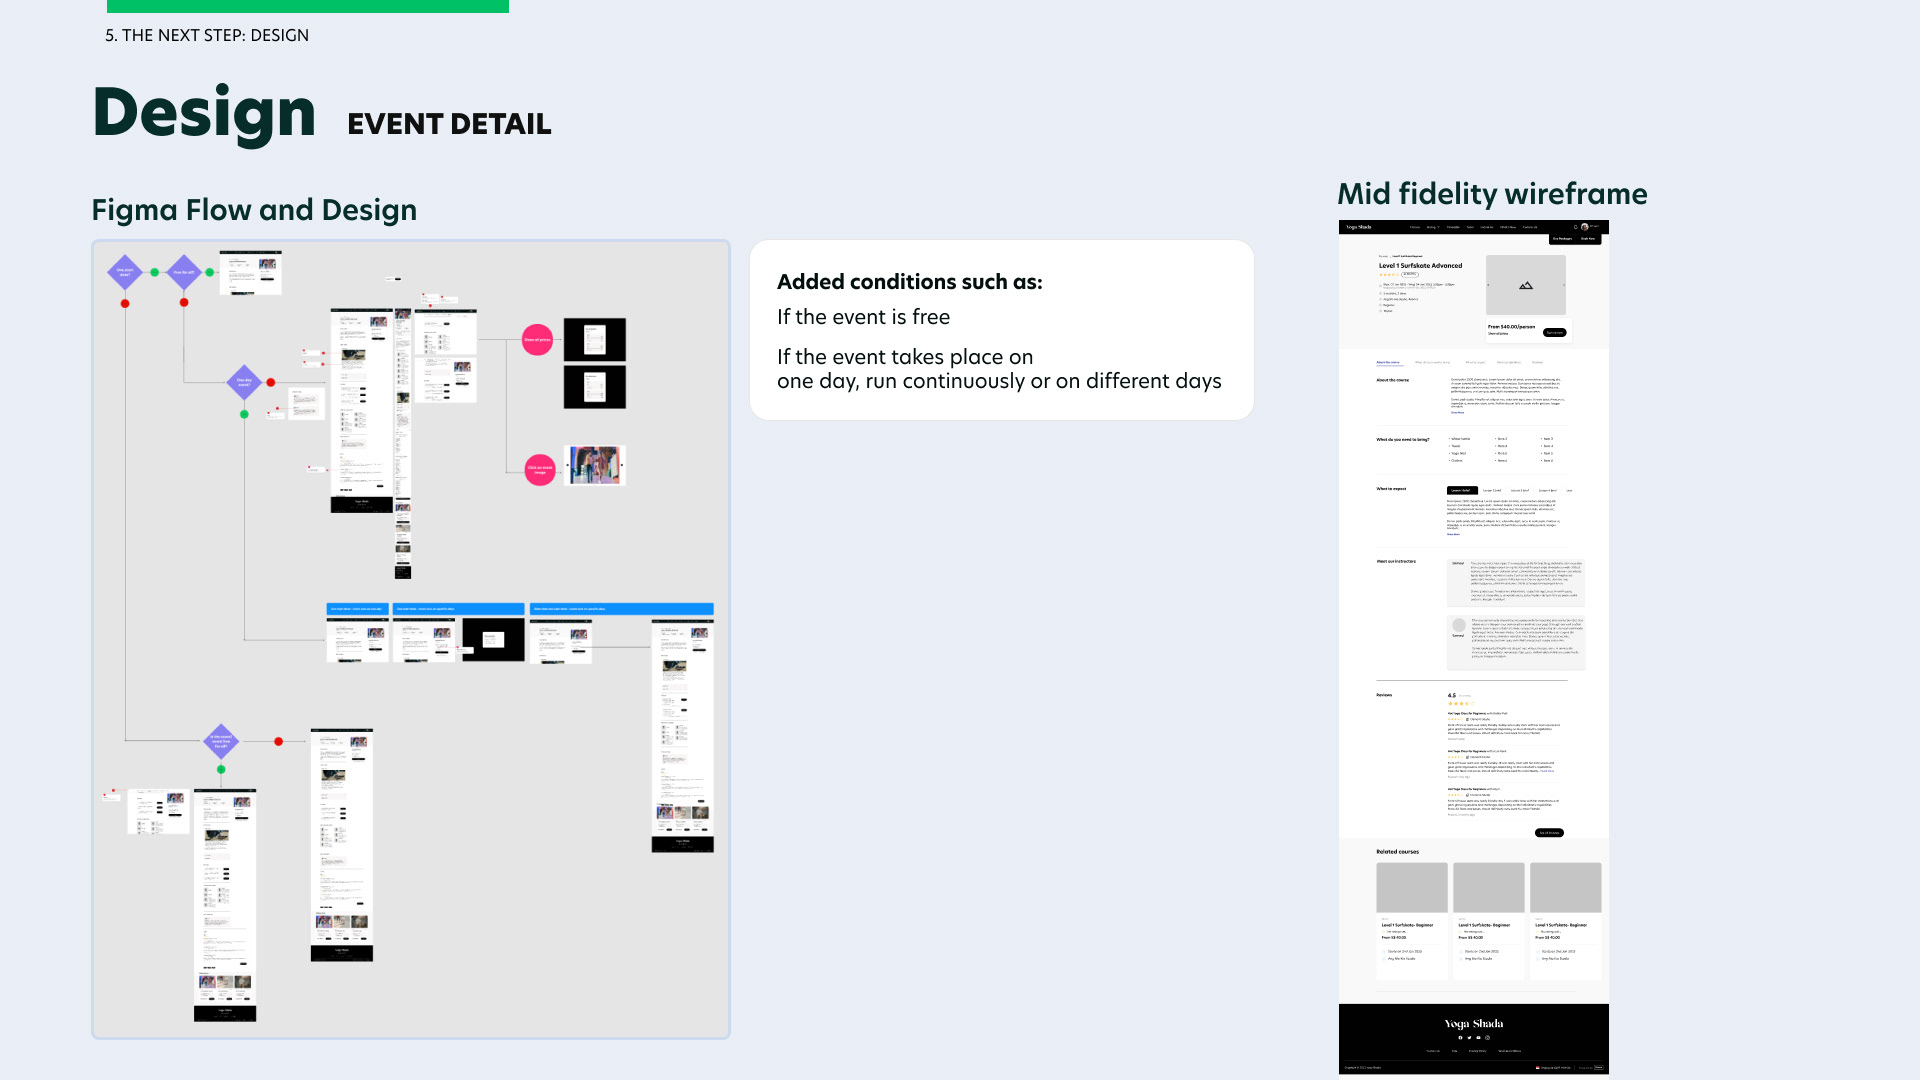
Design for Event Detail & The User Flow on Figma
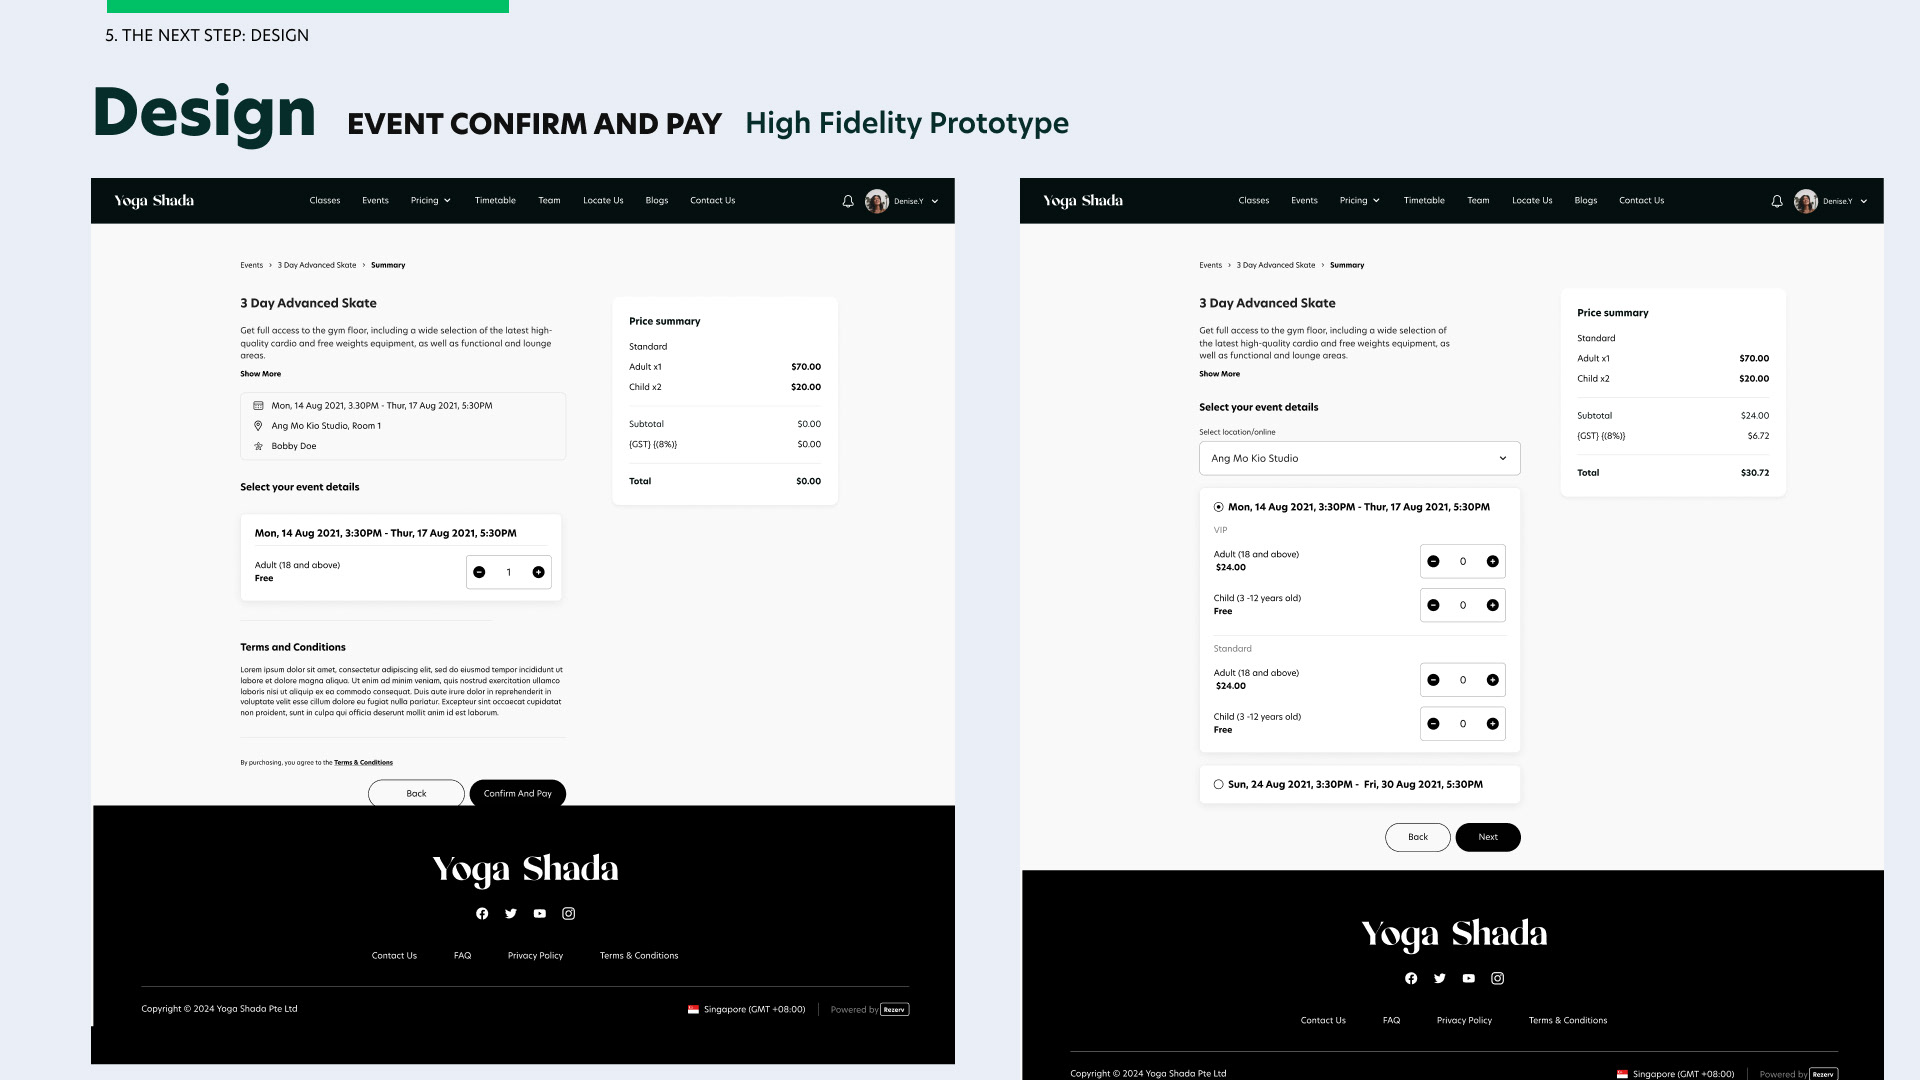
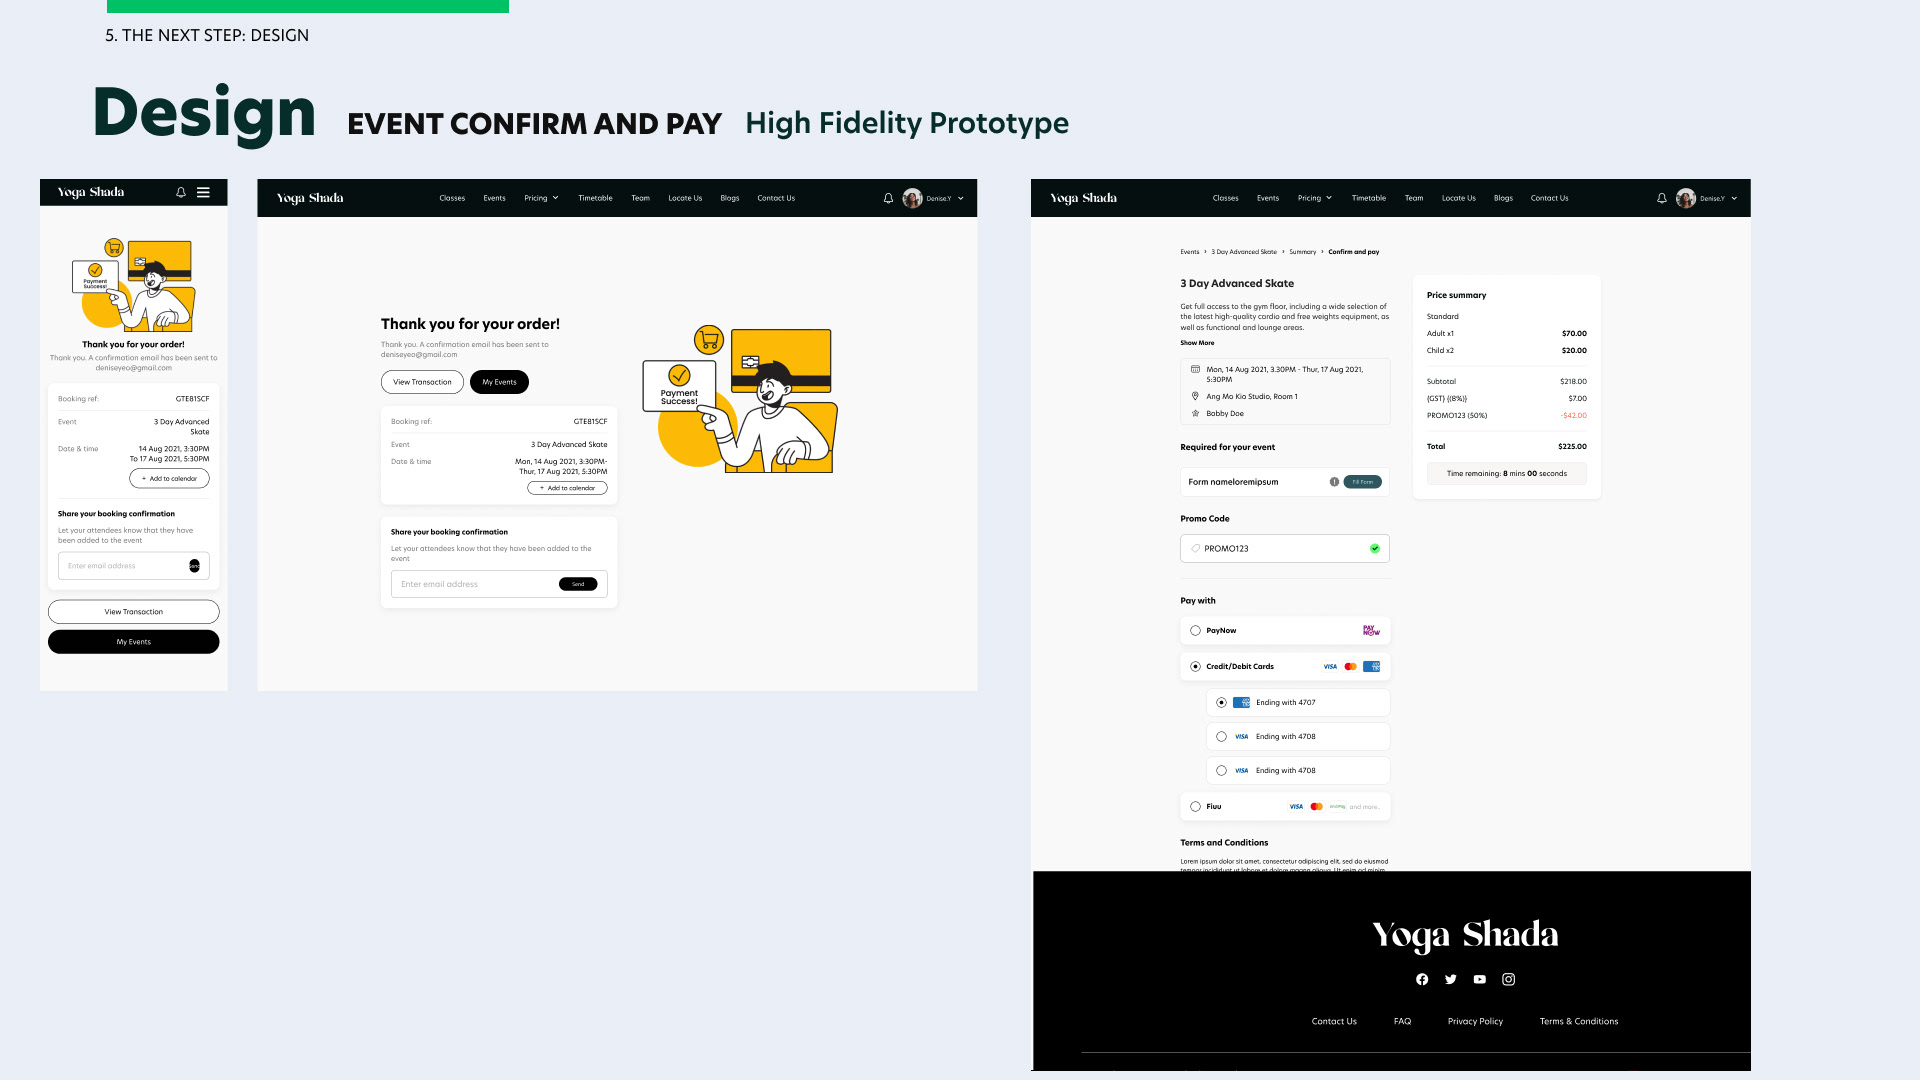
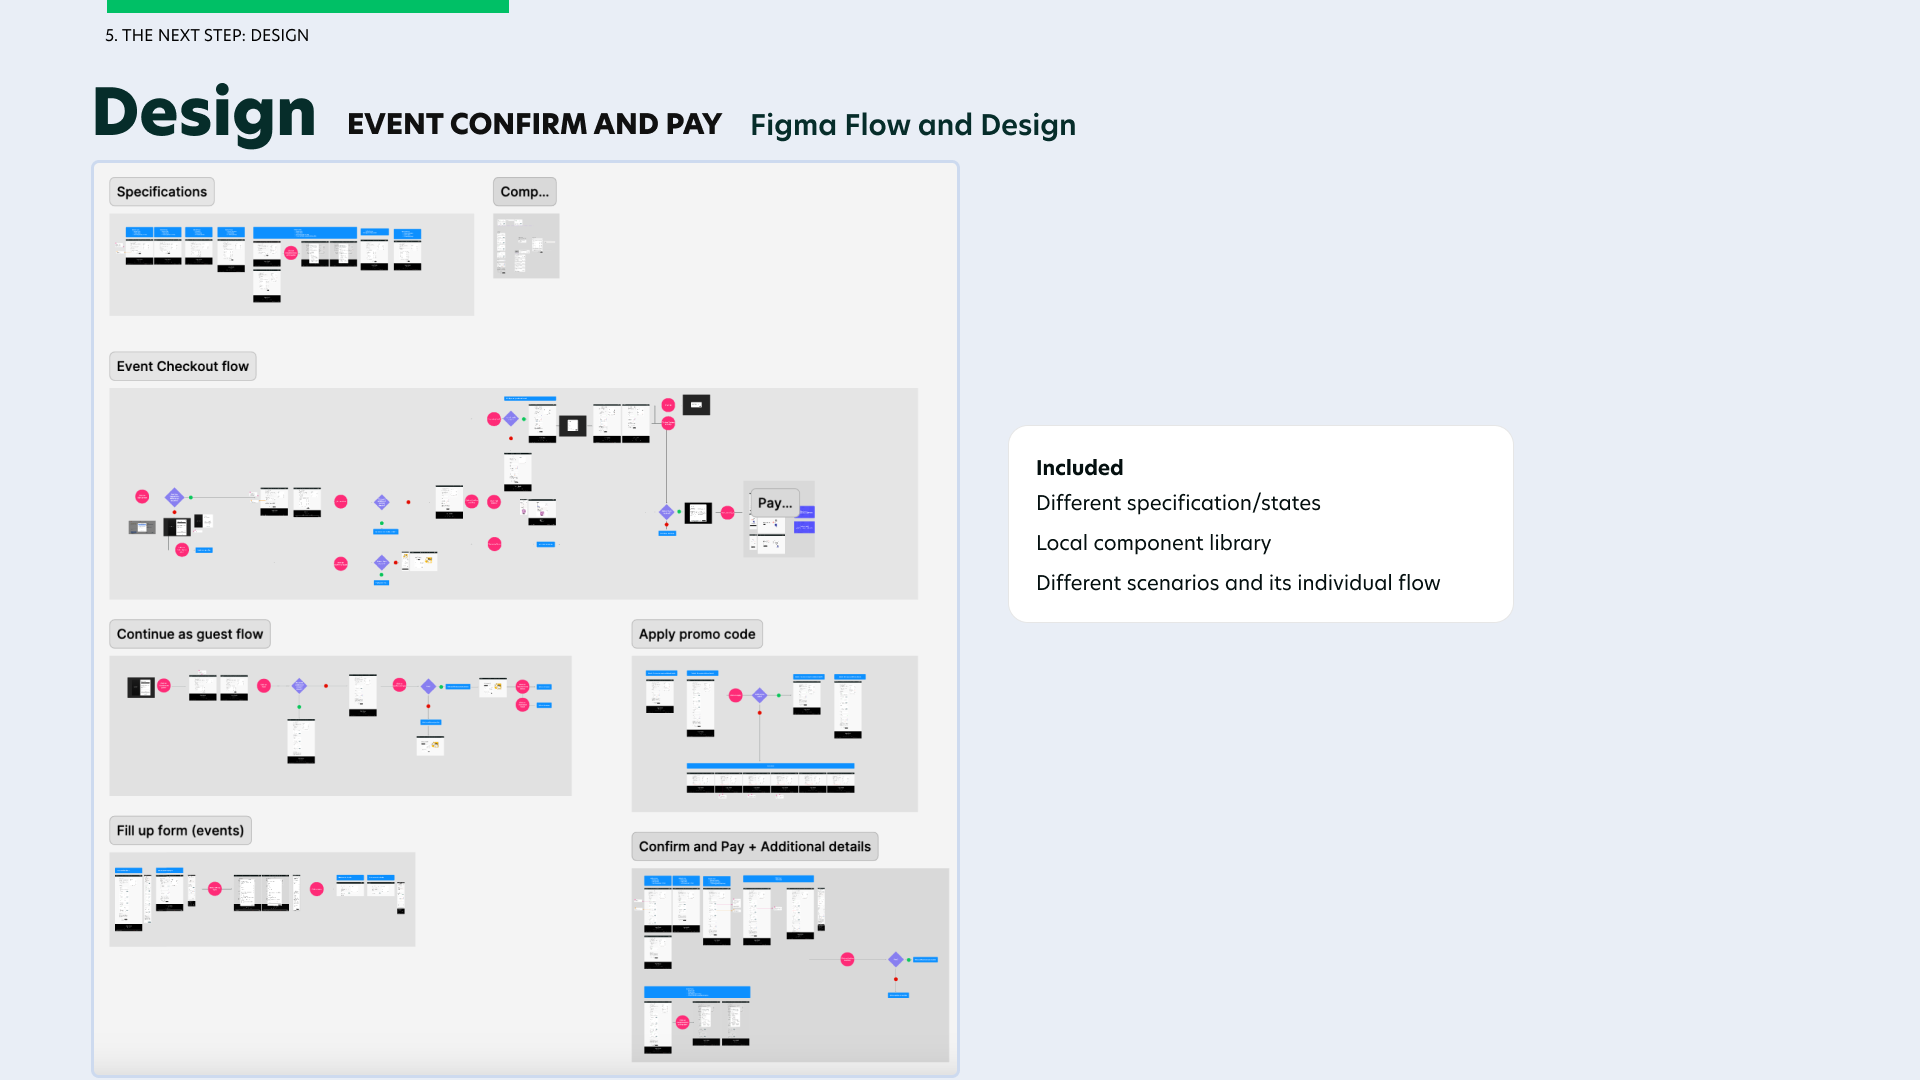
Design for Event Confirm and Pay & The User Flow on Figma
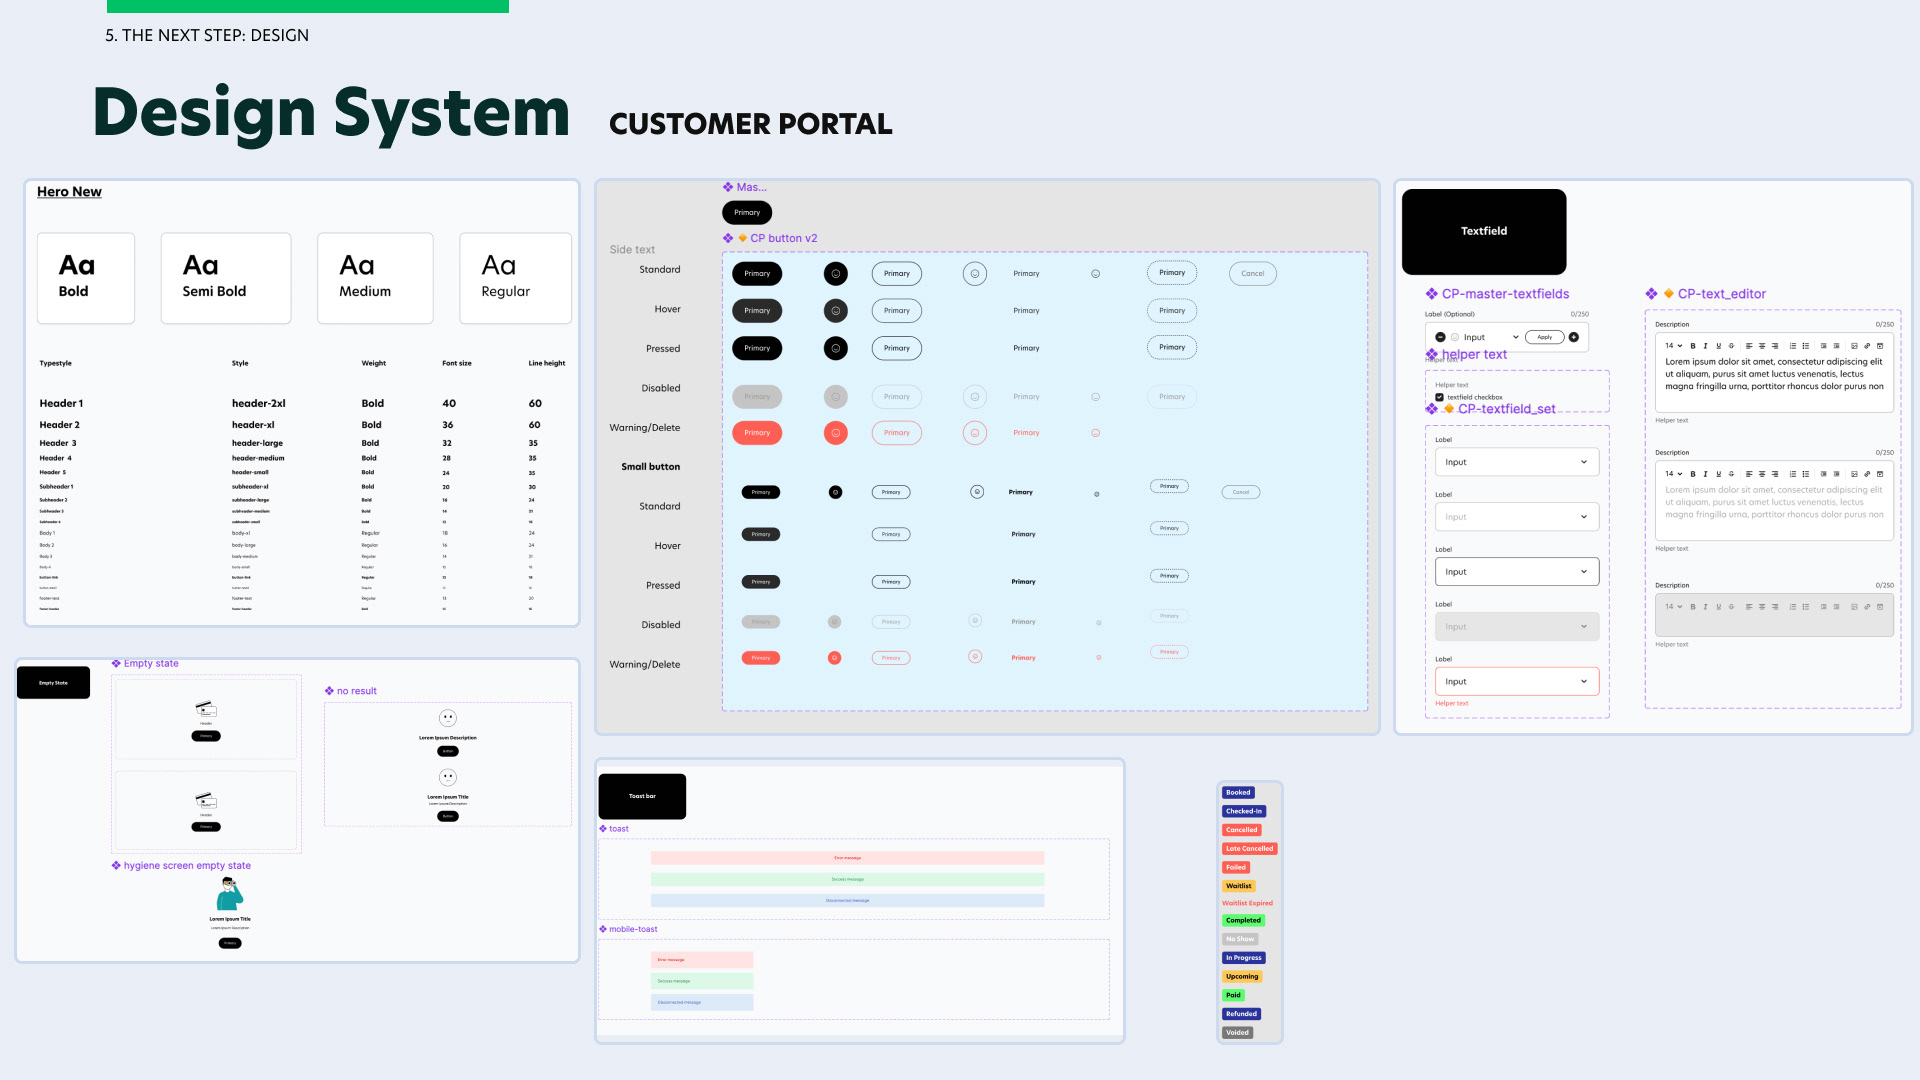
Working with the Design System
I would like to showcase the fundamentals from our component library in our design system to reuse across all screens in the same userflow. This is where we reuse the similar components for the font, buttons, textfield, toast, status chips and empty state.
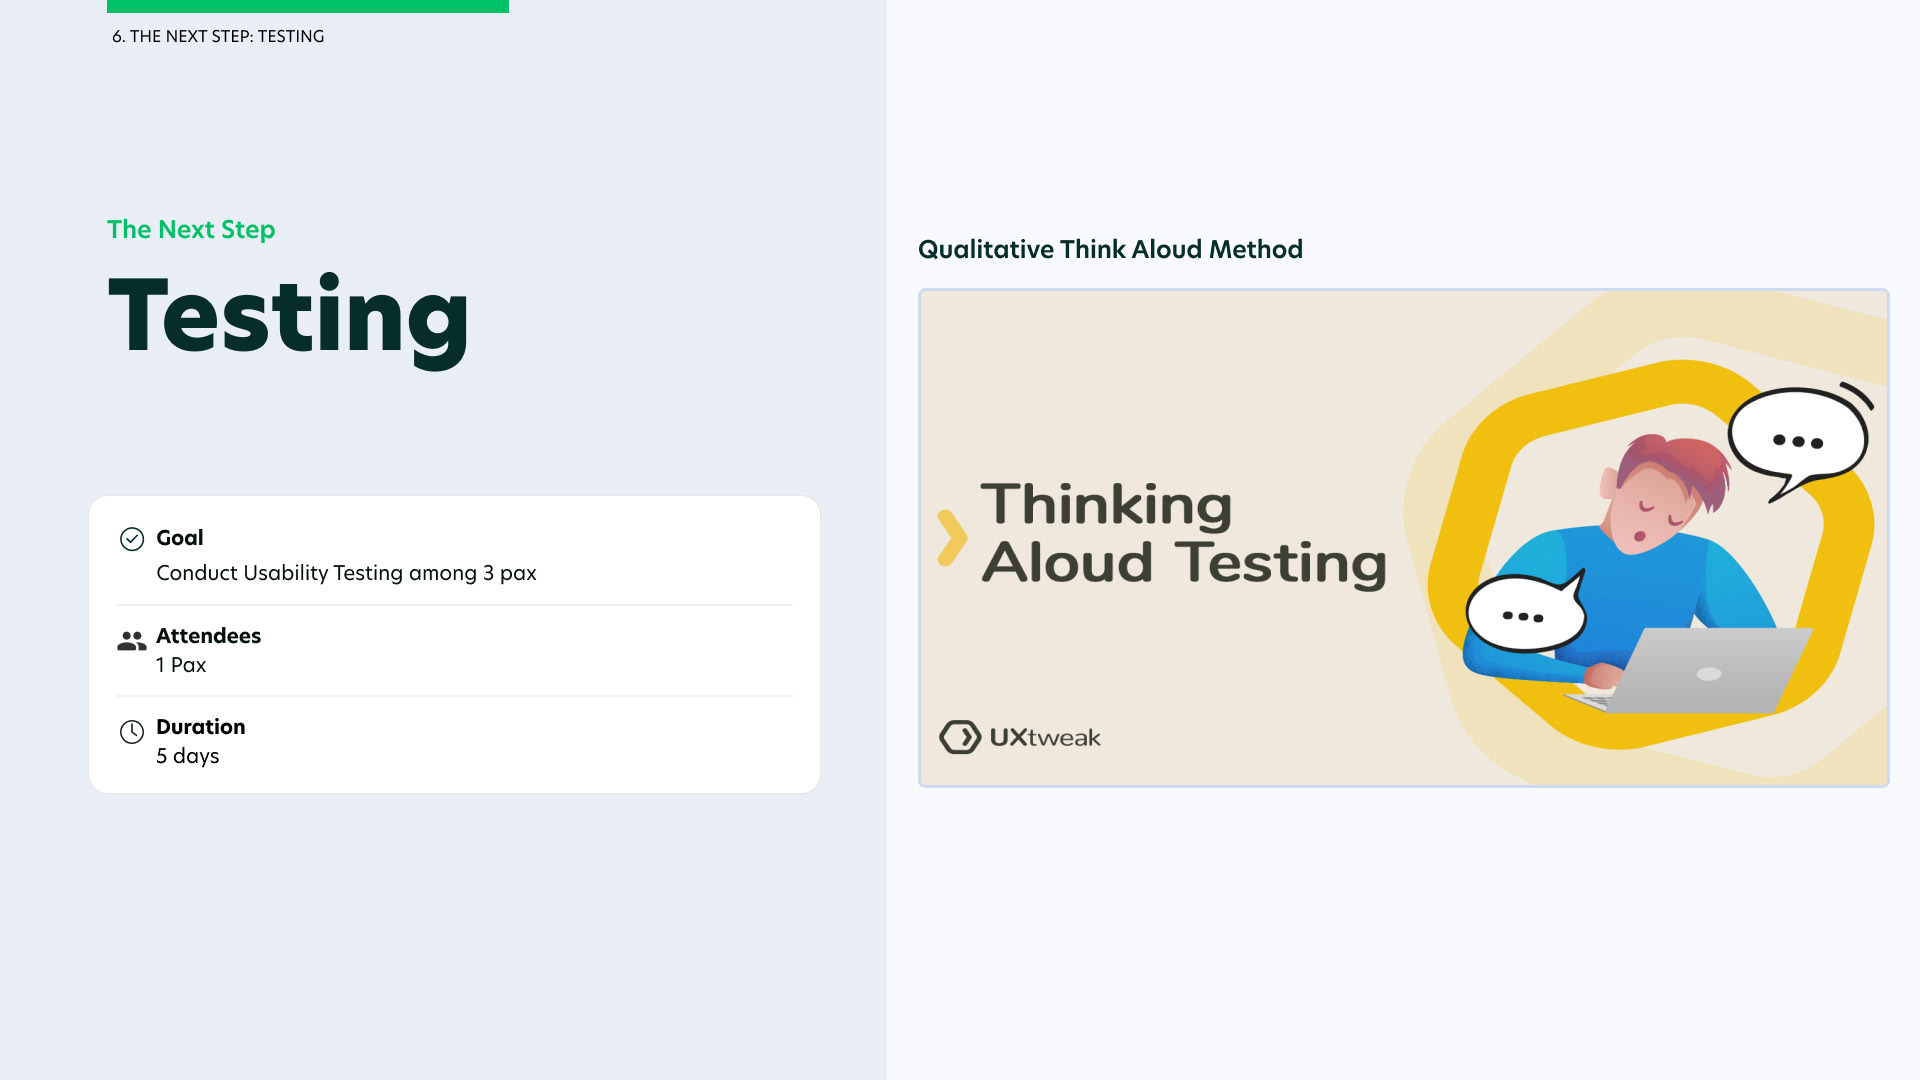
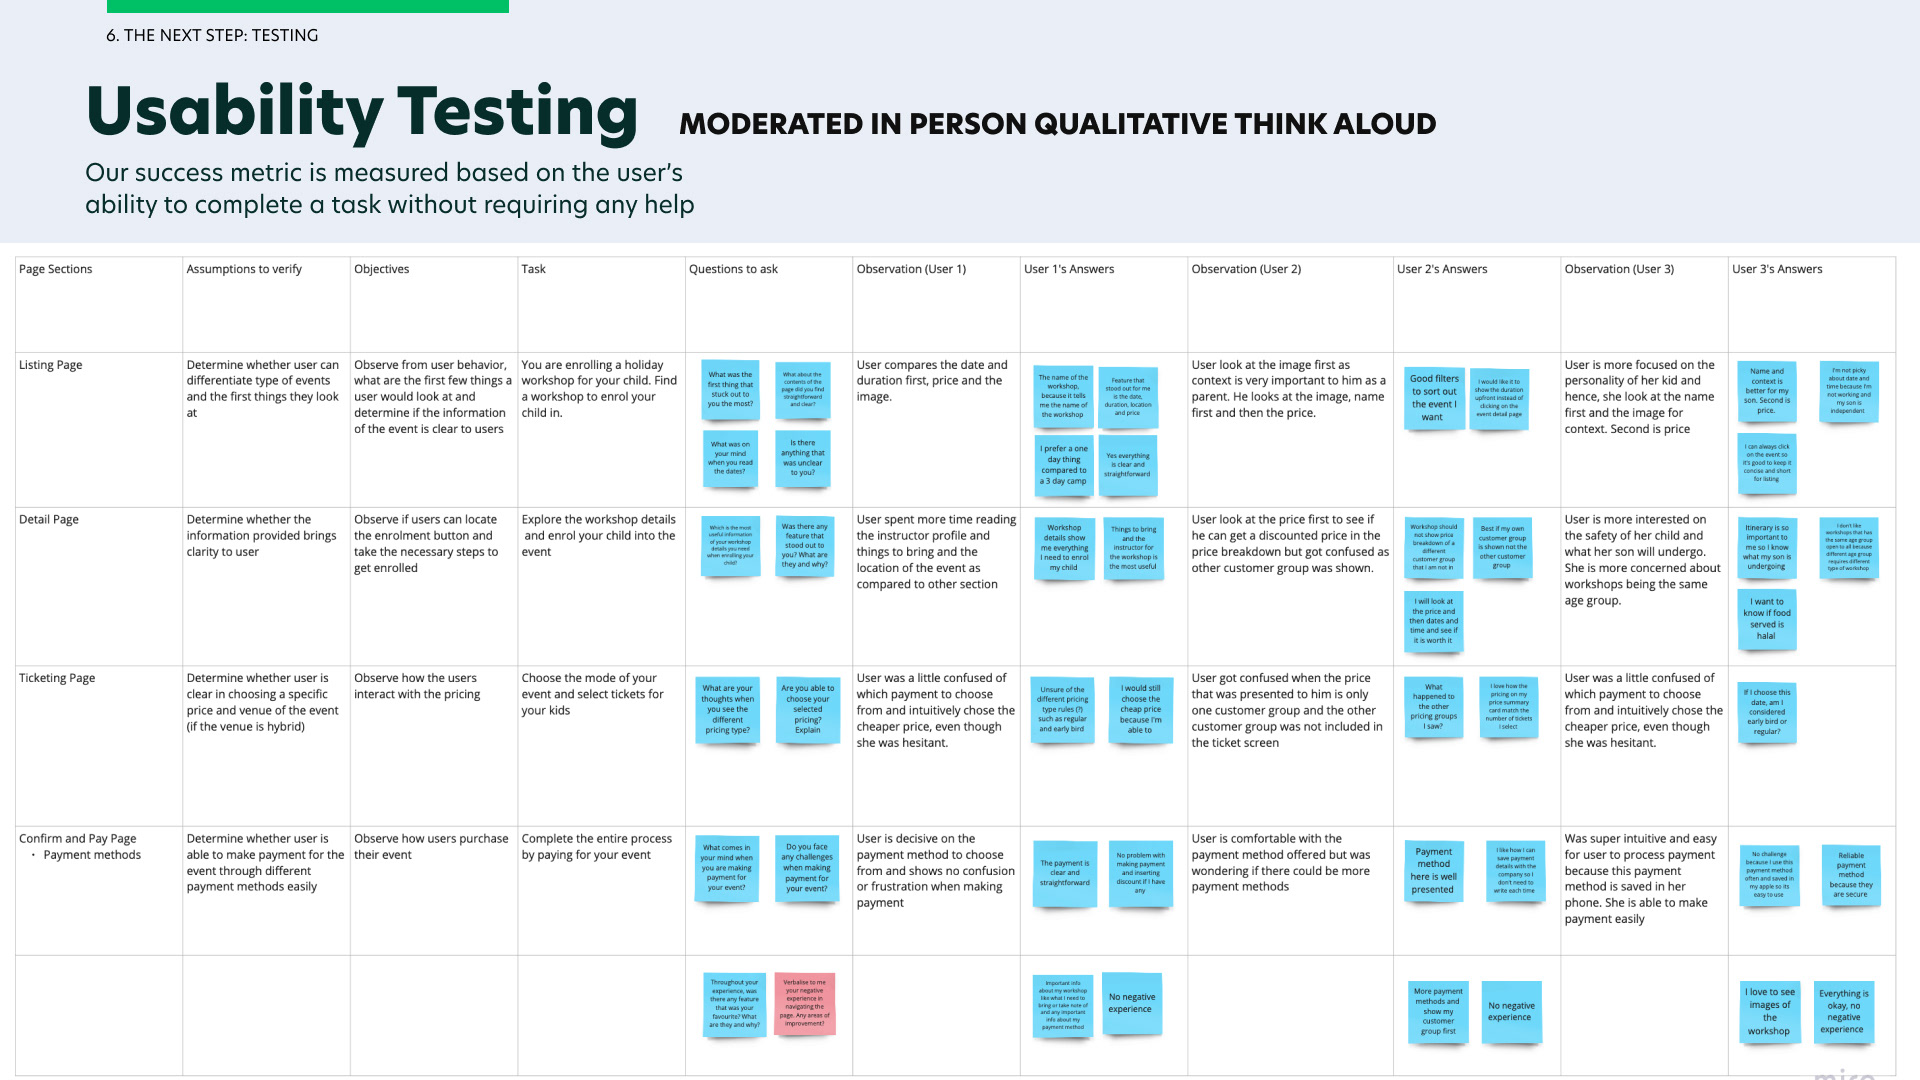
6. User Testing
Our user testing is conducted throughout the prototyping phase. This is important to us as we put our users' needs first. We want to ensure that users' needs and problems are met and our end-users are satisfied with our product.
For simplicity sake, I will only showcase the usability testing conducted on the customer portal as there are a lot to cover on the business portal.
I conducted the usability testing among 3 end users on the customer portal by getting our users to think aloud. Our success metrics is to get them to complete a task without any help. At the end, I would ask questions on what they prefer improve and this is how I was able to gather insights on the users' needs. Our users comprises of parents and fitness enthusiasts as I notice that our business users are mainly targeting families and enthusiasts of different age group when organising one time events and workshops.
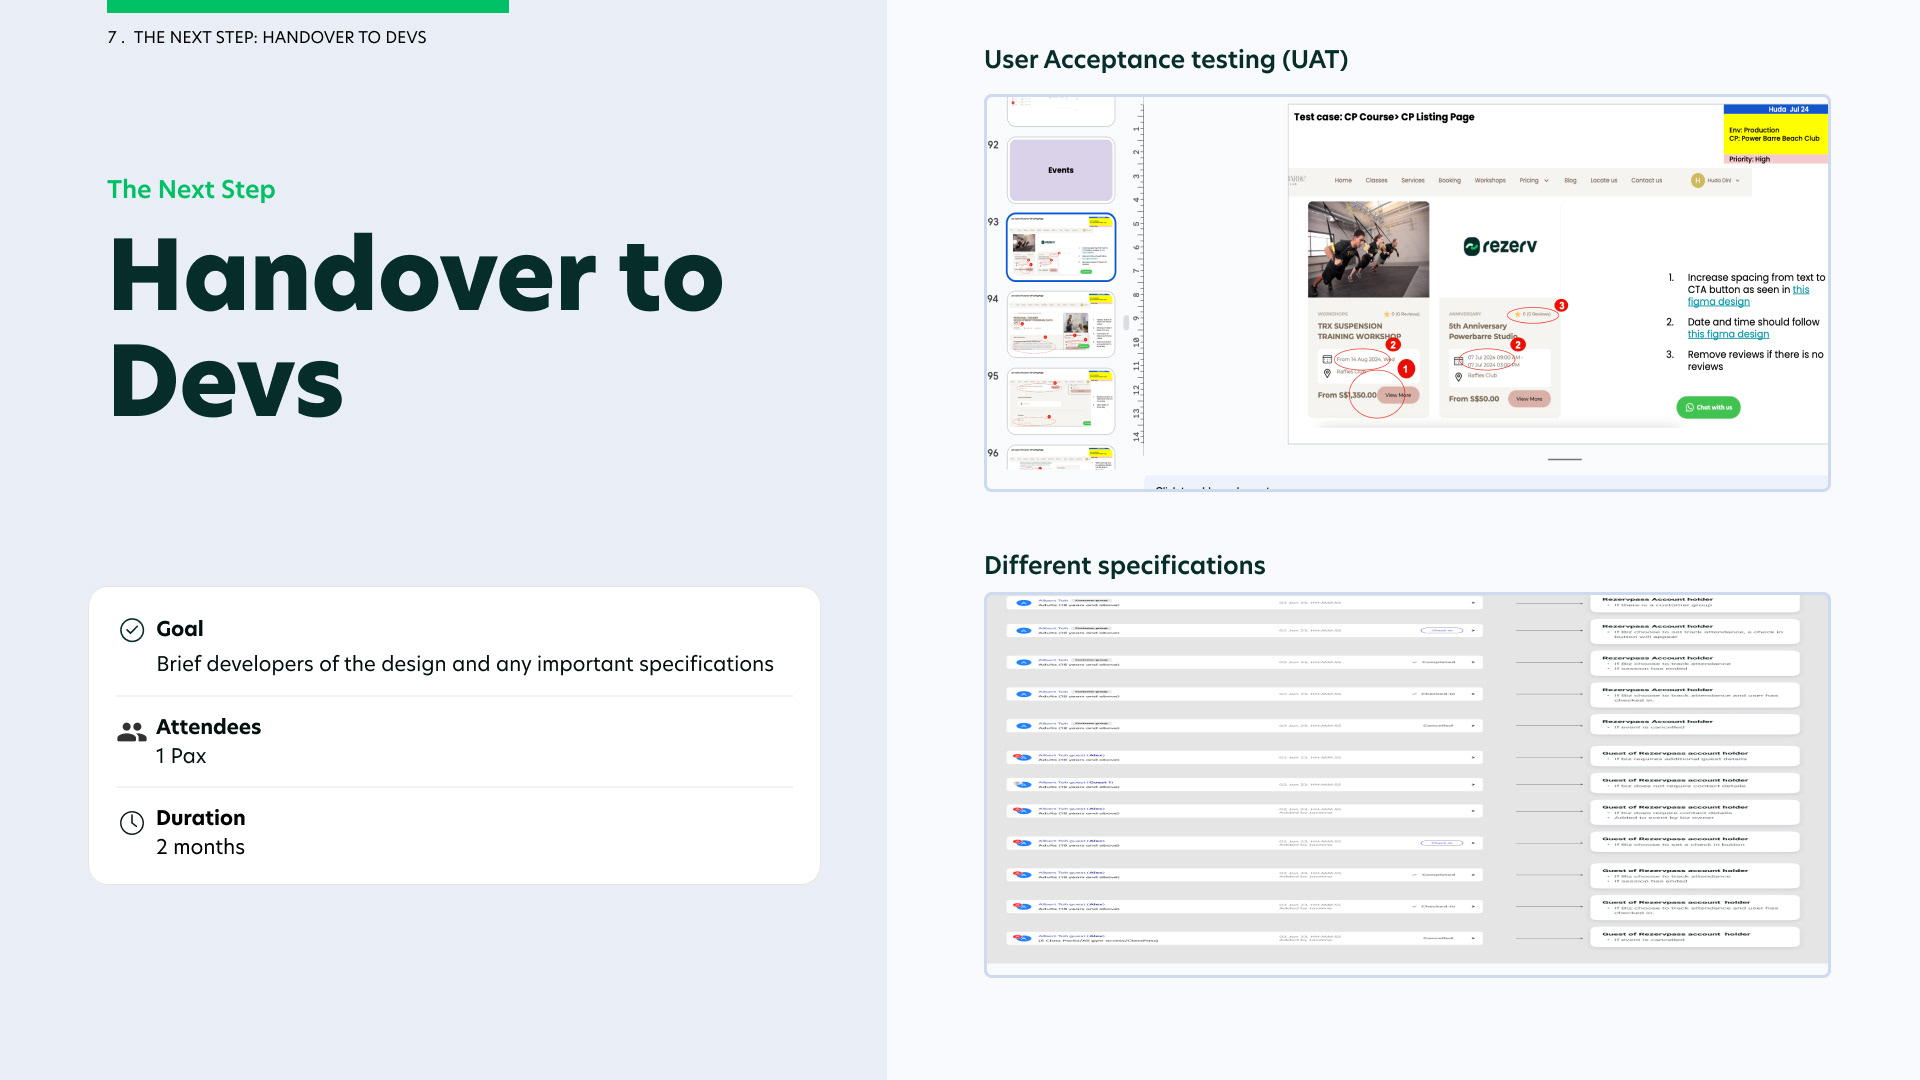
7. Handover to Developers
Once user testing is complete and design has been approved by my stakeholders, the last and important step is to handover to the developers.
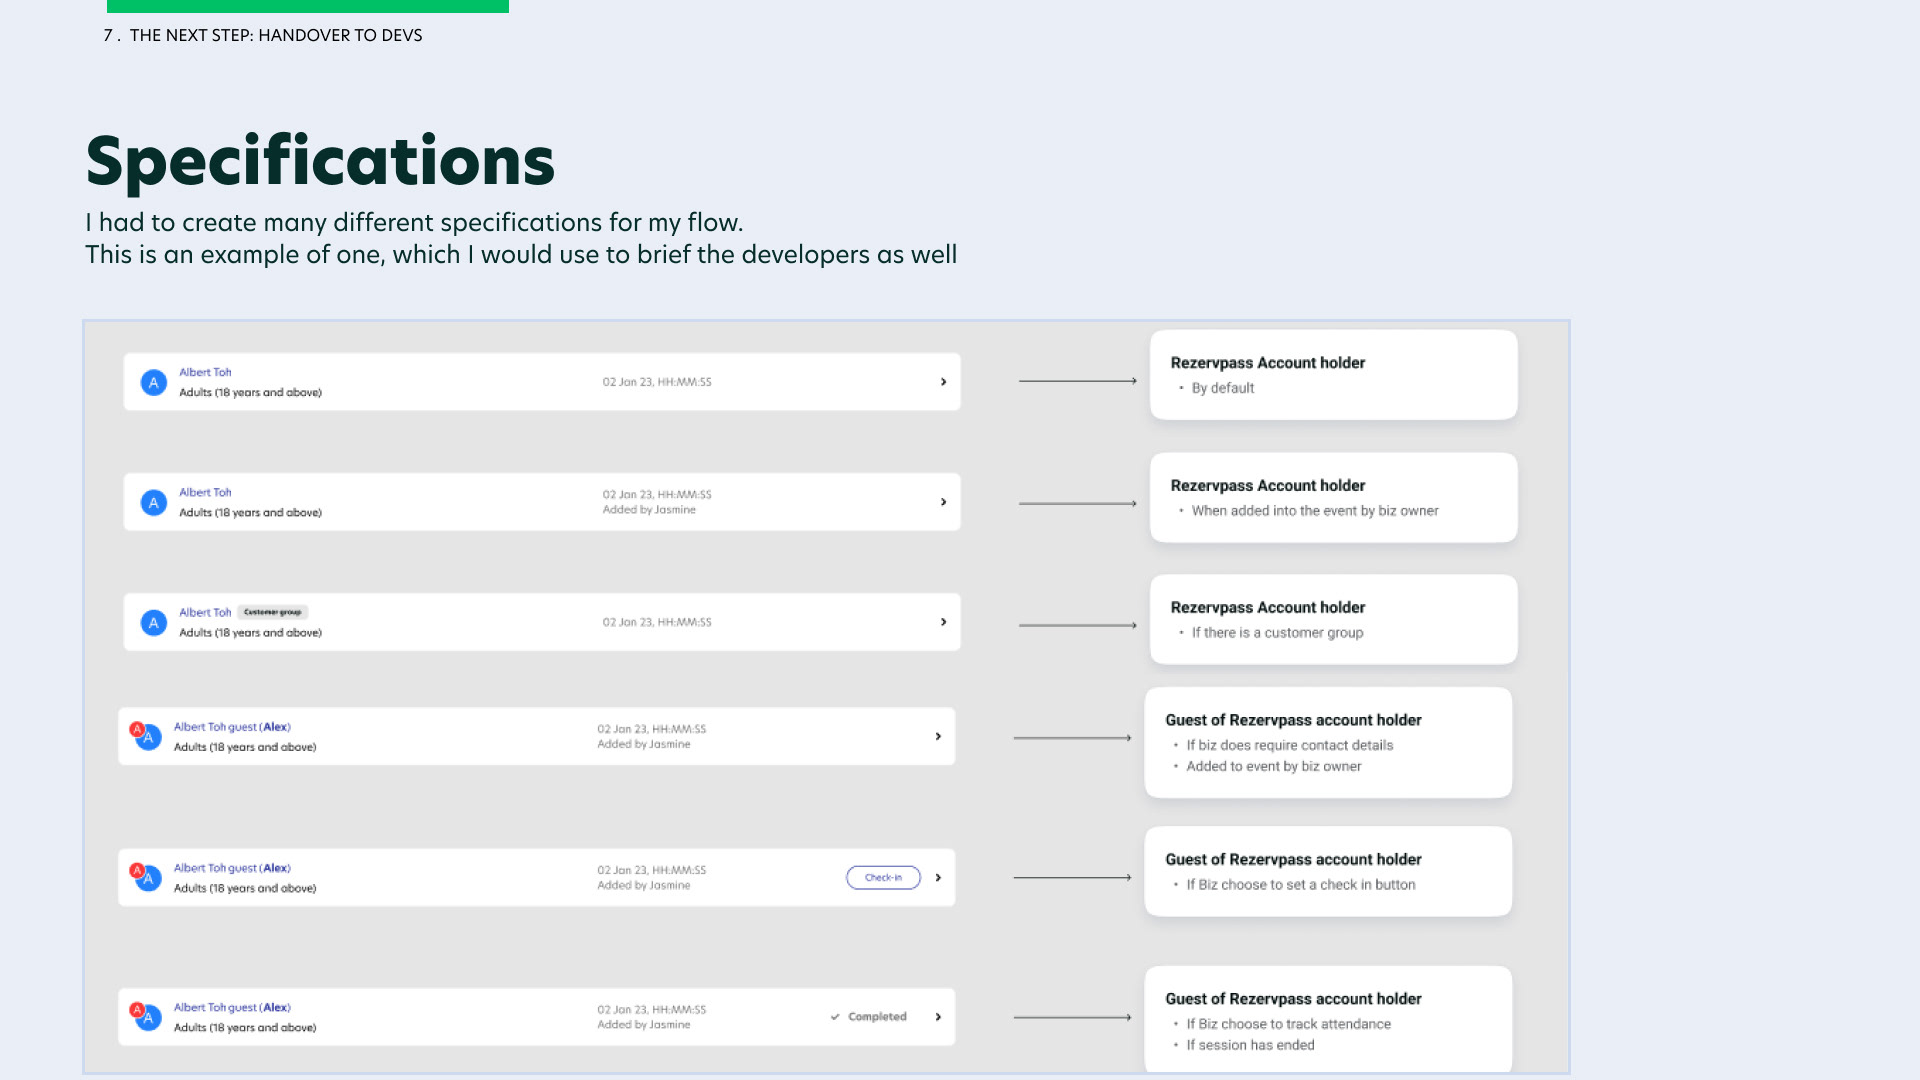
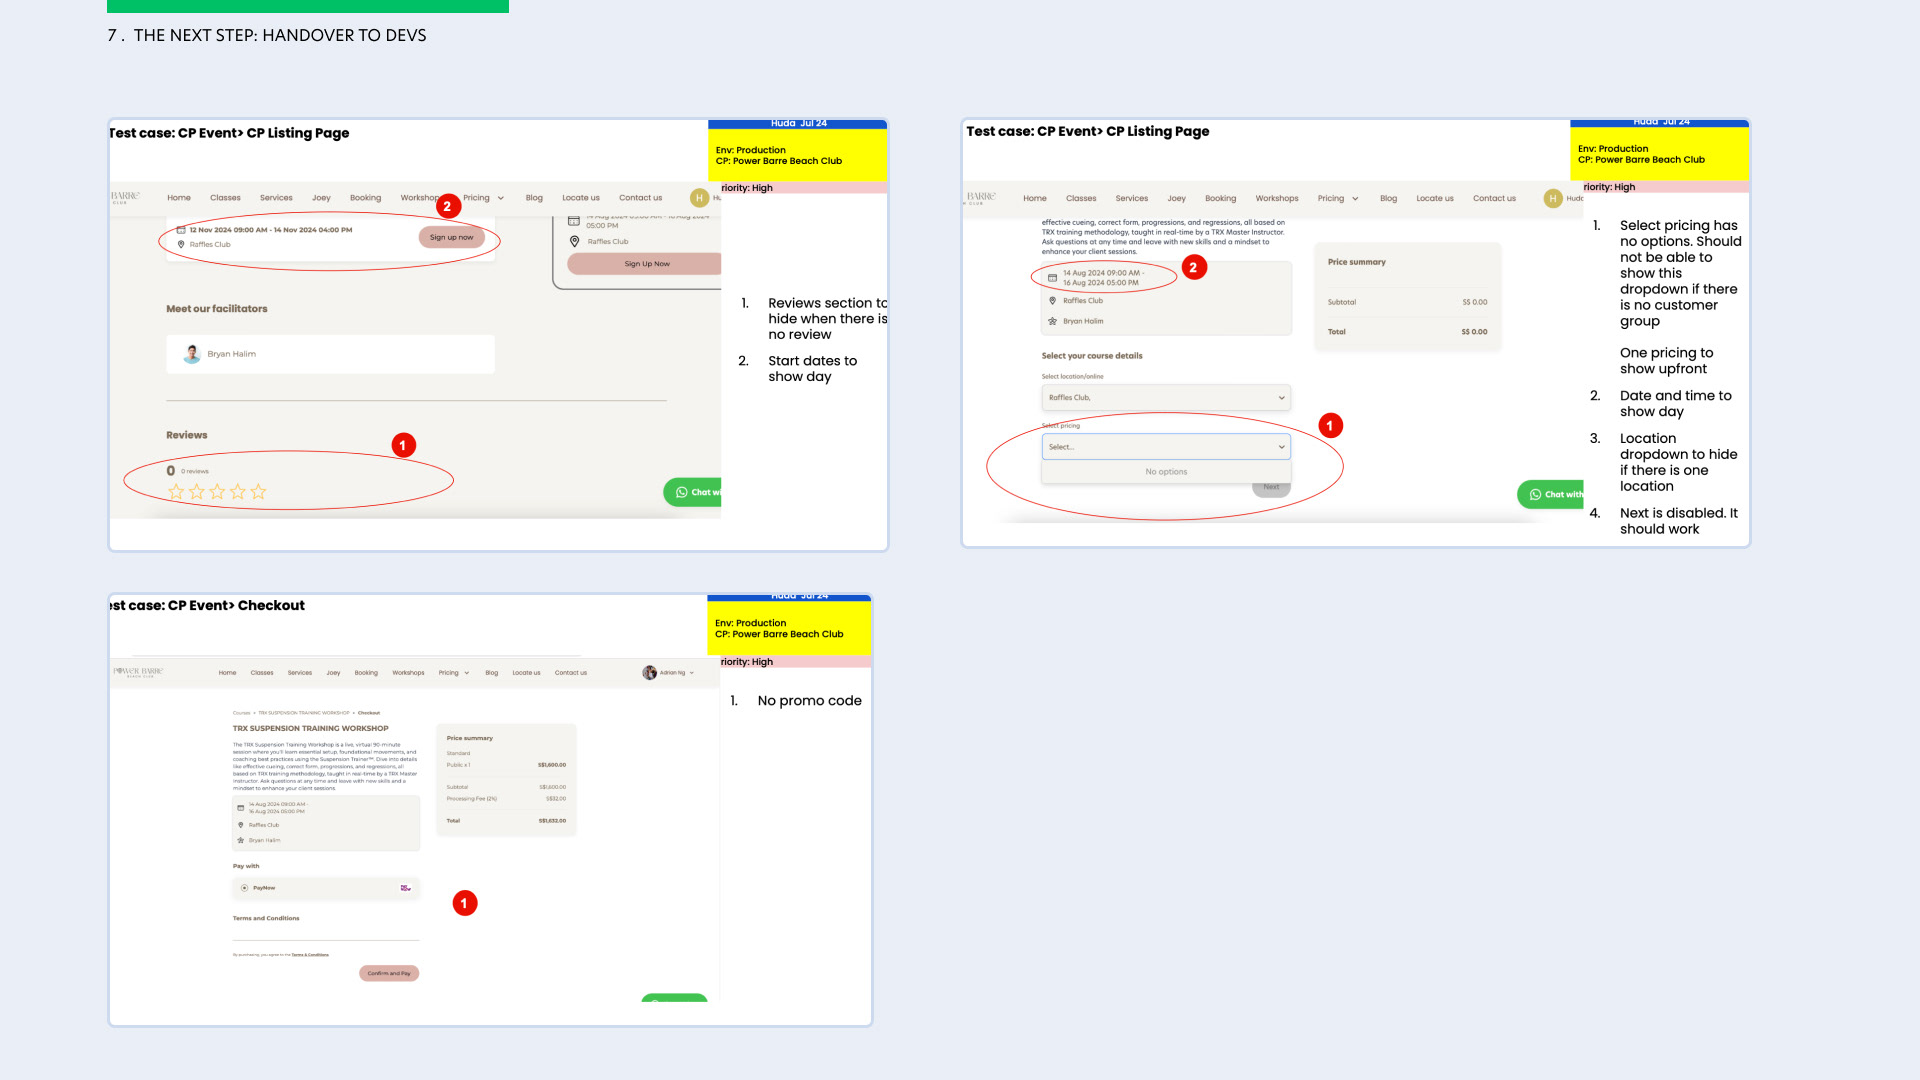
Here, the different specifications and notecards are needed so that developers are aware of the different states and conditions that they have to abide by. As the feature gets developed, a user acceptance test (UAT) is prepared by the product manager and checked thoroughly by the UX designer so that we caught mistakes made early and inform the developers before pushing this feature live onto production for our end-users.